Creazione panorami
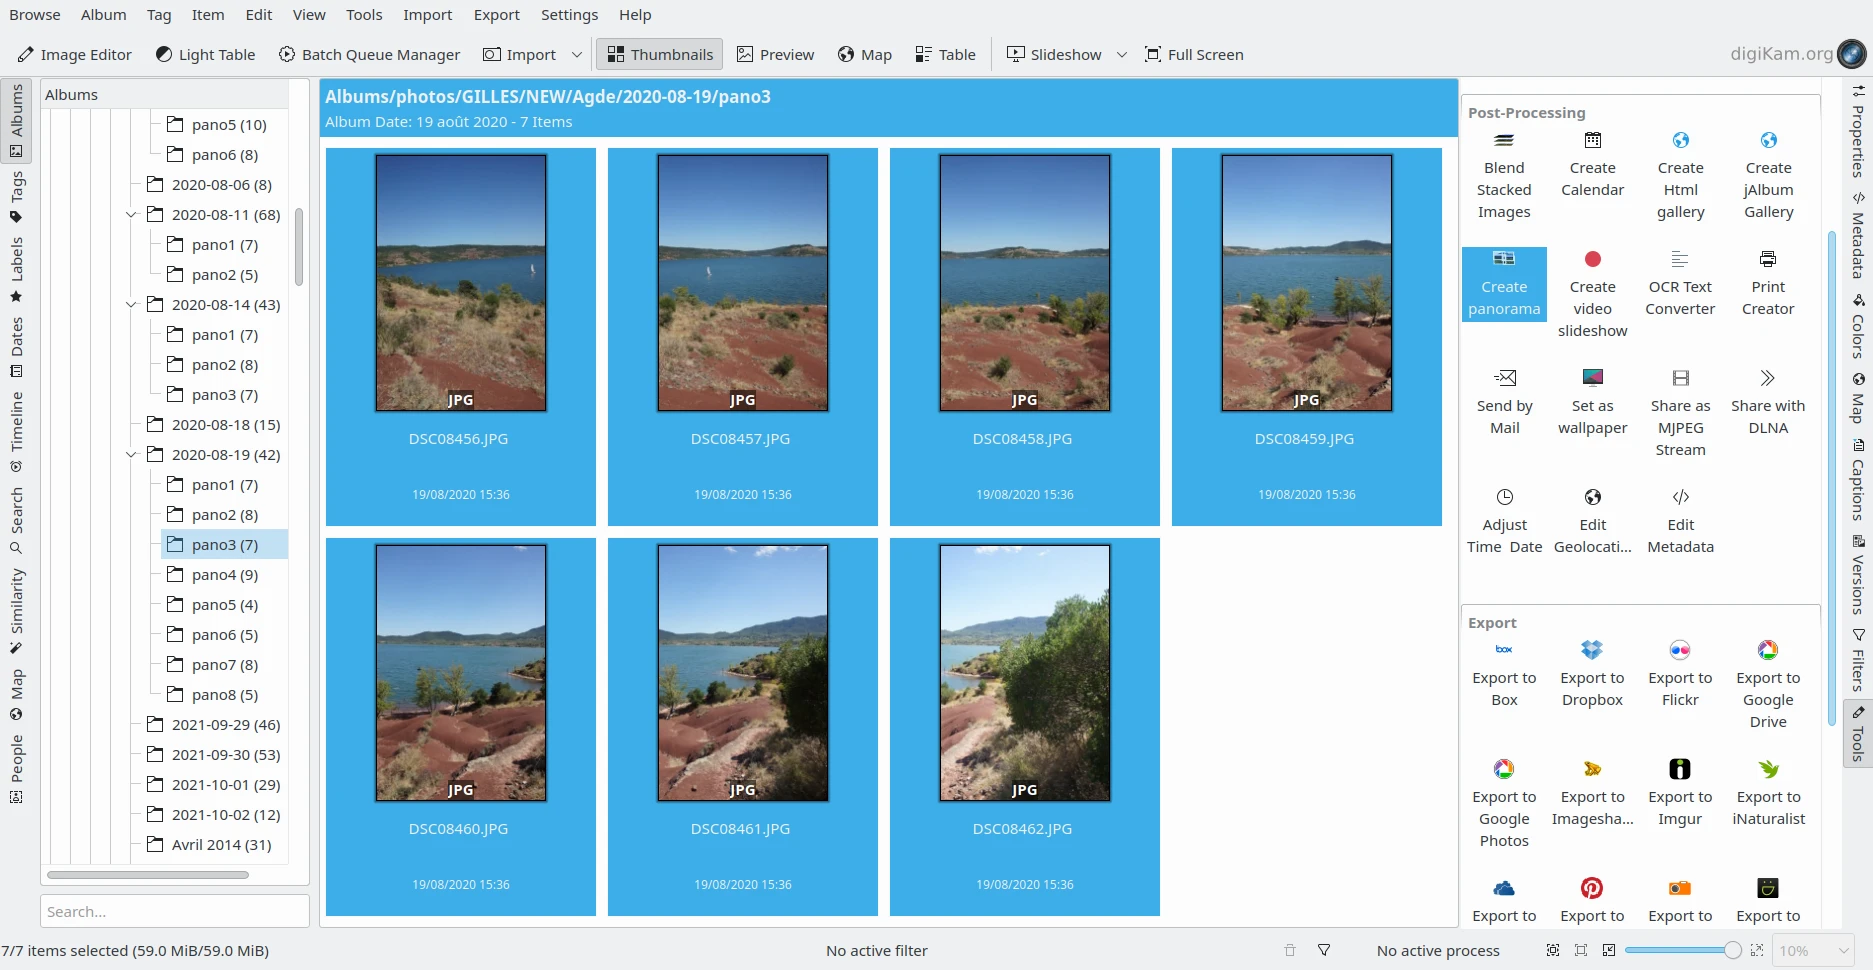
I file JPEG panoramici selezionati dalla vista a icone (immagini 7x24 Mpx scattate con fotocamera Sony A77 - 59 Mb)
Un panorama è una composizione di più fotografie scattate nelle stesse condizioni con la stessa fotocamera/obiettivo. La fotocamera è ruotata attorno a un unico punto tra ogni scatto, in modo che le foto risultanti possano essere unite assieme come se fossero un unico scatto fatto con un obiettivo super grandangolo. Le immagini sequenziali devono essere scattate con sovrapposizione dei bordi. L’algoritmo panoramico tenterà di individuare le porzioni comuni delle immagini e unirne i contenuti. Per ottenere la prospettiva più allineata possibile è meglio un tripode, soprattutto con le composizioni complesse. Lo strumento Creazione panorami ti consente di assemblare gli scatti orizzontalmente, verticalmente o come matrice.
Nota
Fai attenzione che il panorama finale verrà costruito da una grande quantità di dati, dunque la sua elaborazione richiede molta memoria.
Scegli le immagini da unire e vai al menu . Si aprirà la finestra della procedura guidata come quella sotto riportata.
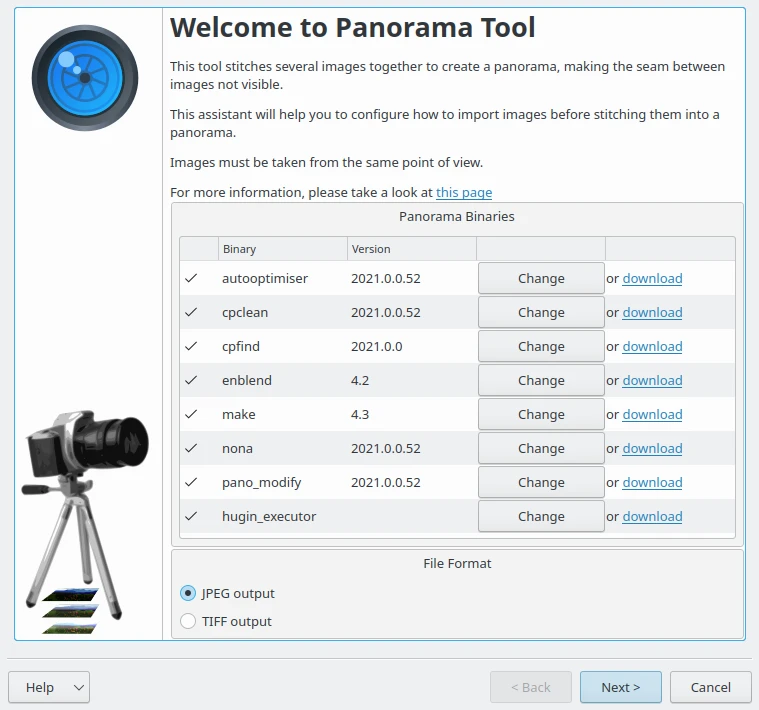
La procedura guidata di creazione panorama con il rilevamento dei componenti Hugin
Per analizzare e assemblare gli elementi, questa estensione usa gli strumenti a riga di comando Hugin. Se nel tuo sistema vengono trovati tutti i componenti, ti basterà selezionare il formato di uscita per generare il panorama e fare poi clic sul pulsante Successivo. Apparirà la pagina sotto riportata:
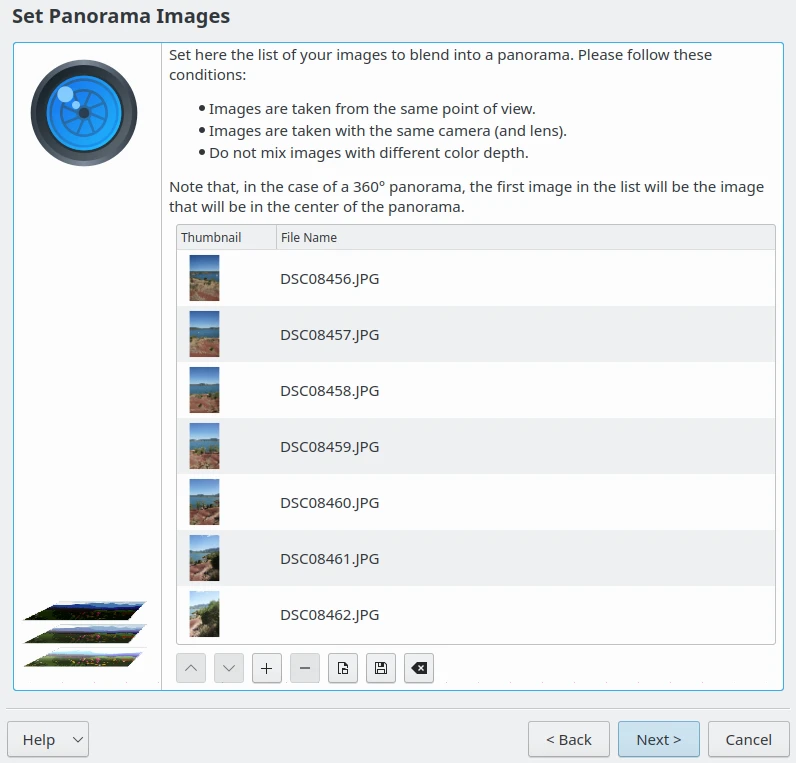
La procedura guidata di creazione panorama con l’elenco degli elementi da assemblare
Se necessario, sistema le immagini nell’ordine corretto con i pulsanti Su e Giù. Usa i pulsanti con i simboli Più e Meno per aggiungere o rimuovere elementi. Se vuoi generare un panorama a 360°, la prima immagine dell’elenco dovrà essere l’elemento posizionato al centro del panorama. Una volta fatto, fai clic sul pulsante Successivo.
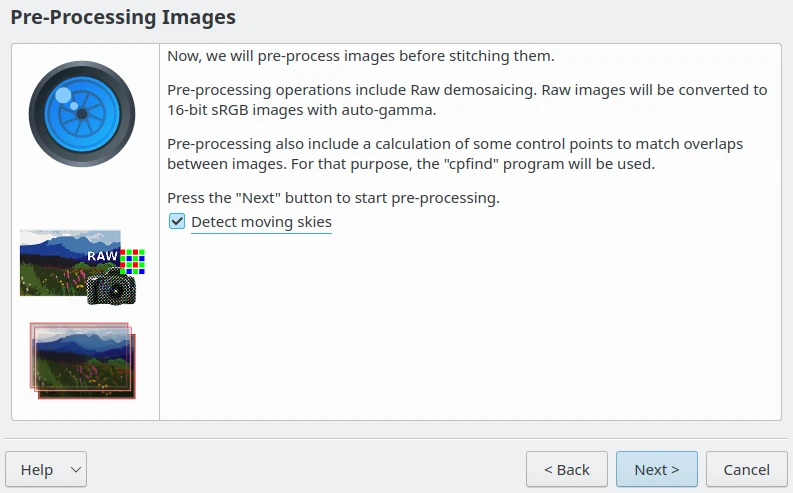
La fase di pre-elaborazione della Creazione guidata panorama
L’opzione Riconosci i movimenti nel cielo permette di individuare in modo automatico le nuvole, in modo da evitare concordanza di punti chiave sbagliati dovuti a forme in movimento. Per essere precisi, il processo scarta qualsiasi punto associato a una possibile nuvola durante la selezione dei punti di controllo. Questo è utile per impedire che le nuvole in movimento alterino il processo di concordanza dei punti di controllo usato dagli algoritmi. A seconda del contenuto della scena, attiva l’opzione e premi il pulsante Successivo per pre-elaborare gli elementi.
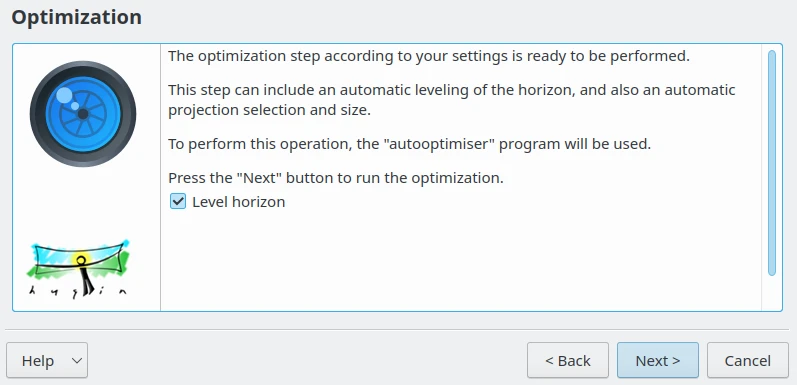
La fase di ottimizzazione della Creazione guidata panorama
La pagina di ottimizzazione include un’altra opzione chiamata Livella orizzonte da utilizzare con scene orizzontali. Attiva questa opzione per riconoscere l’orizzonte e adattare di conseguenza la proiezione. L’orizzonte individuato diventerà una linea orizzontale nel panorama finale. Se la scena è una composizione verticale, ignora pure questa impostazione. Fai clic sul pulsante Successivo per osservare un’anteprima del risultato.
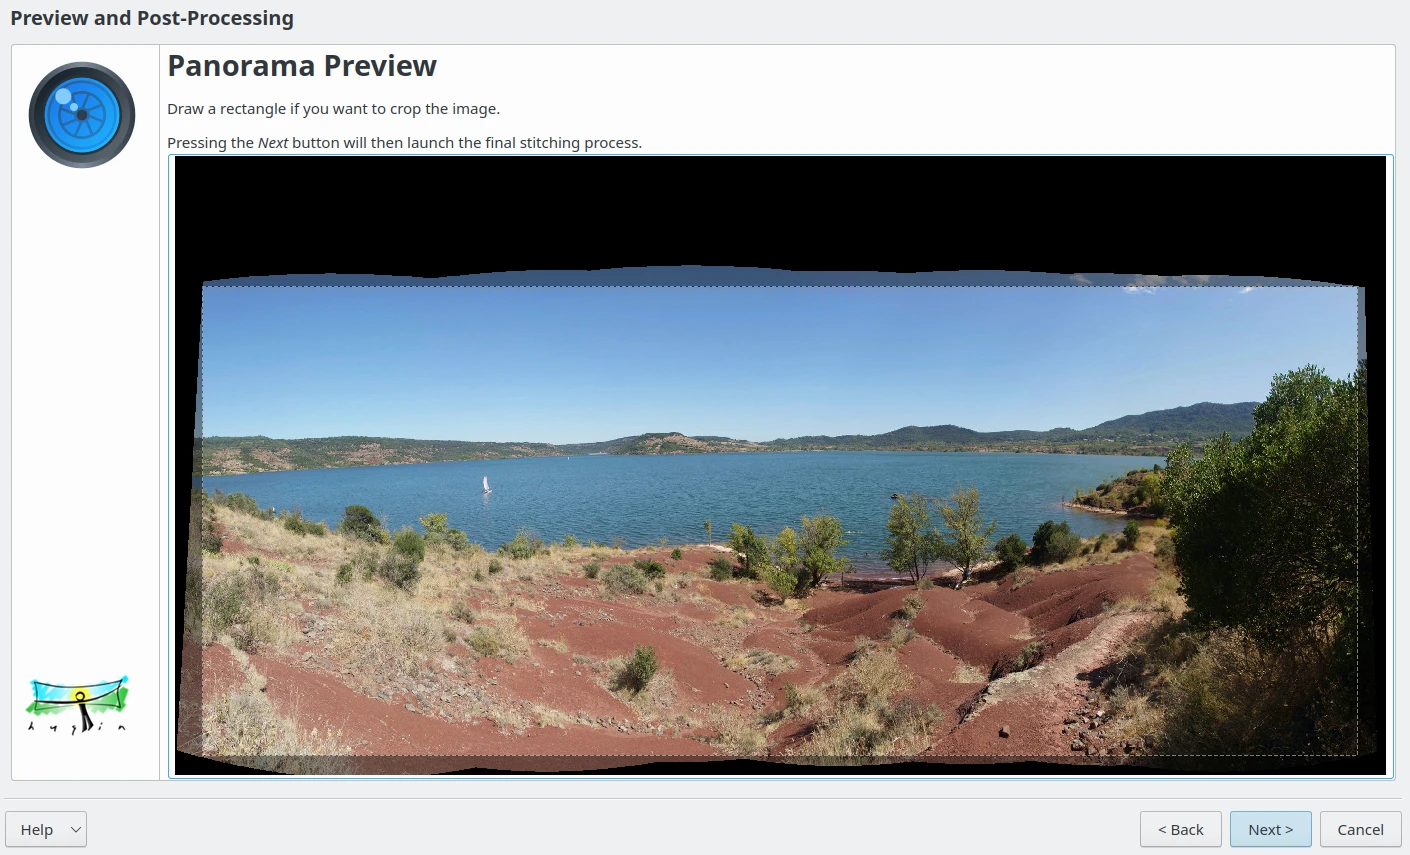
La fase di anteprima della Creazione guidata panorama
Questa pagina visualizza le immagini assemblate, permettendoti di valutarne il risultato. Puoi quindi ritagliare il contenuto per eliminare i fotogrammi neri attorno alla scena. Per impostazione predefinita, lo strumento è in grado di rilevare in modo automatico la regione effettiva del panorama. Se sposti il mouse sull’anteprima comparirà, nell’angolo superiore sinistro, una barra degli strumenti con i comandi Ingrandisci, Rimpicciolisci e Ingrandimento adattivo sull’immagine. Fai clic sul pulsante destro del mouse per ridefinire una nuova area di ritaglio. Una volta che è tutto sistemato, fai clic sul pulsante Successivo per elaborare la composizione finale del panorama.
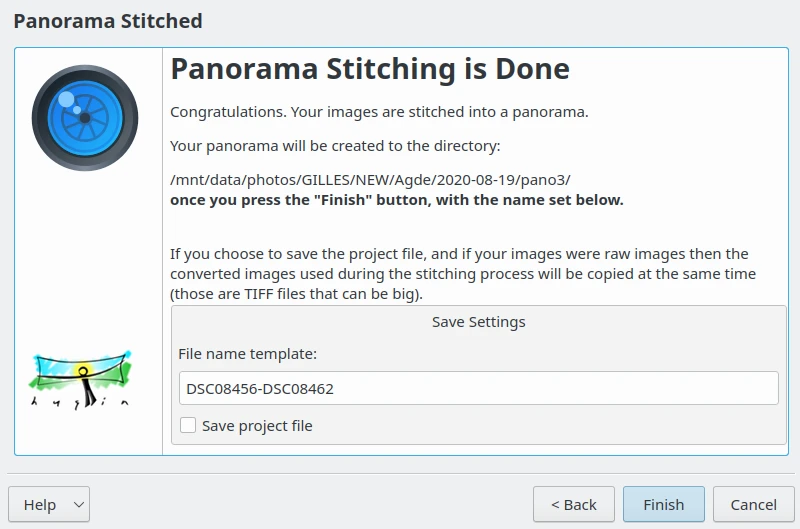
L’ultima pagina della Creazione guidata panorama
Dopo una lunga fase di calcolo l’unione del panorama è completata e lo strumento propone un nome di modello per il file generato. Puoi anche salvare il tuo progetto in un formato compatibile con Hugin, se lo desideri. Fai clic sul pulsante Fine: il risultato sarà salvato nello stesso Album in cui si trovano le immagini originali.
Nota
Le immagini 7x24 Mpx (59 Mb) utilizzate come esempio in questa sezione del manuale producono un singolo file elaborato panoramico JPEG di 82 Mpx (23 Mb).
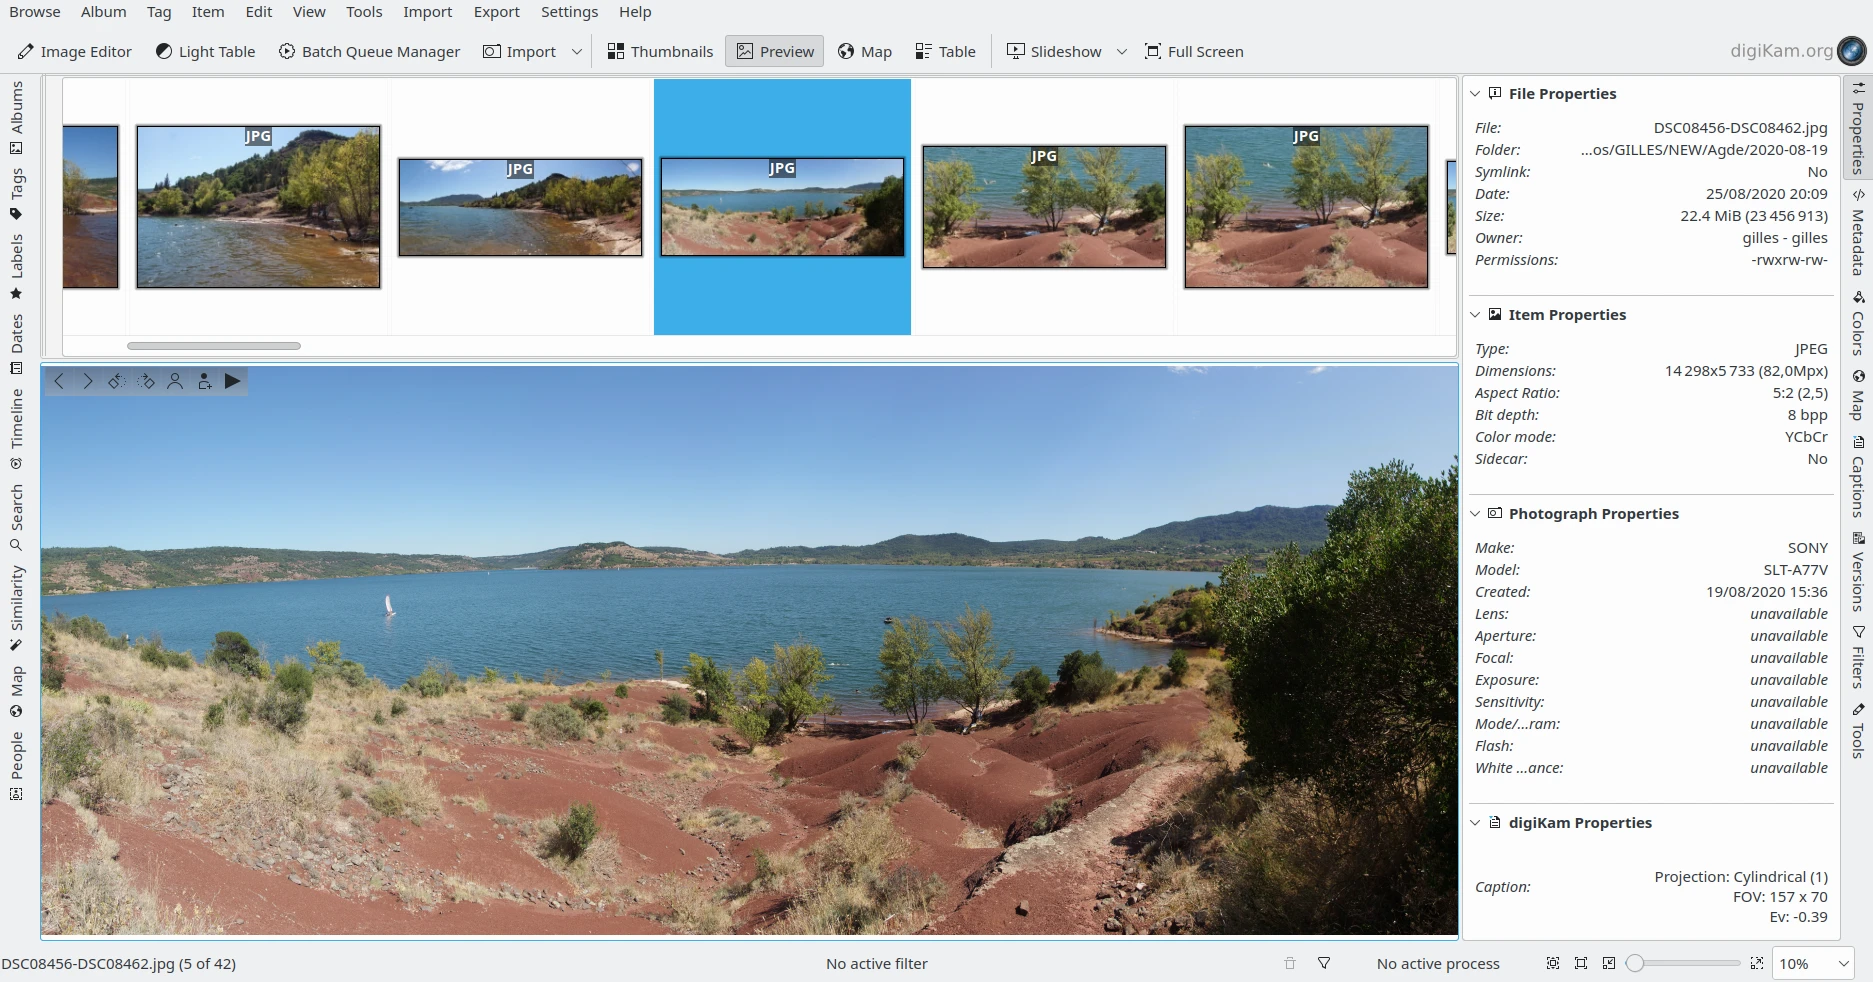
I file JPEG panoramici assemblati visualizzati in digiKam