Miscelazione di esposizione
Non importa quanto sia buona la tua macchina fotografica, scattare una fotografia ben esposta di una scena ad alto contrasto, come un uccello nero sulla neve, può essere davvero complicato. Anche se passi alla modalità manuale e regoli le impostazioni di esposizione, c’è ancora il rischio di scattare una foto contenente aree sovraesposte o sottoesposte. Un modo per risolvere questo problema è usare la Miscelazione di esposizione di digiKam. Questa tecnica include lo scatto di diverse fotografie con esposizioni differenti (a forcella, bracketing in inglese) e la fusione di queste foto in una perfettamente esposta.
Nonostante la miscelazione di esposizione sembri semplice in teoria, ottenere risultati accettabili potrebbe essere un’operazione laboriosa e dispendiosa in termini di tempo. Fortunatamente, digiKam è in grado di fare la parte più difficile per te. Lo strumento Miscelazione di esposizione si basa sugli strumenti a riga di comando Hugin per l’elaborazione e la fusione delle fotografie, dunque devi prima installare Hugin sulla tua macchina.
Dalla vista a icone, seleziona le fotografie che vuoi miscelare e scegli , oppure fai clic sull’icona Unisci immagini sovrapposte dalla scheda Strumenti nella barra laterale destra.
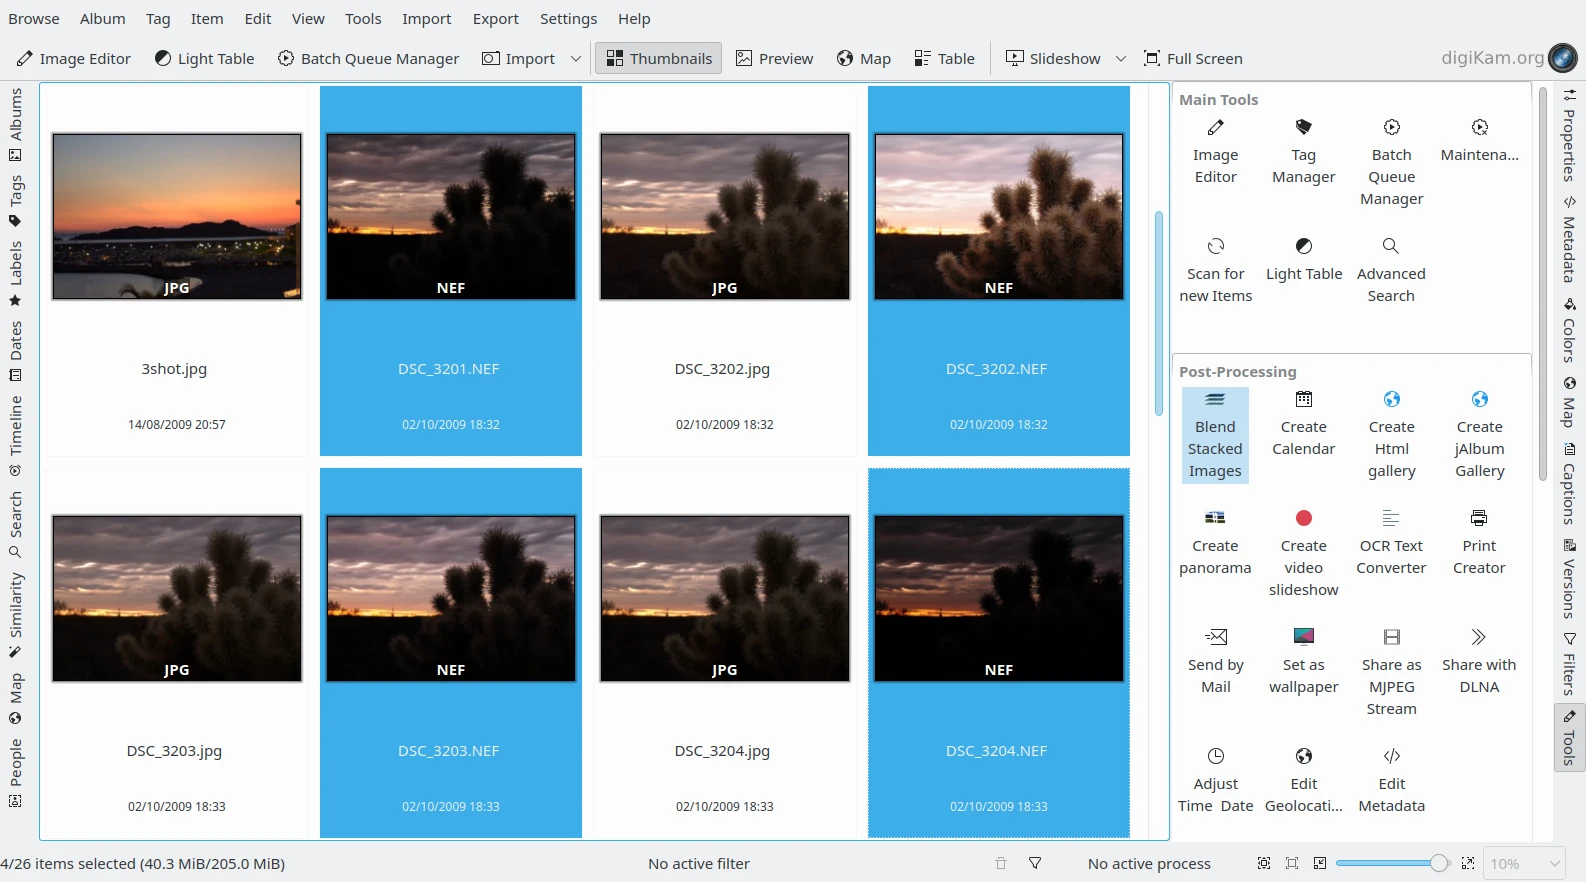
I file NEF raggruppati selezionati dalla vista a icone
Questo apre la procedura guidata Miscelazione di esposizione che ti accompagnerà attraverso l’intero processo.
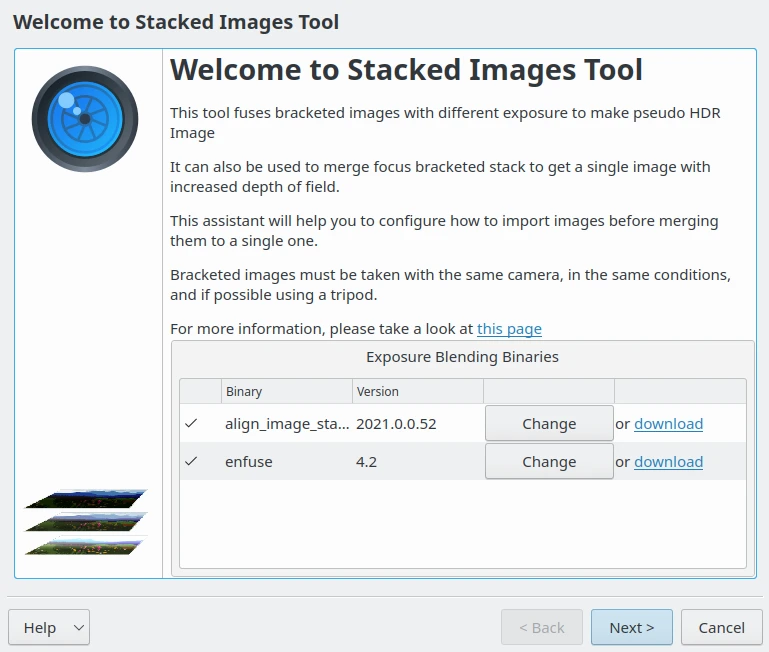
La procedura guidata di miscelazione esposizione con il rilevamento dei componenti Hugin
Nella finestra Imposta le immagini raggruppate aggiungi le altre fotografie necessarie e rimuovi e ridisponi le foto che sono già in elenco. Fai quindi clic sul pulsante Successivo per passare all’altra pagina.
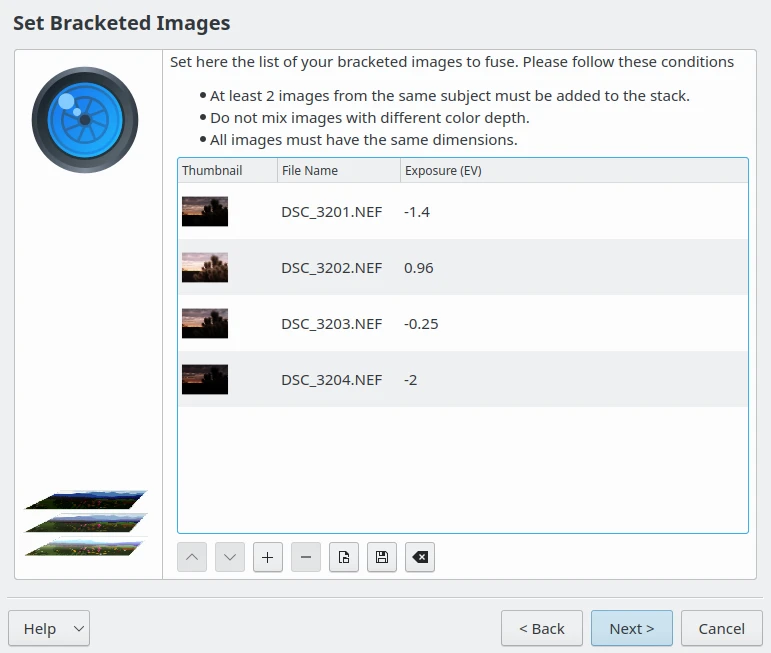
La procedura guidata di miscelazione esposizione con l’elenco degli elementi da unire
digiKam può allineare le fotografie selezionate prima di unirle assieme. Questa funzionalità risulta utile se hai scattato foto senza tripode. Se è questo il caso, spunta la casella Allinea le immagini raggruppate, poi premi il pulsante Successivo per avviare la pre-elaborazione.
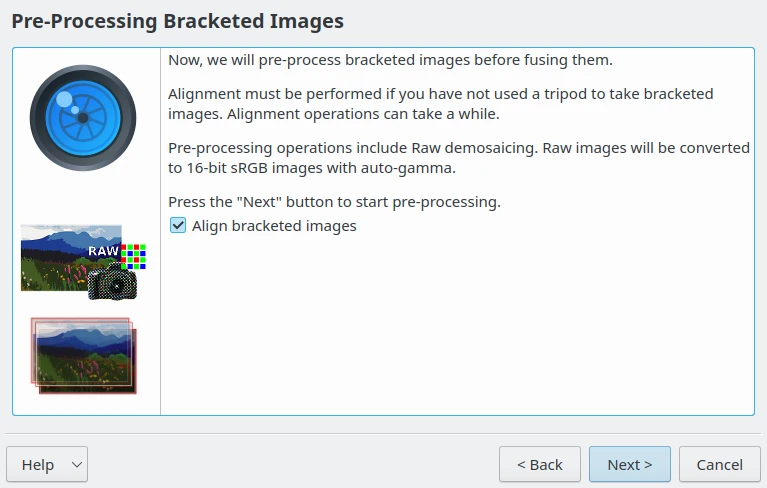
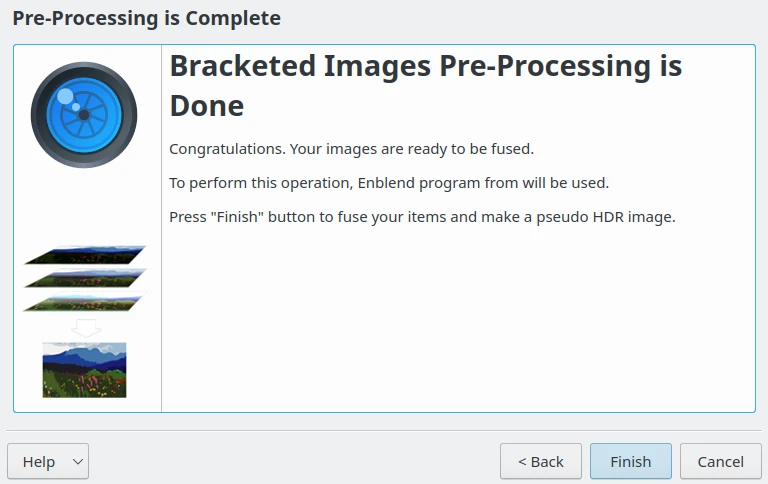
La fase di pre-elaborazione della procedura guidata di miscelazione esposizione
Una volta che digiKam ha terminato, premi il pulsante Fine per aprire automaticamente l”Editor della Miscelazione di esposizione.
La Miscelazione di esposizione pronta per la modifica delle immagini sovrapposte
Premi il pulsante Anteprima per visualizzare le foto unite nel pannello dell’anteprima. Se sposti il mouse sulla tela di anteprima, compare una barra degli strumenti, nell’angolo superiore sinistro dell’immagine, con i comandi per ingrandire, rimpicciolire e adattare alla finestra.
Se il risultato dell”anteprima non ti soddisfa, puoi regolare le Impostazioni Enfuse disponibili sul lato destro, in cui sono presenti le seguenti opzioni:
Bilanciamento automatico caratteristiche locali/globali dell’immagine (livelli): imposta la selezione automatica del livello (massimizzato) per la miscelazione piramidale, ossia ottimizza le caratteristiche dell’immagine (contrasto, saturazione, …) per essere più globali possibile.
Bilanciamento caratteristiche immagine: imposta il numero di livelli di miscelazione della piramide. Bilancia verso le caratteristiche locali (numero piccolo) o quelle globali (numero alto). In aggiunta, un numero basso controbilancia la qualità di risultati per un tempo di esecuzione più rapido e un utilizzo della memoria inferiore. Questa opzione è disponibile solo se è disattivata l’opzione Bilanciamento automatico caratteristiche locali/globali dell’immagine (livelli).
Maschera forte: forza le maschere di miscela forti senza eseguire una media sulla scala più fine. Utile solo per sovrapporre le messe a fuoco su diversi piani con caratteristiche di contrasto alte e fini. Migliora la nitidezza ma con una maggiore presenza di disturbi.
Contributo di buona esposizione: imposta il contributo di buona esposizione per il processo di miscelazione. Valori più alti favoriranno pixel ben esposti.
Contributo di alta saturazione: l’incremento di questo valore aumenterà il contributo di pixel con alta saturazione al risultato finale.
Contributo di alto contrasto: imposta il peso relativo di pixel con alto contrasto. L’incremento di questo peso aumenterà il contributo dei pixel con pixel adiacenti colorati in modo differente al risultato finale. Particolarmente utile per la sovrapposizione delle messe a fuoco.
Usa Modello di aspetto del colore (CIECAM02): usa la modellazione di aspetto del colore (CIECAM02) per rappresentare colori dettagliati. I tuoi file di input devono essere profili ICC incorporati. Se non sono presenti profili ICC, verrà considerato lo spazio dei colori sRGB. La differenza tra l’uso di questa opzione e l’algoritmo predefinito di miscelazione dei colori è minima, e sarà più evidente se hai bisogno di miscelare assieme aree di diversi colori primari.
Puoi anche escludere le singole foto dalla pila, nell’angolo superiore destro, per migliorare il risultato della miscelazione. La parte ingegnosa è che, ogni volta che regoli le impostazioni e premi il pulsante Anteprima, digiKam genera un’immagine di anteprima, nell’angolo inferiore destro, che puoi confrontare con le versioni precedenti. Puoi quindi salvare tutte le versioni generate oppure salvare quella che preferisci, selezionandone l’anteprima. Il formato di uscita da utilizzare può essere impostato in Salva il risultato nella fase successiva. Se il file esportato esiste già, può essere sovrascritto o no. È possibile configurare anche un nome file di un modello comune per i file esportati.
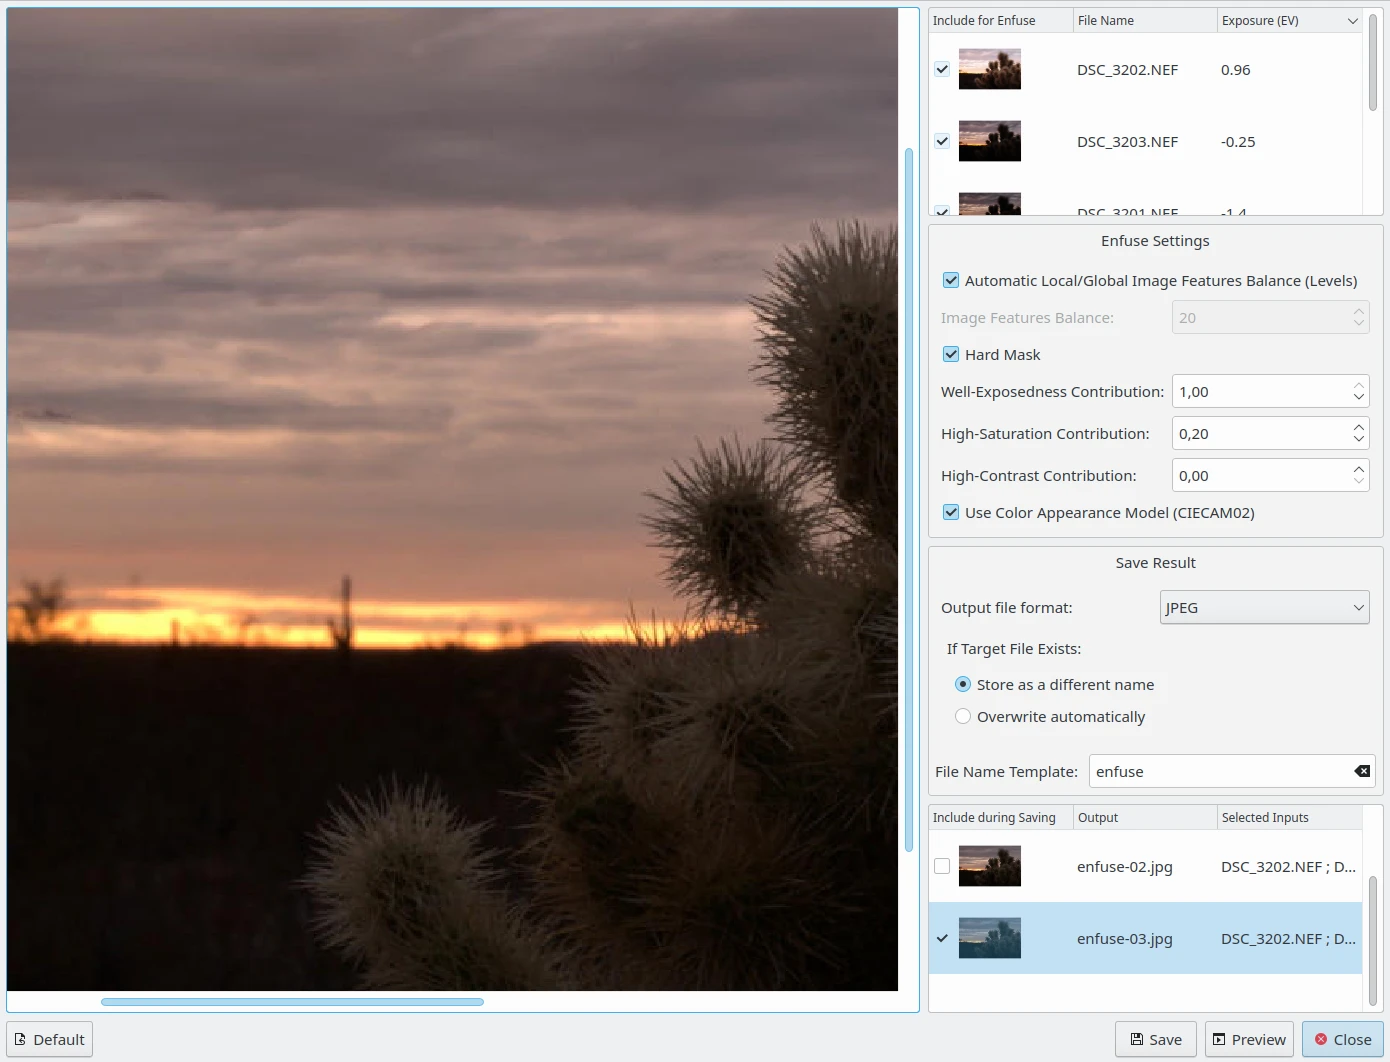
L’editor della Miscelazione di esposizione per creare versioni unite
Lo strumento di miscelazione di esposizione di digiKam è capace di produrre risultati notevoli, specialmente se non hai paura di sporcarti le mani e gestire manualmente i risultati finali.
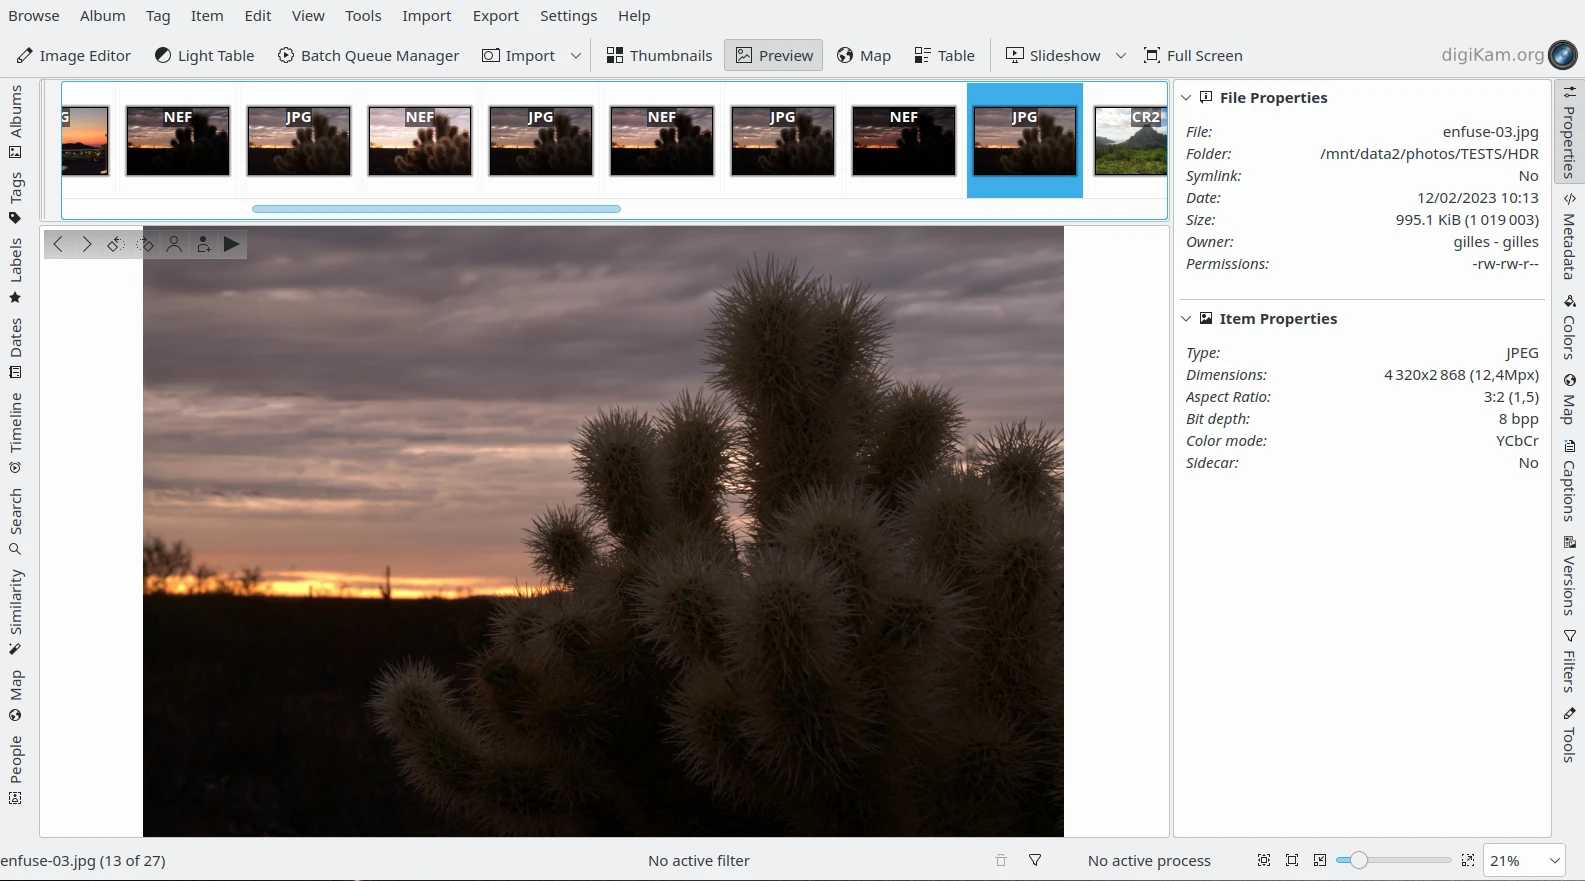
I file NEF uniti esportati come JPEG e visualizzati in digiKam