Galleria HTML
Panoramica
La Galleria HTML è uno strumento per esportare un gruppo di album o di immagini in una pagina HTML.
Questo strumento avanzato è in grado di esportare i tuoi album in una galleria web di immagini conforme agli standard HTML. Puoi selezionare in modo semplice le immagini o gli album da esportare in una pagina HTML e impostare molti motivi e parametri per la resa HTML. Per un’internazionalizzazione ottimizzata, viene usata la codifica UTF-8.
Usare la procedura guidata
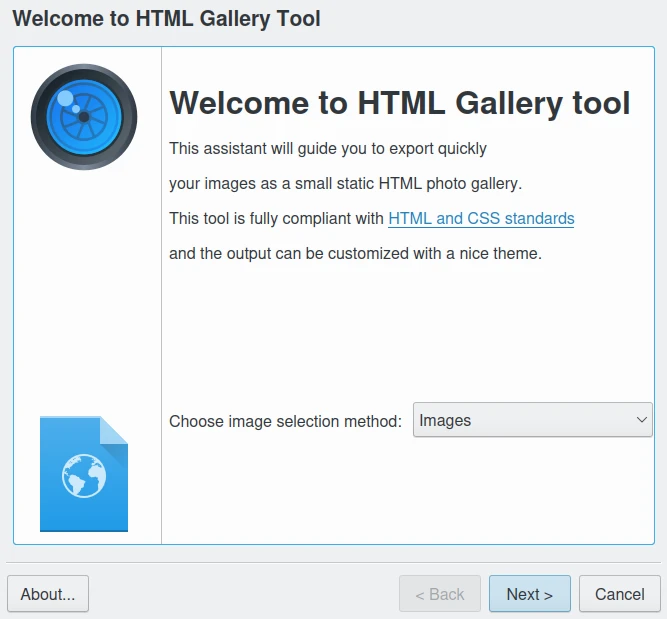
La modalità di selezione della Galleria HTML
Per avviare lo strumento usa la voce di menu Ctrl+Alt+Maiusc+H o l’icona corrispondente dalla scheda Strumenti della barra laterale destra. Lo strumento mostrerà una vista in cui selezionare il contenuto da esportare: dalla selezione attuale degli elementi o da un elenco di album. La modalità di selezione Album ti consente di scegliere gli elementi dagli album che vuoi esportare in HTML semplicemente selezionando i vari album dall’elenco gerarchico annidato. Puoi usare le tre schede successive Tag, Ricerche ed Etichette per raffinare la selezione in base a tag, etichette o risultati di precedenti ricerche fatte in digiKam.
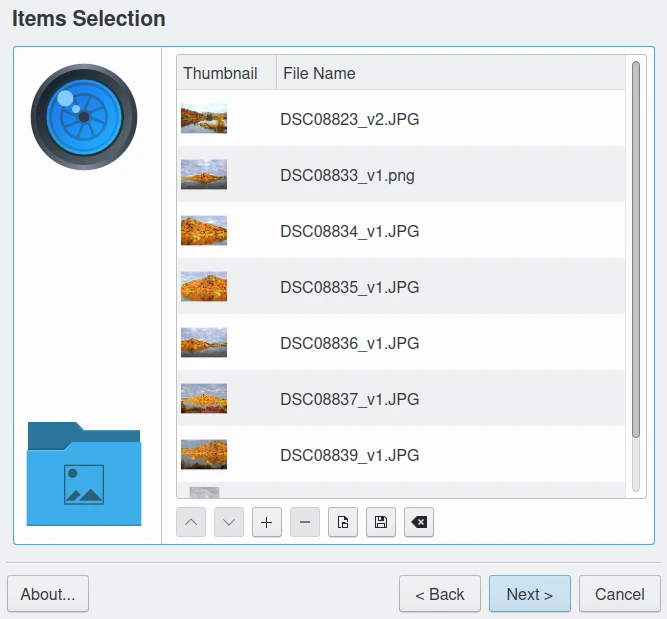
La pagina della Galleria HTML per selezionare gli elementi
Il passaggio successivo è selezionare un tema con cui generare la galleria.
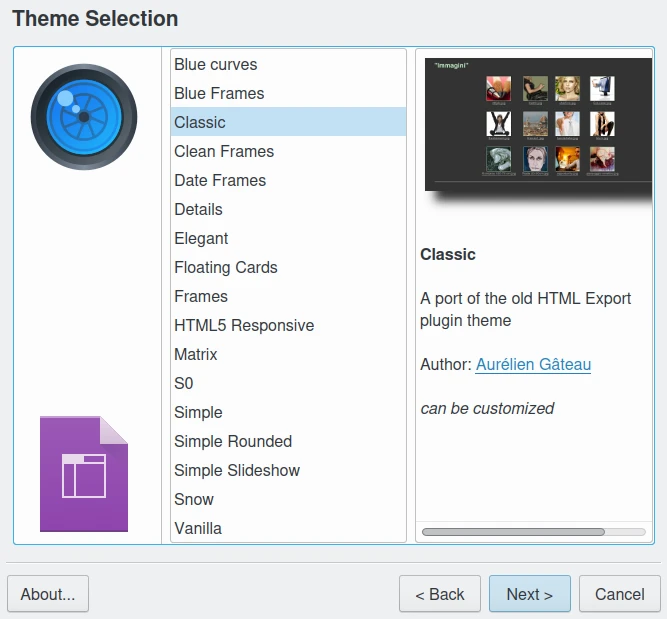
La pagina della Galleria HTML per selezionare il tema
A seconda del tema scelto, potrebbero comparire ulteriori opzioni per regolare in modo preciso l’aspetto della galleria.
La schermata che segue mostra la configurazione dei parametri del tema (in questo caso, per esempio, il tema Classico).
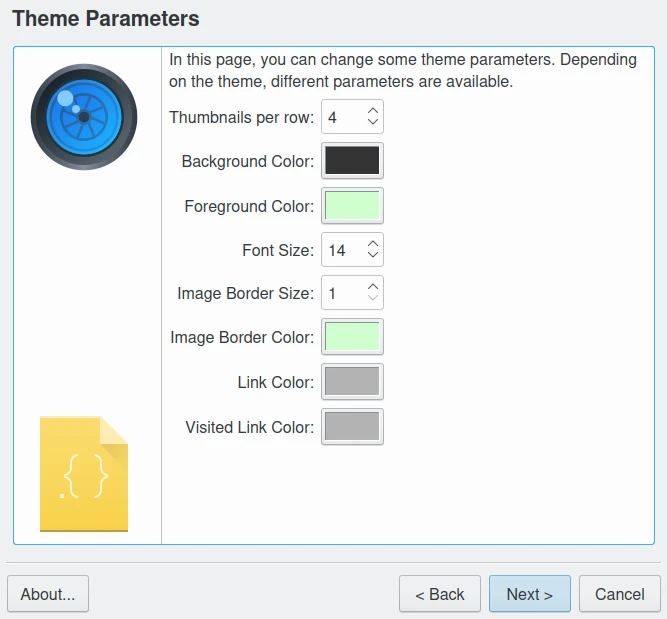
La pagina della Galleria HTML per regolare i parametri del tema
Per tutti i temi selezionati è possibile regolare le impostazioni per le immagini e le miniature della galleria.
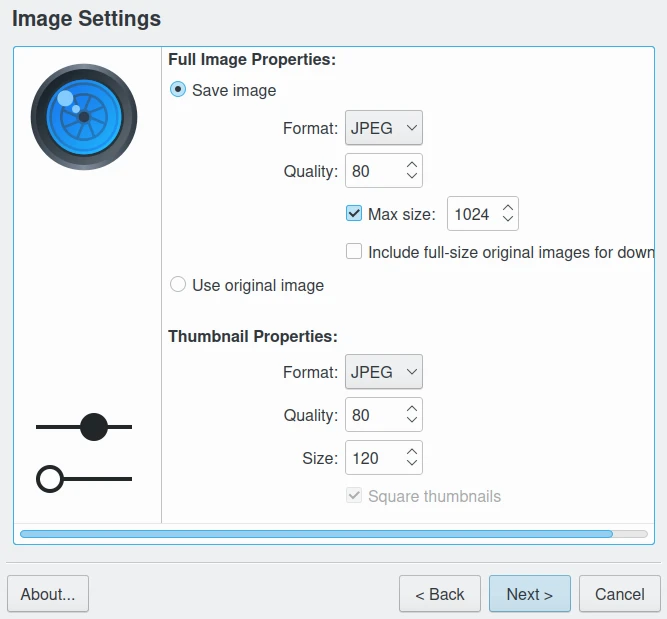
La pagina della Galleria HTML per regolare le proprietà delle immagini e delle miniature
Nella sezione Proprietà immagine intera puoi salvare le immagini modificate oppure usare l’immagine originale.
Per le immagini modificate, puoi selezionare il formato di uscita JPEG (file di dimensioni più piccole, ma con perdita di dati) o PNG (senza perdita di dati e con licenza libera) e impostare i parametri specifici per la compressione dell’immagine. Se lo spazio su disco è importante, verifica la compressione dell’immagine generata e abbassa il livello di compressione dal valore predefinito dell’applicazione ospite.
Se spunti la casella di controllo Dimensione massima puoi regolare la dimensione massima (in pixel) dell’immagine generata, tramite le frecce di selezione a destra. Le immagini più grandi di questo valore verranno ridimensionate, mentre quelle più piccole non saranno modificate.
Nota
Se, per ridimensionare le immagini da generare, viene selezionato il formato di file JPEG, tutte le informazioni Exif verranno mantenute dai file JPEG originali.
La sezione Proprietà miniatura consente di impostare il formato, la qualità e la dimensione delle miniature nella galleria.
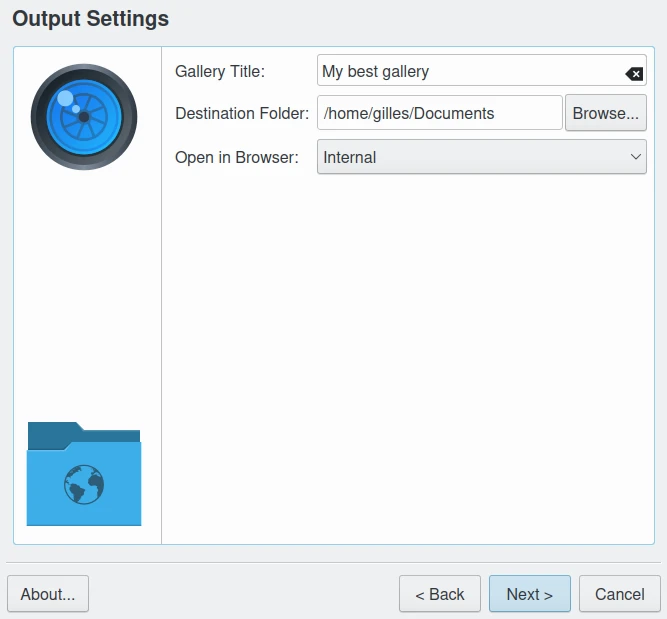
La pagina della Galleria HTML per configurare il risultato
Questa pagina definisce le impostazioni della posizione e del metodo di memorizzazione della galleria e di tutte le sue immagini associate. Scegli una cartella, o aggiungine una nuova, con permessi di scrittura in cui salvare la galleria: verranno create due sotto cartelle col nome della cartella dell’album e il nome del tema, contenenti tutti gli elementi.
Viene visualizzata una finestra di avanzamento per fornire riscontro dell’operazione. Se, durante questa fase, volessi interrompere l’operazione, premi il pulsante Annulla.
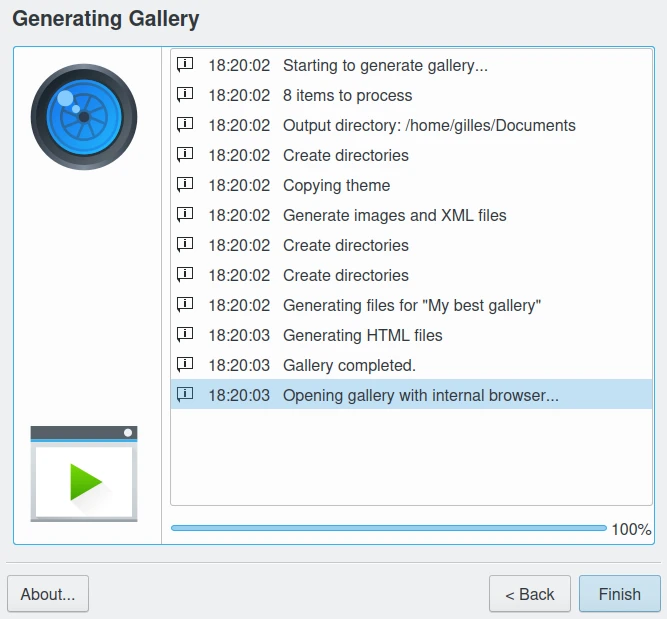
La pagina della Galleria HTML che mostra l’avanzamento della generazione della galleria
Infine, la galleria HTML generata verrà visualizzata in un a browser.
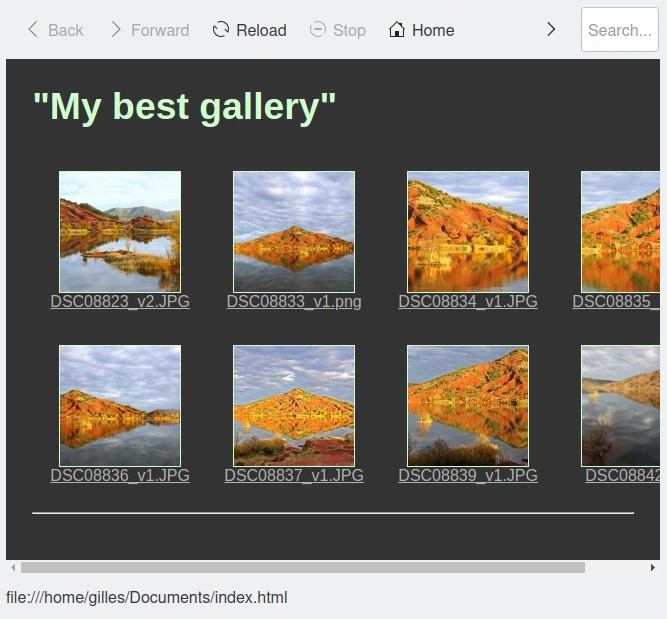
Il browser che visualizza la galleria HTML finale
Creare di un nuovo tema
Lo strumento Galleria HTML è in grado di creare facilmente siti molto diversi basati su temi. Questo capitolo spiega come creare un nuovo tema.
Primi passi
Un tema è una cartella che contiene almeno due file:
un file Desktop che descrive il tema
un file
template.xslper generare i file HTML
Quando lo strumento è in esecuzione, esegue le operazioni seguenti:
crea una cartella di destinazione
per ciascuna raccolta di immagini:
crea una cartella
genera le miniature (quadrate, per impostazione predefinita)
genera immagini intere
facoltativamente, copia le immagini originali
copia la cartella del tema nella cartella di destinazione
genera un file XML che descrive le raccolte delle immagini:
gallery.xml.genera i file HTML applicando
template.xslagallery.xml.
Il file Desktop
Il file desktop descrive il tema. Le informazioni che contiene vengono utilizzate nella pagina di selezione del tema dello strumento.
È un file INI e assomiglia a questo:
[Desktop Entry]
Type=Theme
Name=Hello World
Comment=A demonstration theme

[X-HTMLGallery Author]
Name=The Author
Url=http://example.com/themes/helloworld

[X-HTMLGallery Preview]
Name=Preview's Caption
Url=preview.png
Per facilitare le traduzioni delle voci viene utilizzato un formato di file desktop. Se guardi un file desktop di uno dei temi distribuiti con lo strumento, osserverai qualcosa di simile a questo:
[Desktop Entry]
Name=Simple
Name[br]=Eeun
Name[cs]=Jednoduchý
Name[cy]=Syml
Name[da]=Simpel
...
L’aspetto positivo di integrare il tuo tema all’interno dei temi predefiniti della Galleria HTML è che i traduttori internazionalizzeranno il file desktop al tuo posto.
Il file di anteprima immagine utilizzato per illustrare il tema nella procedura guidata sarà memorizzato nella cartella del tema radice.
Creare un nuovo tema da uno esistente
Il modo più semplice per iniziare è copiare un tema e modificarlo. Le cartelle si trovano in genere, in Linux, alla posizione /usr/share/apps/digikam/themes/. Per scrivere in questa cartella sono necessari privilegi di amministratore, dunque non creare il tema lì, ma esegui invece in una console:
Creazione di una cartella del tema nella tua cartella home:
mkdir -p ~/.local/share/digikam/themes/
Vai alla cartella:
cd ~/.local/share/digikam/themes/
Copia il tema snow in questa cartella, con il nuovo nome snow2:
cp -r /usr/share/apps/digikam/themes/snow snow2
Rinomina di conseguenza il file desktop:
cd snow2
mv snow.desktop snow2.desktop
Modifica snow2.desktop per rimuovere tutte le voci Name[…] e sostituire Name=Snow con Name=Snow 2.
Finito, puoi aprire digiKam e avviare lo strumento Galleria HTML: il tema Snow 2 sarà visualizzato nell’elenco dei temi.
Generare codice HTML utilizzando le regole XSL
Il file template.xsl è responsabile della generazione dei file HTML a partire dal file gallery.xml. È un file in stile ini standard e assomiglia a questo:
<?xml version="1.0" encoding="UTF-8"?>
<collections>
 <collection>
  <name>Name of first collection</name>
  <fileName>collection_folder</fileName>
  <comment>Collection comment</comment>
  <image>
   <title>Image Title</title>
   <description>Image Description</description>
   <date>2009-08-27T09:53:26</date>
   <full fileName="pict1279.jpeg" height="450" width="600"/>
   <thumbnail fileName="thumb_pict1279.jpeg" height="80" width="80"/>
   <!-- If there is an original image, you will get the 'original' tag -->
   <original fileName="original_pict1279.jpeg" height="3000" width="4000"/>

  </image>
  <image>
   <title>Image Title</title>
   <date>2009-08-27T09:55:33</date>
   <description>Image Description</description>
   <full fileName="pict1280.jpeg" height="450" width="600"/>
   <thumbnail fileName="thumb_pict1280.jpeg" height="80" width="80"/>
   <original fileName="original_pict1279.jpeg" height="3000" width="4000"/>
  </image>
  ...
 </collection>

 <collection>
  <name>Name of second collection</name>
  ...
 </collection>
</collections>
Non spiegheremo qui la sintassi XSLT, la documentazione relativa è rintracciabile in Internet. Raccomandiamo di approfondire la conoscenza di XSLT con questa esercitazione XSLT.
Tuttavia, vale la pena sottolineare che puoi utilizzare EXSLT, un gruppo di estensioni per XSLT. In particolare, exslt:document element è estremamente utile perché ti permette di generare più documenti dallo stesso file.
Lo strumento Galleria HTML non impone limiti sull’organizzazione dei file HTML. Puoi generare un file per immagine, oppure solo uno per raccolta. Si può immaginare un tema che contenga solo un file HTML e utilizzi JavaScript per mostrare le varie immagini. Esiste già un tema che utilizza i frame. Puoi persino generare file CSS al volo, se lo desideri.
Informazioni sulle traduzioni
Non devi rendere fisso (hardcoded) il testo nel modello, ma devi invece utilizzare i parametri i18n. Per esempio, invece di usare questo:
<a href="previous">Previous</a>
| <a href="next">Next</a>
Fai questo:
<a href="previous"><xsl:value-of select="$i18nPrevious"/></a>
| <a href="next"><xsl:value-of select="$i18nNext"/></a>
È molto più prolisso ma in questo modo l’utente otterrà il risultato HTML tradotto.
Se vuoi utilizzare i parametri i18n negli attributi, fai questo:
<a href="previous" title="{$i18nPrevious}"><img src="previous.png"/></a>
| <a href="next" title="{$i18nNext}"><img src="next.png"/></a>
Attualmente, i parametri i18n generali disponibili sono:
i18nPrevious
i18nNext
i18nCollectionList
i18nOriginalImage
i18nUp
E le proprietà dell’immagine sono:
i18nexifimagemake («Produttore»)
i18nexifimagemodel («Modello»)
i18nexifimageorientation («Orientazione dell’immagine»)
i18nexifimagexresolution («Risoluzione X dell’immagine»)
i18nexifimageyresolution («Risoluzione Y dell’immagine»)
i18nexifimageresolutionunit («Unità di risoluzione dell’immagine»)
i18nexifimagedatetime («Data e ora dell’immagine»)
i18nexifimageycbcrpositioning («Posizionamento YCBCR»)
i18nexifphotoexposuretime («Tempo di esposizione»)
i18nexifphotofnumber («Numero F»)
i18nexifphotoexposureprogram («Indice di esposizione»)
i18nexifphotoisospeedratings («velocità ISO»)
i18nexifphotoshutterspeedvalue («Valore di velocità dell’otturatore»)
i18nexifphotoaperturevalue («Diaframma»)
i18nexifphotofocallength («Lunghezza focale»)
Se hai necessità di ulteriori parametri i18n, invia una richiesta al Team del progetto.
Immagini e file CSS
Nel tuo tema sei libero di usare immagini, file CSS o altri file: inseriscili nella cartella del tema e lo strumento li copierà nella cartella di destinazione.
Immagini originali
Come spiegato in precedenza, se l’utente seleziona l’opzione Includi le immagini originali, il file gallery.xml conterrà i tag <original />. Se è presente questo tag, la pagina dell’immagine conterrà un collegamento per scaricare l’immagine originale.
Ecco un esempio:
<xsl:if test="original/@fileName != ''">
      <p>
           <a href="{original/@fileName}"><xsl:value-of select="$i18nOriginalImage"/></a>
      </p>
 </xsl:if>
Miniature non quadrate
Per impostazione predefinita, le miniature vengono ritagliate in modo da apparire quadrate e di dimensione identica. Ciò semplifica la creazione dello stile HTML/CSS. Tuttavia, se il tuo tema è pronto per gestire miniature di dimensioni diverse, aggiungi questo pezzo di codice al tuo file desktop:
[X-HTMLGallery Options]
Allow-non-square-thumbnails=true
L’utente potrà così selezionare se i quadrati non debbano essere quadrati. Per le miniature non quadrate, la dimensione specificata è ricavata da quella del lato più grande della miniatura.
Parametri del tema
Nel caso volessi fornire all’utente un modo per personalizzare il tuo tema, potresti offrire, per esempio, alcuni file CSS alternativi, oppure permettere all’utente di personalizzare il colore di sfondo. facile da eseguire.
Dichiarare un parametro
Per prima cosa, devi dichiarare il parametro. Modifica il file desktop e aggiungi qualcosa tipo questa:
[X-HTMLGallery Parameter bgColor]
Name=Background Color
Type=color
Default=#123456
Ora avvia lo strumento e seleziona il tuo tema, dopo aver premuto il pulsante Successivo, dovresti vedere un’opzione con un pulsante del colore inizializzato al colore #123456.
Usare il valore del parametro
In template.xsl, puoi ottenere il valore del tuo parametro così:
<xsl:value-of select="$bgColor"/>
Per cambiare il colore di sfondo del tag body, dovresti scrivere qualcosa tipo questo:
<body bgcolor="{$bgColor}">
...
</body>
Riferimento del parametro
Di seguito una descrizione più dettagliata per dichiarare i parametri. Un parametro viene dichiarato da una sezione chiamata X-HTMLGallery Parameter Un_Nome. Un_Nome va sostituito col nome che vuoi utilizzare nel file template.xsl.
La chiave Name definisce il testo che verrà mostrato nella pagina delle opzioni. Dato che è un file desktop, può essere tradotto come le altre chiavi.
La chiave Type definisce il tipo di parametro. Attualmente può essere:
caption
string
color
list
int
La chiave Default definisce il valore predefinito del parametro.
Chiavi del parametro List
Un parametro di elenco permette all’utente di selezionare un elemento da un elenco. Per dichiarare gli elementi disponibili, devi utilizzare due gruppi di chiavi: Value-N e Caption-N, dove N è la posizione dell’elemento, che inizia da 0.
Value-N è il valore interno dell’elemento. È il valore che sarà impostato nel parametro.
Caption-N è il valore visualizzato dell’elemento. È il testo che verrà mostrato nell’elenco.
Ecco un esempio: il parametro stile dal tema Simple:
[X-HTMLGallery Parameter style]
Name=Style
Type=list
Default=natural.css
Value-0=natural.css
Caption-0=Natural
Value-1=dark.css
Caption-1=Dark
Come puoi osservare, l’utente potrà scegliere o Natural o Dark. A seconda della scelta dell’utente, il valore <xsl:value-of select=”$style”/> si estenderà al file natural.css o dark.css.
Chiavi del parametro Int
Un parametro int permette all’utente di selezionare un valore intero utilizzando una casella numerica. In aggiunta al valore predefinito, puoi definire il valore massimo e minimo, utilizzando le chiavi Min e Max.
Ecco un esempio:
[X-HTMLGallery Parameter size]
Name=Size
Type=int
Default=12
Min=4
Max=28
Chiavi del parametro String e Caption
Un parametro string permette all’utente di digitare una stringa singola per impostare, per esempio, delle regole di configurazione. Un parametro caption permette all’utente di digitare una stringa a più righe con supporto di correzione ortografica per impostare una Descrizione o un Titolo.
Considerazioni finali
Siamo arrivati alla fine di questo capitolo, è dunque ora di essere creativi e di iniziare ad aggiungere nuovi temi.
Quando hai finito, non esitare a inviare il tuo lavoro in modo che sia integrato ufficialmente in digiKam. Pensa a quando saresti orgoglioso di vederlo incluso nell’elenco ufficiale. Per dettagli, consulta la pagina Contribute del sito web del progetto di digiKam.