Майстер створення панорам
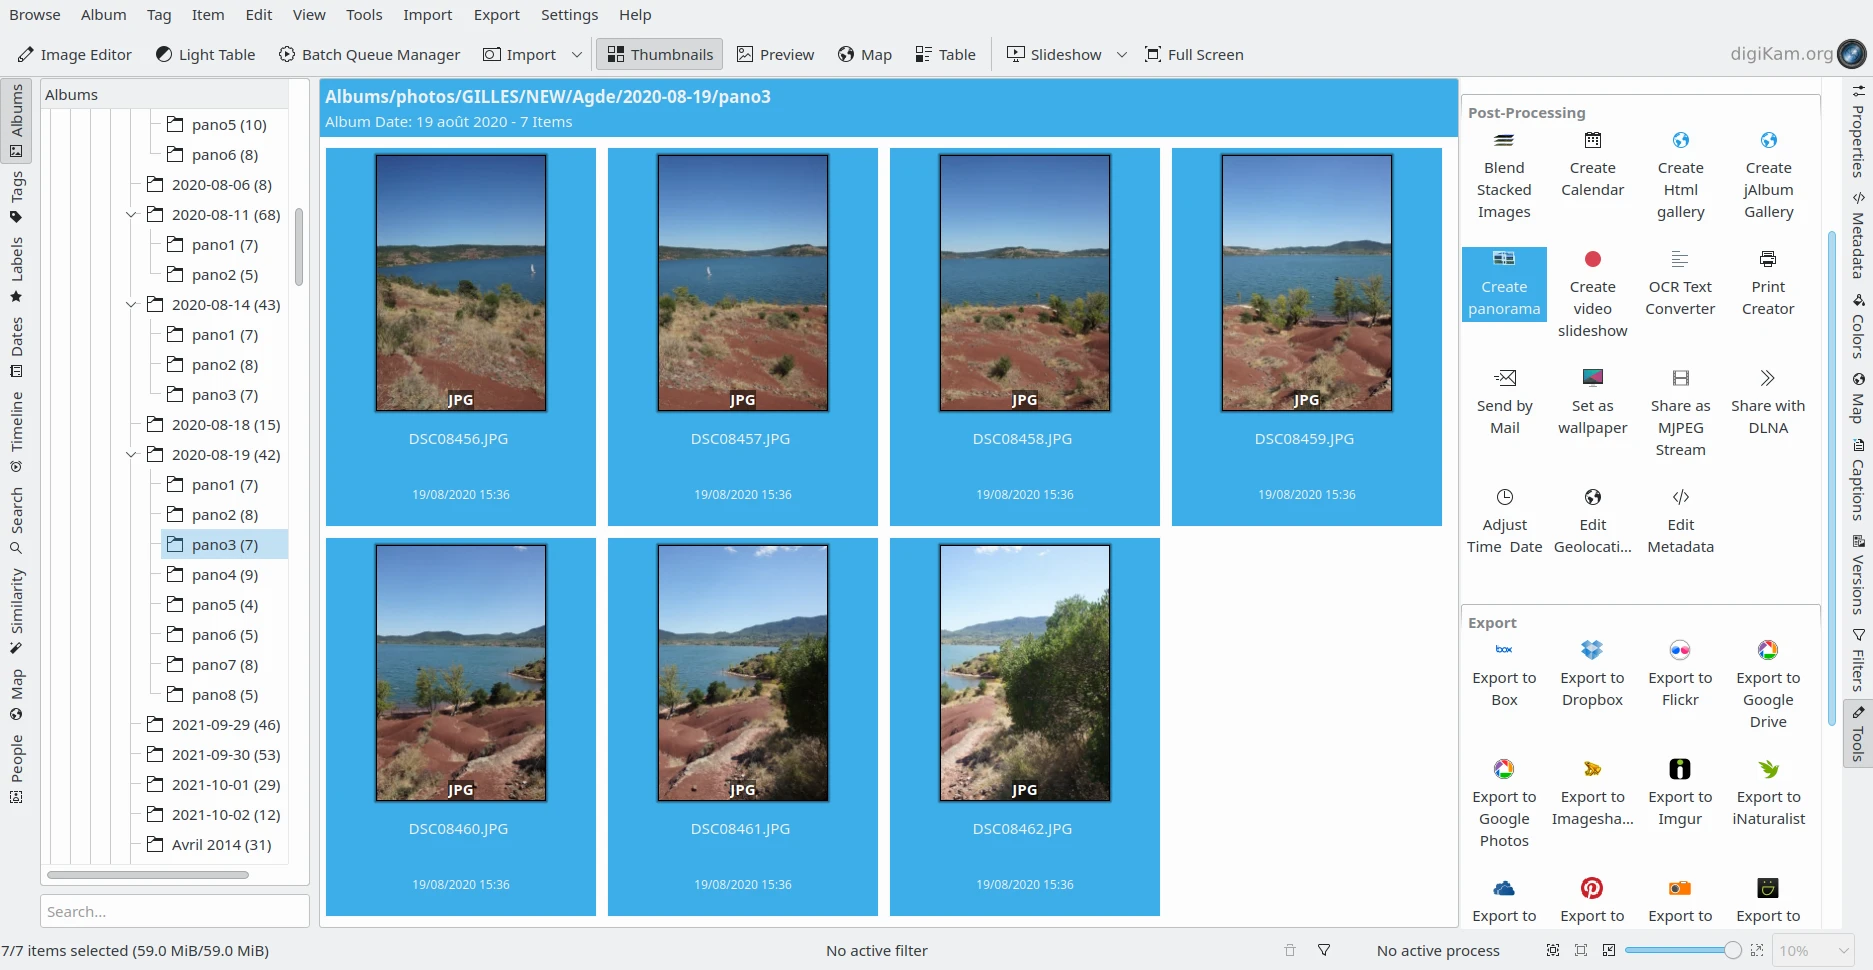
Вибрані на панелі перегляду піктограм панорамні файли JPEG (зображення 7x24 Мпк, які створено за допомогою Sony A77 — 59 МБ)
Панорама – це сукупність кількох фотографій, зроблених в однакових умовах за допомогою однієї камери/об’єктива. Камера обертається в одній точці між кожним знімком, тому кінцеві фотографії можна з’єднати разом, ніби вони були зняті за допомогою надширококутного об’єктива. Послідовні зображення мають бути створені з накладанням країв. Панорамний алгоритм спробує знайти загальні частини зображень, щоб об’єднати та об’єднати вміст. Щоб отримати найбільш узгоджену перспективу, найкраще використовувати штатив, особливо для складних композицій. Інструмент Засіб створення панорами надає змогу збирати кадри, зроблені горизонтально, вертикально або як матрицю.
Примітка
Зважайте на те, що панорама є великим масивом даних і потребує для обробки багато пам’яті.
Позначте зображення, які ви хочете зшити, і скористайтеся пунктом меню . У відповідь буде відкрито вікно майстра.
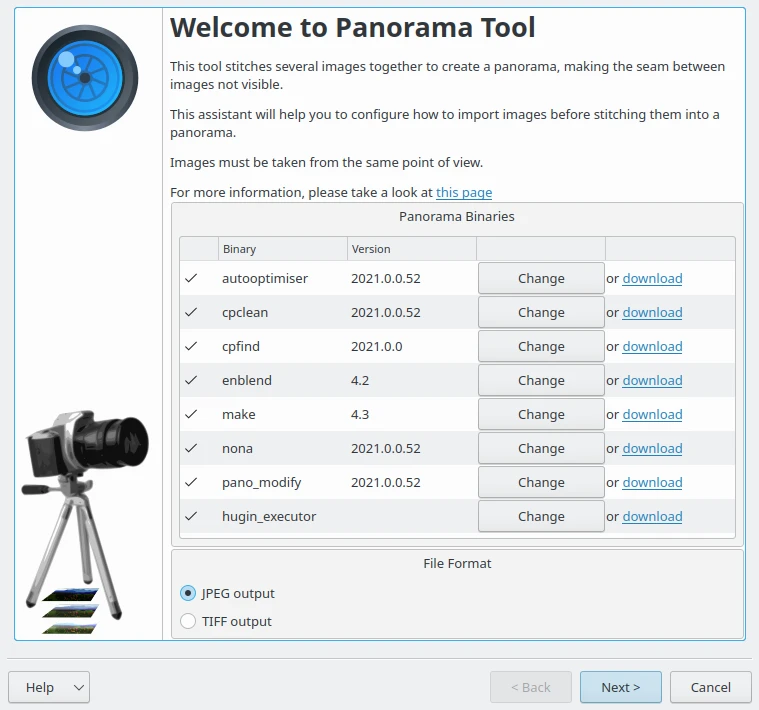
Майстер створення панорам із засобом виявлення компонентів Hugin
Роботу цього додатка засновано на інструментах командного рядка Hugin, які виконують збирання знімків. Якщо у вашій системі буде виявлено усі потрібні компоненти програмного забезпечення, просто виберіть бажаний формат виведення даних для панорами і натисніть кнопку Далі. Має бути показано сторінку, подібну до наведеної нижче:
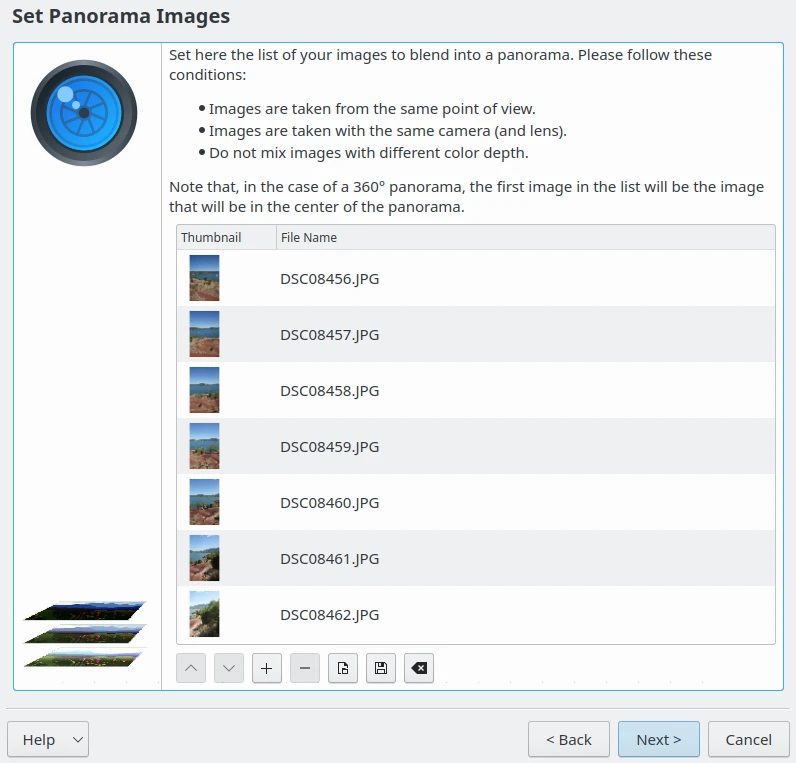
Майстер створення панорам зі списком записів для збирання
Якщо потрібно, упорядкуйте зображення належним чином. Порядок можна змінити натисканням стрілок вгору і вниз. Скористайтеся кнопками із символами плюс і мінус для додавання або вилучення записів. Якщо ви хочете створити панораму у 360°, першим у списку має бути знімок, який буде розташовано у центрі панорами. Після встановлення належного порядку натисніть кнопку Далі.
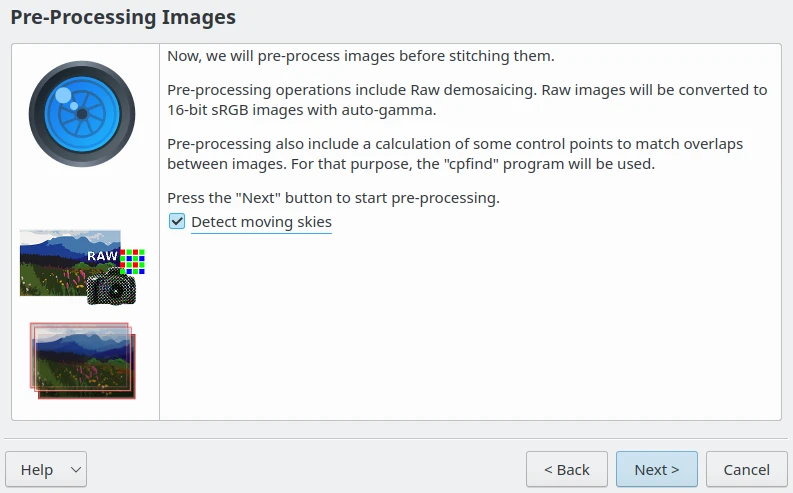
Крок попередньої обробки у майстрі створення панорам
За допомогою пункту Визначення руху хмар можна наказати програмі автоматично виявляти хмари, щоб запобігти помилковому визначенню ключових точок на знімках через рухомі об’єкти. Якщо бути точнішим, під час вибору контрольних точок програма відкидатиме усі точки, які можна пов’язати із хмарами. Це корисно, щоб запобігти зміні прив’язки контрольних точок внаслідок неправильного застосування алгоритмів до рухомих об’єктів. Залежно від вмісту сцени, позначте чи зніміть позначку з цього пункту, і натисніть кнопку Далі, щоб виконати попередню обробку знімків.
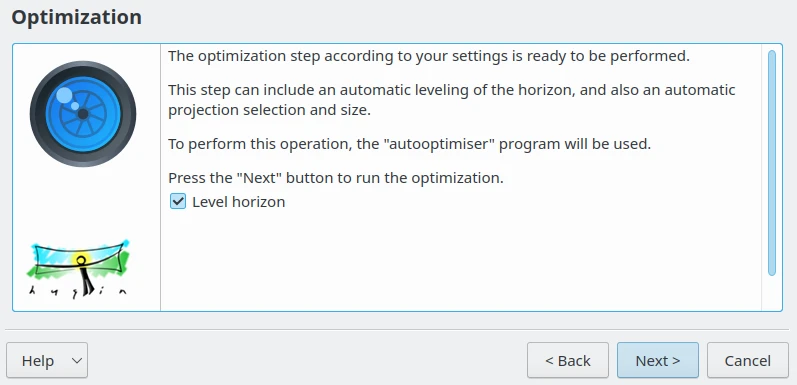
Крок оптимізації у майстрі створення панорам
На сторінці оптимізації ви побачите ще один пункт — Рівень горизонту, який призначено для горизонтальних сцен. Позначте цей пункт, щоб програма виявила горизонт і відповідним чином скоригувала проєкцію. Виявлений горизонт буде горизонтальною лінією у остаточній панорамі. Якщо ваша сцена має вертикальну композицію, ви можете проігнорувати цей пункт. Натисніть кнопку Далі, щоб переглянути результат.
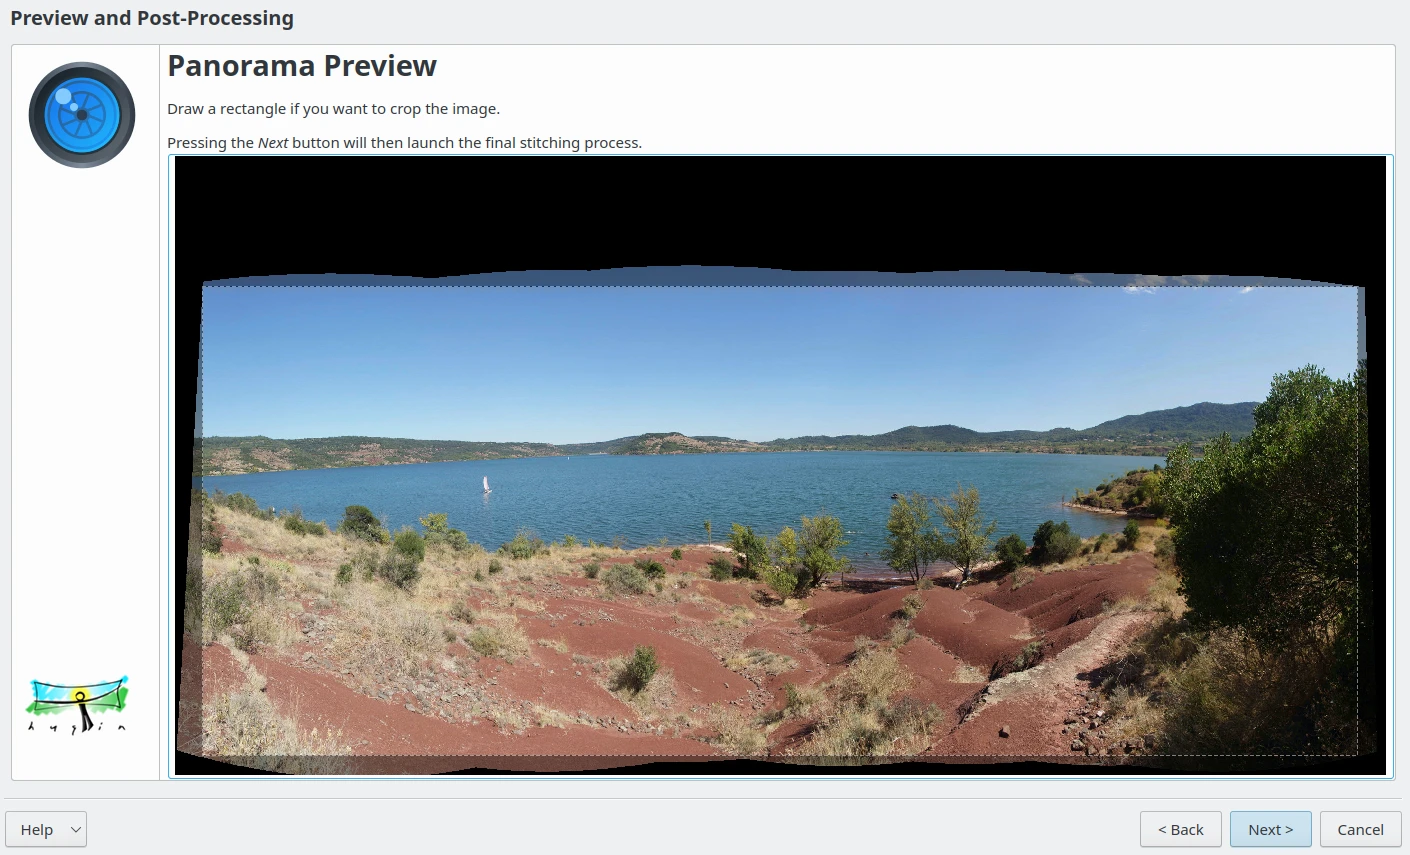
Крок попереднього перегляду у майстрі створення панорам
На цій сторінці зображення буде зібрано, ви зможете оцінити результат і обрізати його, щоб викинути зі сцени чорні кадри. Типово, інструмент здатен автоматично виявляти змістовну область панорами. Якщо ви наведете вказівник миші на полотно попереднього перегляду, має з’явитися панель інструментів у верхньому лівому куті. За її допомогою ви зможете Збільшити, Зменшити і Підібрати за розміром зображення. Клацанням правою кнопкою миші ви можете повторно визначити нову область обрізання. Коли досягнете бажаного результату, натисніть кнопку Далі, щоб обробити остаточну композицію панорами.
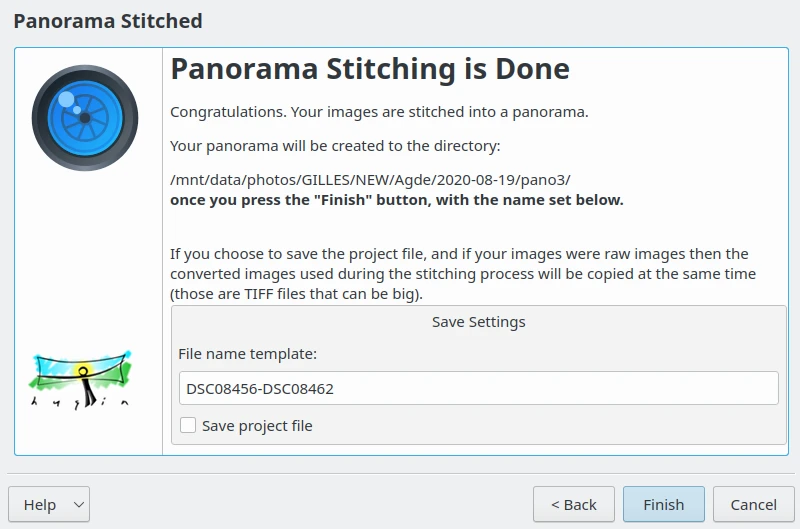
Остання сторінка майстра створення панорам
Після досить довгого обчислення зшивання панорами буде завершено, і програма запропонує назву шаблона для файла-результату. Якщо ви хочете, можете зберегти проєкт у форматі, який сумісний із Hugin. Натисніть кнопку Завершити, і ви можете переглянути виведення у тому самому альбомі, що і початкові зображення.
Примітка
У цьому розділі підручника, як приклад, використано зображення 7x24 Мпк (59 МБ). У результаті отримано один панорамний файл JPEG з 82 Мпк (23 МБ).
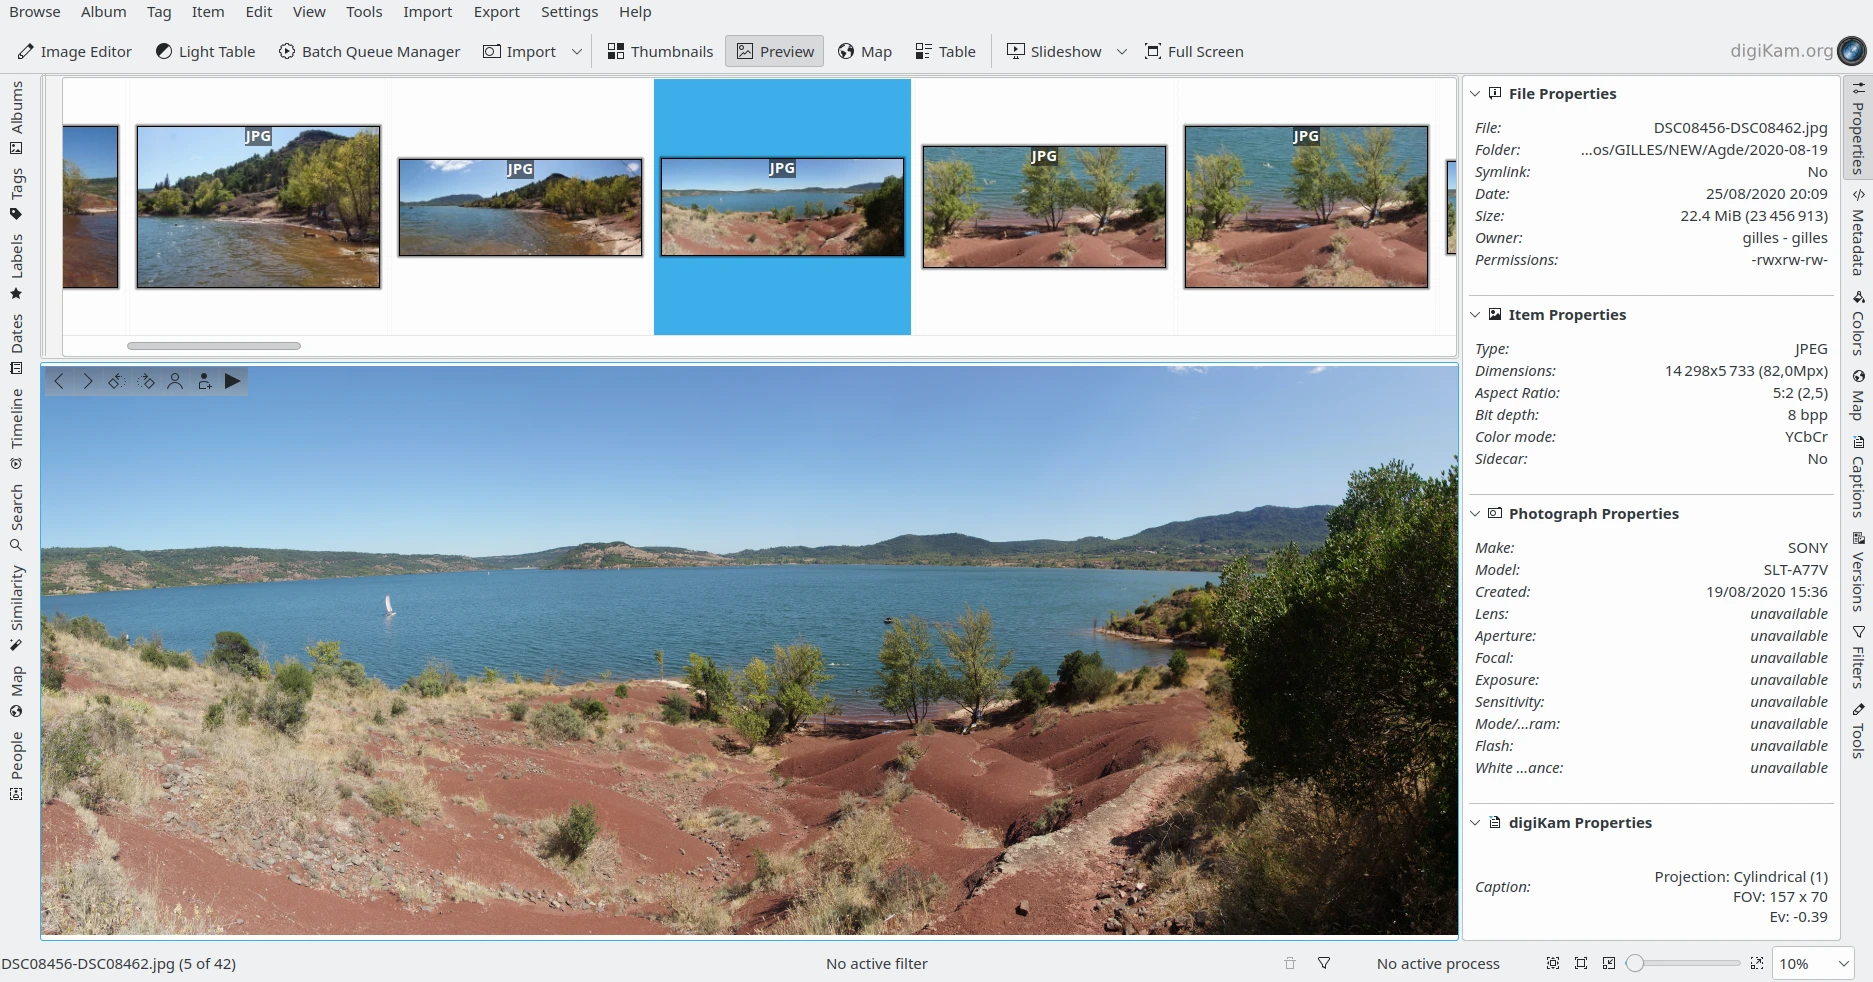
Зібрані панорамні файли JPEG у digiKam