The Reverse Geocoding tab which allows you to find geographic names (cities, street names, …) by using a public reverse geocoding service and the GPS data of an image. These names can then be used for additional photo tagging.
The Search tab which allows you to find positions on the map from geographic names (cities, monuments, …) by using a public geoname service (GeoNames and OpenStreetMap at the time of writing).
The KML Export tab which allows you to export a set of positions and thumbnails into a standard KML file for use in other mapping programs.
The Map Settings button opens a small menu which allows you to choose between OpenStreeMap and Off-line Maps, and depending on that choice to choose the kind of map you want to use. Furthermore, you can select the projection (Spherical, Mercator, Equi-Rectangular) and you can display a few additional tools like compass and scale on the map.
** 放大** 按钮
The Zoom Out button .
The Switch Between Markers And Thumbnails button, will display as or to let you choose whether you want the positions of your images indicated by a marker symbol or by a thumbnail on the map. If you choose thumbnails, the next two buttons are of particular interest.
备注
The Markers color over the map depends of the number of items grouped at a location, and it depends on the zoom level. The meanings of the colors are listed below:
颜色
分组项目数
青色
1
绿色
2
黄色
10
橙色
50
红色
100
放大地图中的缩略图 按钮 和 缩小地图中的缩略图 按钮 用来调整地图中照片缩略图的大小尺寸。
The Pan Mode button lets you move the map by clicking and dragging. The cursor symbol will change to a hand.
The Zoom Into A Group button is useful if you have images so close to each other on the map that all but the topmost are obscured. Once you click on the visible image, the zoom factor will be adjusted so that all the other images behind it become visible. If you click on a group of images and nothing really happens they either have exactly the same geographic position and/or the zoom factor is already at its maximum.
The Select Images button toggles the selection of an image, or a group of images, in the list of images right below the buttons once you click on it on the map. The selection status of all other images in the list remain unchanged. Be aware of the fact that there is a kind of two-stage selection! If you click on a thumbnail or marker on the map, the selected image(s) in the list of images will be displayed with a light blue background. If you click on it in the list, the background will become a darker blue and if there were more than one image with a light blue background before, the other images will be de-selected. Only clicking on an image in the list will let its preview appear to the right of the list.
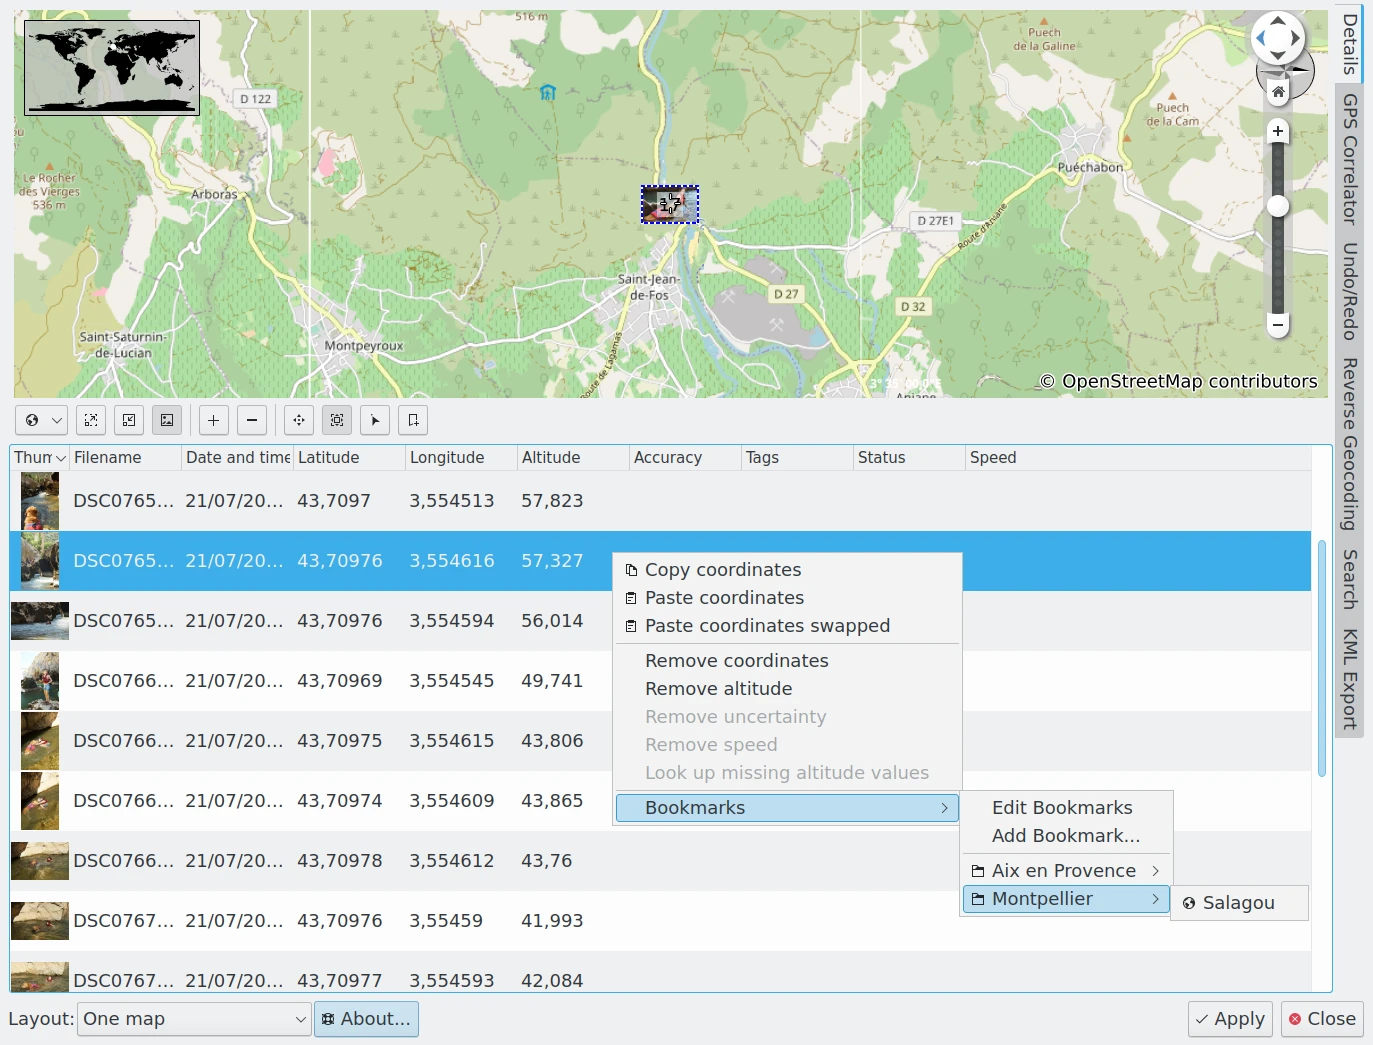
The Display Bookmarked Positions On The Map button can be used to display places on the map that are already registered in the Bookmarks Manager.
Copy geo: URL copies the geographic coordinates at the cursor position to the clipboard in decimal degrees, e.g. geo:48.3800450672,-4.4865371254
Address Details performs a reverse location lookup to display the address of the selected location in a dialog.
Info Boxes allows you to select which widgets to display on the map, including compass, scale bar, navigation widget, overview map, and a progress indicator.
Add Measure Point add a measure point at the clicked location. Add a second point to measure distance between the two points. Add a third point to measure total distance and angles between the points.
Remove Last Measure Point remove the last measure point to be added.
Remove Measure Points removes all measure points.
Additional information on the map view is available from the Marble handbook.
The digiKam geolocation Bookmarks Manager is a tool to register a nested list of favorite places which can be reused later to geolocalize items taken at the same positions.
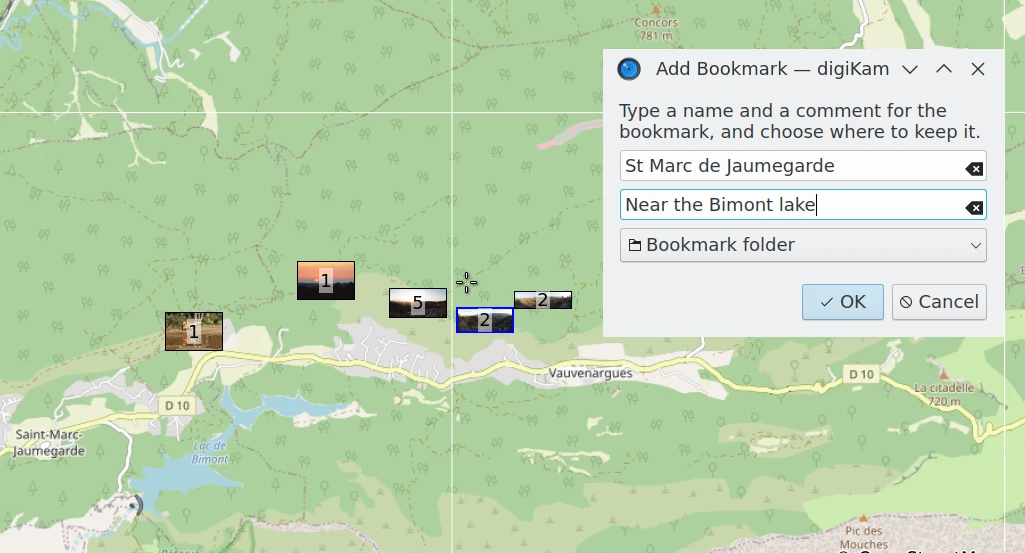
Add Bookmark: if the current selected item from the list has GPS information, this location can be bookmarked with this option. A dialog to populate the bookmark properties then appears.
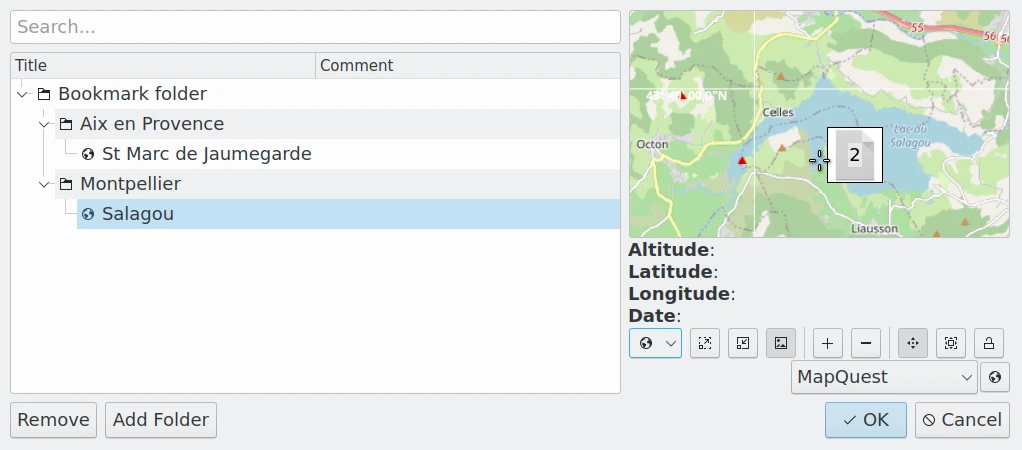
Edit Bookmarks: displays a dialog with the complete hierarchy of managed bookmarks. You can change item properties, the place in the hierarchy using drag and drop, and display the corresponding location on a map from the right side. In the Hierarchy you can append new branches using the Add Folder button. The Remove button allows you to delete an item in the hierarchy.

opens a small menu which allows you to choose between OpenStreeMap and Off-line Maps, and depending on that choice to choose the kind of map you want to use. Furthermore, you can select the projection (Spherical, Mercator, Equi-Rectangular) and you can display a few additional tools like compass and scale on the map.
.
or
to let you choose whether you want the positions of your images indicated by a marker symbol or by a thumbnail on the map. If you choose thumbnails, the next two buttons are of particular interest.
和 缩小地图中的缩略图 按钮
用来调整地图中照片缩略图的大小尺寸。
lets you move the map by clicking and dragging. The cursor symbol will change to a hand.
is useful if you have images so close to each other on the map that all but the topmost are obscured. Once you click on the visible image, the zoom factor will be adjusted so that all the other images behind it become visible. If you click on a group of images and nothing really happens they either have exactly the same geographic position and/or the zoom factor is already at its maximum.
toggles the selection of an image, or a group of images, in the list of images right below the buttons once you click on it on the map. The selection status of all other images in the list remain unchanged. Be aware of the fact that there is a kind of two-stage selection! If you click on a thumbnail or marker on the map, the selected image(s) in the list of images will be displayed with a light blue background. If you click on it in the list, the background will become a darker blue and if there were more than one image with a light blue background before, the other images will be de-selected. Only clicking on an image in the list will let its preview appear to the right of the list.
can be used to display places on the map that are already registered in the Bookmarks Manager.