The Printer Profiles
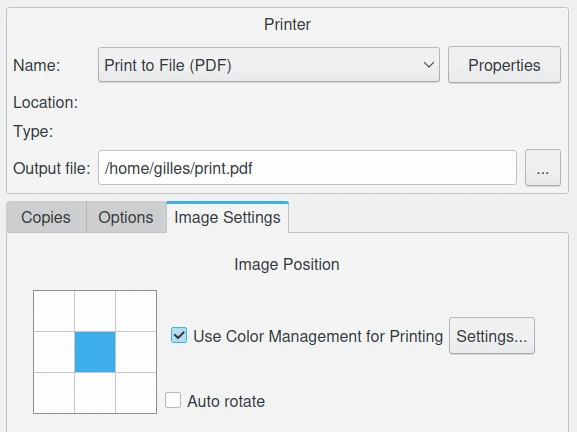
Using Printer Profile
We are now almost ready to print that image. Where to get a printer profile? you already know the answer. You can use the generic profile that comes with your printer. You can purchase a professionally produced profile. Some commercial printing establishments will send you their printer profiles (which won’t work with your printer). You can make your own printer profile using Argyll, in which case your profile can be tailored to your particular paper, inks, and even image characteristics (if you are printing a series of images with a color palette limited to subdued browns, you don’t need a printer profile that tries to make room for saturated cyan and blue).
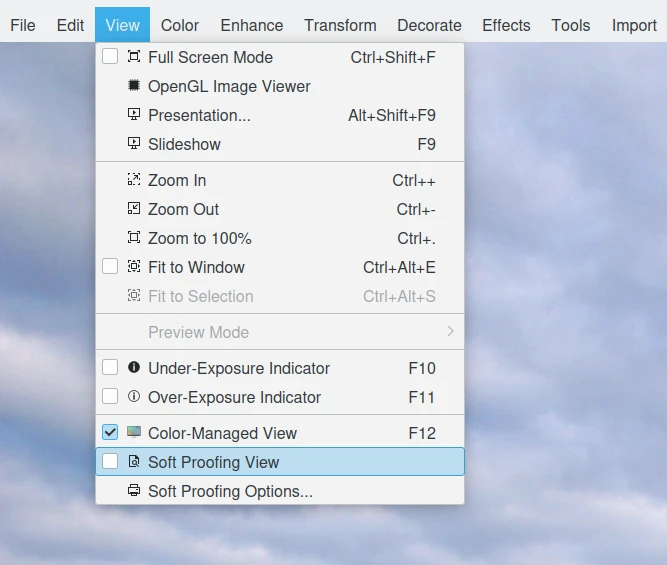
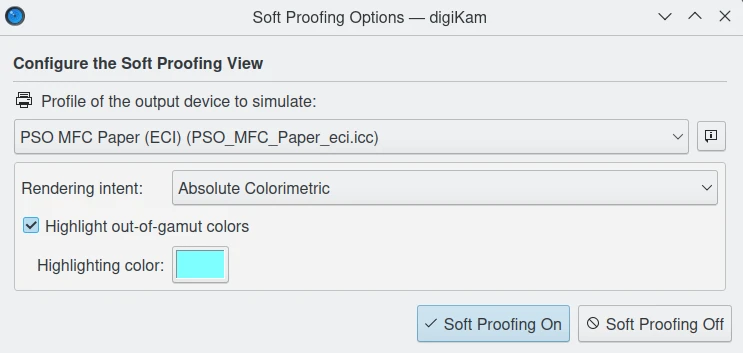
In digiKam Image Editor, Soft-Proofing can be configured to render over the canvas a preview of a printing job using your printer color profile.
The Rendering Intents
Rendering intent refers to the way color gamuts are handled when the intended target color space (for example, the monitor or the printer) cannot handle the full gamut of the source color space (for example the working space).
There are four commonly-used rendering intents:
Perceptual, also called Image or Maintain Full Gamut. This is generally recommended for photographic images. The color gamut is expanded or compressed when moving between color spaces to maintain consistent overall appearance. Low saturation colors are changed very little. More saturated colors within the gamuts of both spaces may be altered to differentiate them from saturated colors outside the smaller gamut space. Perceptual rendering applies the same gamut compression to all images, even when the image contains no significant out-of-gamut colors.
Relative Colorimetric, also called Proof or Preserve Identical Color and White Point. Reproduces in-gamut colors exactly and clips out-of-gamut colors to the nearest reproducible hue.
Absolute Colorimetric, also called Match or Preserve Identical Colors. Reproduces in-gamut colors exactly and clips out-of-gamut colors to the nearest reproducible hue, sacrificing saturation and possibly lightness. On tinted papers, whites may be darkened to keep the hue identical to the original. For example, cyan may be added to the white of a cream-colored paper, effectively darkening the image. Rarely of interest to photographers.
Saturation, also called Graphic or Preserve Saturation. Maps the saturated primary colors in the source to saturated primary colors in the destination, neglecting differences in hue, saturation, or lightness. For block graphics; rarely of interest to photographers.
Perceptual and Relative colorimetric rendering are probably the most useful conversion types for digital photography. Each places a different priority on how they render colors within the gamut mismatch region. Relative colorimetric maintains a near exact relationship between in gamut colors, even if this clips out of gamut colors. In contrast, Perceptual rendering tries to also preserve some relationship between out of gamut colors, even if this results in inaccuracies for in gamut colors.
Absolute is similar to relative colorimetric in that it preserves in gamut colors and clips those out of gamut, but they differ in how each handles the white point… Relative colorimetric skews the colors within gamut so that the white point of one space aligns with that of the other, while absolute colorimetric preserves colors exactly (without regard to changing white point). Saturation rendering intent tries to preserve saturated colors.
The usual choice to use Rendering Intent to display contents on monitor is relative colorimetric. We would suggest that you not use absolute colorimetric unless you want very strange results.
警告
Rendering intents are available when converting from one profile to another depends on the destination profile. Not every profile supports every rendering intent. Problems can occur when you select an unsupported rendering intent is that Lcms quietly uses the profile’s default rendering intent.
The Soft Proofing
Soft-proofing will show you the differences to be expected between what you see on your screen and what you will see when you make a print. To soft-proof, you need a profile for your printer (actually, for your printer-paper combination, as the paper used affects the ink colors and the white point). If you don’t like the soft-proofed image, you can make changes in your working space, not after converting the image to your printer space.
Perceptual intent may or may not give the best results with soft-proof, depending on the respective gamuts of the image and printer/paper combination in question. Usualy, the Colorimetric intents give clearer, brighter colors, albeit at the cost of having to carefully re-edit the image to avoid clipping highlights and shadows. Perceptual is just an option, not by any means always the best option.
Perceptual rendering intent is a safe choice because it prevents clipping of shadows and highlights, although possibly at the expense of de-saturating all your colors. So if you don’t want to bother doing any soft-proofing, choose the perceptual rendering intent (if you don’t want to soft-proof, probably you should also stick with sRGB).
Black Point Compensation
Black point compensation is a way to make adjustments between the maximum black levels of digital files and the black capabilities of various digital devices, such as a printer.
Black point compensation results depends of the context. Try soft-proofing with black point compensation on. If you like it, use it. Otherwise, don’t use it.