HTML Gallery
Introdução
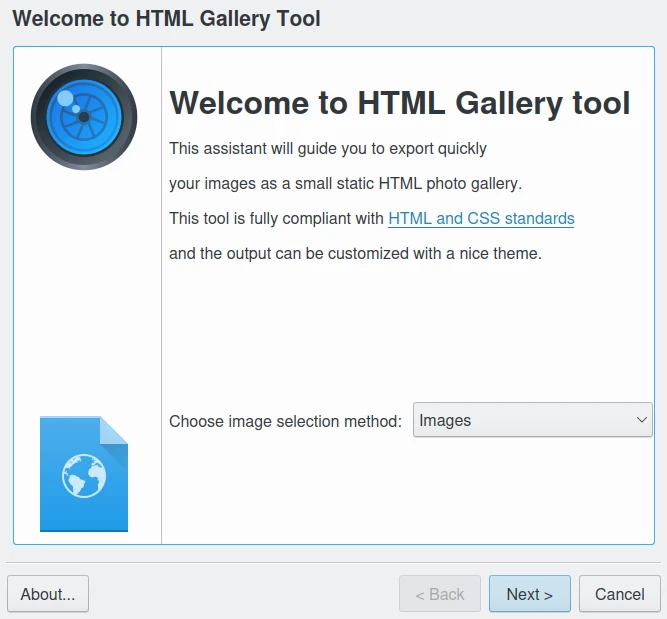
The HTML Gallery is a tool for exporting a set of albums or images to an HTML page.
This powerful tool can export your albums into an HTML-compliant web image gallery. You can easily select the images or the albums to export in an HTML page and set many designs and parameters for the HTML rendering. UTF-8 encoding is used for the best internationalization.
Usar o Assistente
O Modo de Selecção da Página da Galeria em HTML
To launch the tool, uses Ctrl+Alt+Shift+H menu entry, or the corresponding icon from the Tools tab in Right Sidebar. The tool will display a view to select the contents to export, either from current items selection, or from a list of albums. The Albums selection mode allows you to select items from albums that you want to export to HTML. Just check the respective albums from the hierarchical nested list. You can use the next three tabs Tags, Searches, and Labels to refine your selection based on tags, labels, or previous search results in digiKam.
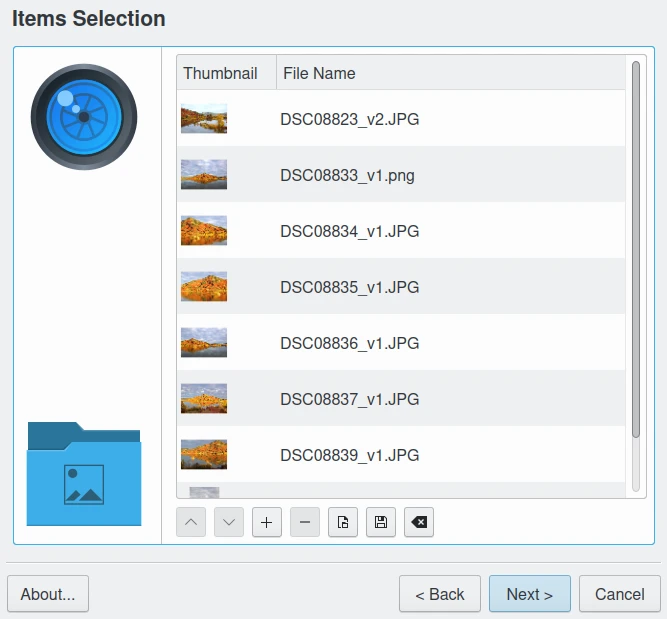
A Página da Galeria de HTML para Seleccionar os Itens
The next step is to select a Theme to generate the gallery.
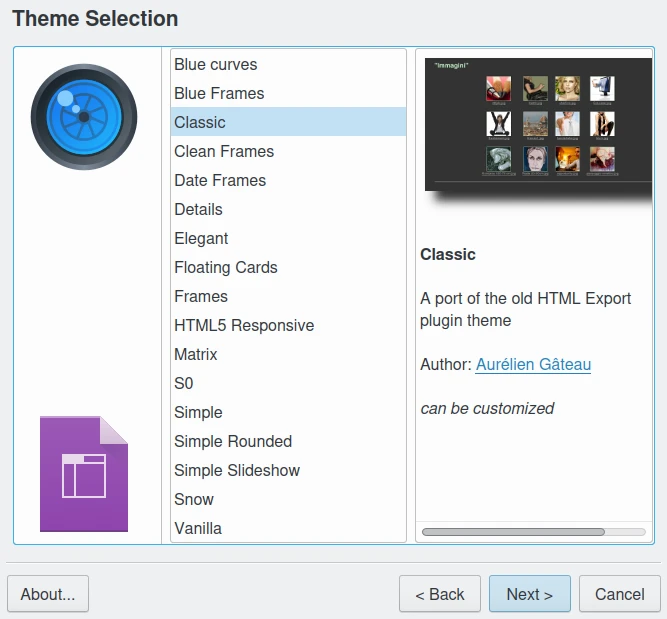
A Página da Galeria de HTML para Seleccionar o Tema
Dependendo do tema escolhido, poderá ter opções adicionais para afinar a aparência da galeria.
A imagem seguinte mostra a configuração dos parâmetros do tema (aqui com o exemplo do tema Clássico).
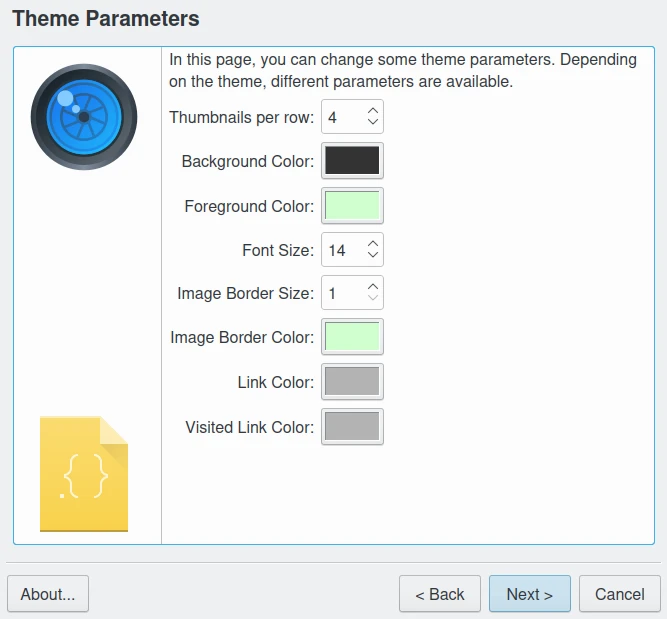
A Página da Galeria de HTML para Ajustar os Parâmetros do Tema
Para todos os temas seleccionados, poderá ajustar a configuração das imagens e miniaturas na galeria.
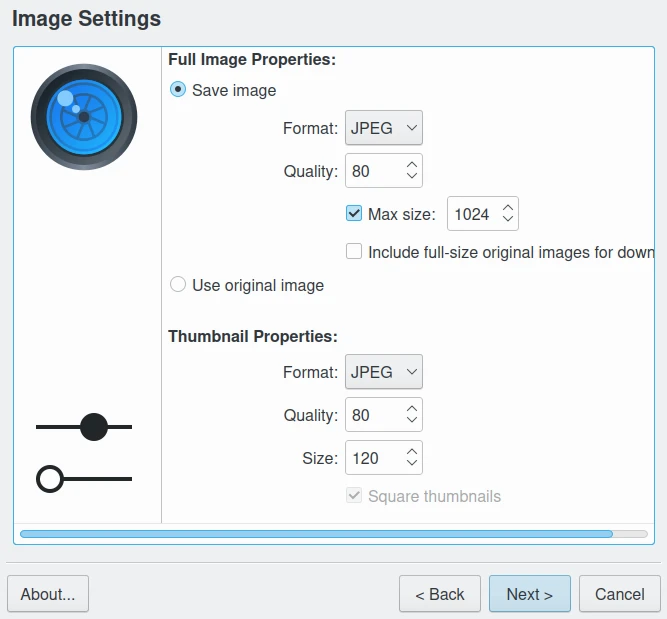
A Página da Galeria de HTML para Ajustar as Propriedades das Imagens e Miniaturas
In the Full Image Properties section you can either Save modified images or Use original image.
For modified images you can select as output format JPEG (smallest file-size, but lossy) and PNG (lossless and license free) and set specific image compression features. If disk space is of concern, check the target image compression and lower the compression level from the host application default value.
Checking the Max. size box you can fix the maximum target image size (in pixels) with the spin-box at the right. Images bigger than this value will be scaled down, but smaller images will not be modified.
Nota
Se for seleccionado o formato de ficheiro JPEG para o tamanho-alvo das imagens, toda a informação de EXIF será preservada a partir dos ficheiros JPEG originais.
The Thumbnail Properties section allows you to set the Format, Quality and Size for the thumbnails in the gallery.
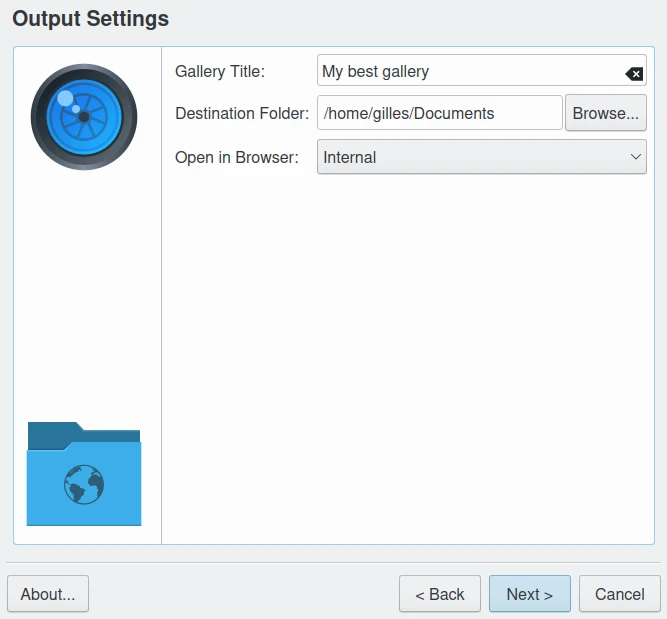
A Página da Galeria de HTML para Configurar o Resultado
This page defines the settings of where and how to store the gallery with all its associated images. Select a folder or add a new folder with write access where you want the gallery to be written. Two sub-folders with the name of your album folder and the theme name will be created containing everything.
A progress dialog is displayed to provide feedback to the user. Press the Cancel button if you want to abort the process during this stage.
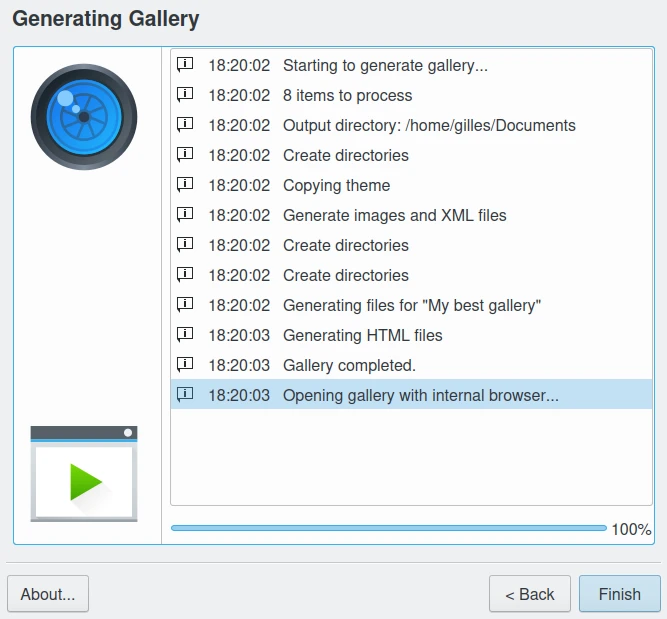
A Página da Galeria de HTML para Mostrar o Progresso da Geração da Galeria
Finalmente, a galeria HTML gerada é apresentada num navegador Web.
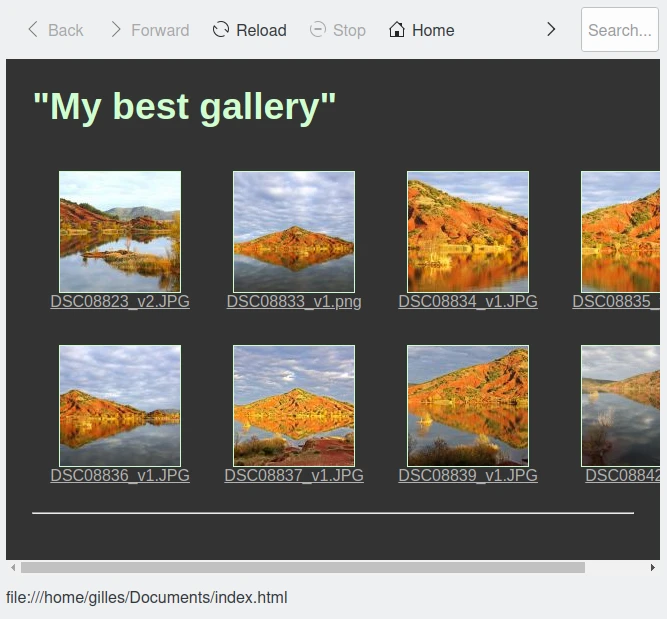
O Navegador a Mostrar a Galeria de HTML no Fim
Criar um Novo Tema
The HTML Gallery tool can easily produce very different sites based on themes. This section explains how to create a new theme.
Começar
Um tema é uma pasta que contém pelo menos dois ficheiros:
A Desktop File describing the theme.
Um ficheiro
template.xslpara gerar os ficheiros em HTML.
Quando a ferramenta está em execução, ela faz o seguinte:
Creates an output folder.
Para cada colecção de imagens:
Creates a folder.
Generates thumbnails (square by default).
Generates full images.
Optionally copies original images.
Copies the theme folder to the output folder.
Generates an XML file describing the image collections:
gallery.xml.Generates the HTML files by applying
template.xsltogallery.xml.
O Ficheiro “Desktop”
O ficheiro “.desktop” descreve o tema. A informação que contém é usada na página de selecção do tema da ferramenta.
É um ficheiro INI semelhante ao seguinte:
[Desktop Entry]
Type=Theme
Name=Hello World
Comment=A demonstration theme

[X-HTMLGallery Author]
Name=The Author
Url=http://example.com/themes/helloworld

[X-HTMLGallery Preview]
Name=Preview's Caption
Url=preview.png
Um ficheiro no formato “desktop” é usado para facilitar as traduções de itens. Se olhar para o ficheiro .desktop, para um dos temas fornecidos com a ferramenta, irá encontrar algo como isto:
[Desktop Entry]
Name=Simple
Name[br]=Eeun
Name[cs]=Jednoduchý
Name[cy]=Syml
Name[da]=Simpel
...
The nice thing is that when your theme gets integrated into the HTML Gallery default themes, translators will internationalize the desktop file for you.
The image preview file used to illustrate the theme in the wizard will be placed in the root theme folder.
Creating a new Theme from Another One
The easiest way to get started is to copy one theme and modify it. Folders can be found usually under Linux at /usr/share/apps/digikam/themes/. Writing in this folder requires root access, so we will not create our theme there - instead do the following from a console:
Crie uma pasta do tema na sua pasta pessoal:
mkdir -p ~/.local/share/digikam/themes/
Vá a esta pasta:
cd ~/.local/share/digikam/themes/
Copie o tema snow para esta pasta, com o novo nome snow2:
cp -r /usr/share/apps/digikam/themes/snow snow2
Mude o ficheiro .desktop de acordo com isso:
cd snow2
mv snow.desktop snow2.desktop
Edite o snow2.desktop para remover todos os itens Name[…] e substitua o Name=Snow por Name=Snow 2.
É tudo - agora poderá abrir o digiKam e iniciar a ferramenta da Galeria de HTML, sendo que o tema Snow 2 deverá aparecer na lista de temas.
Gerar o HTML com Regras em XSL
O ficheiro template.xsl é responsável por gerar os ficheiros HTML a partir do ficheiro gallery.xml. É um ficheiro normal do estilo INI e parece-se com o seguinte:
<?xml version="1.0" encoding="UTF-8"?>
<collections>
 <collection>
  <name>Name of first collection</name>
  <fileName>collection_folder</fileName>
  <comment>Collection comment</comment>
  <image>
   <title>Image Title</title>
   <description>Image Description</description>
   <date>2009-08-27T09:53:26</date>
   <full fileName="pict1279.jpeg" height="450" width="600"/>
   <thumbnail fileName="thumb_pict1279.jpeg" height="80" width="80"/>
   <!-- If there is an original image, you will get the 'original' tag -->
   <original fileName="original_pict1279.jpeg" height="3000" width="4000"/>

  </image>
  <image>
   <title>Image Title</title>
   <date>2009-08-27T09:55:33</date>
   <description>Image Description</description>
   <full fileName="pict1280.jpeg" height="450" width="600"/>
   <thumbnail fileName="thumb_pict1280.jpeg" height="80" width="80"/>
   <original fileName="original_pict1279.jpeg" height="3000" width="4000"/>
  </image>
  ...
 </collection>

 <collection>
  <name>Name of second collection</name>
  ...
 </collection>
</collections>
We won’t explain XSLT syntax here, you should be able to find the documentation you need on the Internet. We recommend the XSLT tutorial here for learning XSLT.
Nevertheless, it’s worth noting that you can make use of EXSLT, a set of extensions to XSLT. In particular, the exslt:document element is extremely useful because it allows you to generate multiple documents from the same file.
HTML Gallery tool imposes no constraint on the organization of HTML files. You can generate one file per image, or only one per collection. One could imagine a theme which would only contains one HTML file and uses JavaScript to show the different images. There is already one theme using frames. You can even generate CSS files on the fly if you want to.
Acerca das Traduções
You should not hardcode any text in the template, but you should instead use the i18n parameters. For example instead of using this:
<a href="previous">Previous</a>
| <a href="next">Next</a>
Faça isto:
<a href="previous"><xsl:value-of select="$i18nPrevious"/></a>
| <a href="next"><xsl:value-of select="$i18nNext"/></a>
It’s a lot more verbose, but this way your user will get localized HTML output.
Se quiser usar os parâmetros i18n nos atributos, faça-o da seguinte forma:
<a href="previous" title="{$i18nPrevious}"><img src="previous.png"/></a>
| <a href="next" title="{$i18nNext}"><img src="next.png"/></a>
Por agora, os parâmetros i18n disponíveis a nível geral são:
i18nPrevious
i18nNext
i18nCollectionList
i18nOriginalImage
i18nUp
And the image properties are:
i18nexifimagemake («Marca»)
i18nexifimagemodel («Modelo»)
i18nexifimageorientation («Orientação da Imagem»)
i18nexifimagexresolution («Resolução em X da Imagem»)
i18nexifimageyresolution («Resolução em Y da Imagem»)
i18nexifimageresolutionunit («Unidade de Resolução da Imagem»)
i18nexifimagedatetime («Data/Hora da Imagem»)
i18nexifimageycbcrpositioning («Posicionamento do YCBCR»)
i18nexifphotoexposuretime («Tempo de Exposição»)
i18nexifphotofnumber («Número-F»)
i18nexifphotoexposureprogram («Índice de Exposição»)
i18nexifphotoisospeedratings («Classificação da Velocidade ISO»)
i18nexifphotoshutterspeedvalue («Valor da Velocidade do Obturador»)
i18nexifphotoaperturevalue («Valor da Abertura»)
i18nexifphotofocallength («Distância Focal»)
If you need more i18n parameters, please submit a request to the Project Team.
Imagens e Ficheiros CSS
You are free to use images, CSS files or other files in your theme. Just put them in the theme folder and the tool will copy them into the output folder.
Imagens Originais
Como foi explicado acima, se o utilizador seleccionar a opção Incluir as imagens originais, o ficheiro gallery.xml irá conter as marcas <original />. Se esta marca estiver presenta, a página da imagem deverá conter uma ligação para transferir a imagem original.
Aqui está um exemplo:
<xsl:if test="original/@fileName != ''">
      <p>
           <a href="{original/@fileName}"><xsl:value-of select="$i18nOriginalImage"/></a>
      </p>
 </xsl:if>
Miniaturas Não-Quadradas
Por omissão, as miniaturas são recortadas de forma a ficarem quadradas e terão um tamanho idêntico. Isto torna mais fácil criar o estilo em HTML/CSS. Contudo, se o seu tema estiver pronto para lidar com miniaturas de tamanhos diferentes, adicione este excerto ao seu ficheiro .desktop:
[X-HTMLGallery Options]
Allow-non-square-thumbnails=true
O utilizador poderá então seleccionar se as miniaturas devem ou não ser quadradas. Para as miniaturas não-quadradas, o tamanho da miniatura indicado fica o tamanho do lado maior da miniatura.
Parâmetros do Tema
Poderá querer fornecer uma forma ao utilizador de personalizar o seu tema; por exemplo, poderá fornecer alguns ficheiros CSS alternativos, ou deixar o utilizador personalizar a cor de fundo. Isto é simples de fazer.
Declarar um Parâmetro
Primeiro, precisa de declarar o seu parâmetro. Edite o seu ficheiro .desktop e adicione algo como o seguinte:
[X-HTMLGallery Parameter bgColor]
Name=Background Color
Type=color
Default=#123456
Agora inicie a ferramenta e seleccione o seu tema, depois de carregar em Seguinte, deverá ver uma página de opção com um botão de cor inicializado com a cor #123456.
Usar o Valor do Parâmetro
No template.xsl, poderá obter o valor do seu parâmetro, como se segue:
<xsl:value-of select="$bgColor"/>
Para mudar a cor de fundo da marca body, iria escrever algo como o seguinte:
<body bgcolor="{$bgColor}">
...
</body>
Referência dos Parâmetros
Aqui está uma descrição mais completa da forma como se declaram os parâmetros. Um parâmetro é declarado com uma secção chamada X-HTMLGallery Parameter nome. O nome deverá ser substituído pelo nome que deseja usar no template.xsl.
A chave Name define o texto que será apresentado na página da opção. Dado que isto é um ficheiro .desktop, poderá ser traduzida como as outras chaves.
A chave Type define o tipo do parâmetro. Na altura em que isto foi escrito, pode ser um dos seguintes valores:
caption
string
color
list
int
A chave Default define o valor predefinido do parâmetro.
Chaves de Parâmetros em Lista
Um parâmetro do tipo lista permite ao utilizador seleccionar um item numa lista. Para declarar os itens disponíveis, deverá usar dois conjuntos de chaves: Value-N e Caption-N, onde o N é a posição do item, a começar em 0.
O Value-N é o valor interno do item. Este é o valor que será configurado para o parâmetro.
Caption-N é o valor visível do item. Este é o texto que será apresentado na lista.
Aqui está um exemplo: o parâmetro style do tema Simples:
[X-HTMLGallery Parameter style]
Name=Style
Type=list
Default=natural.css
Value-0=natural.css
Caption-0=Natural
Value-1=dark.css
Caption-1=Dark
Como poderá ver, o utilizador será capaz de escolher entre Natural ou Dark. Dependendo da escolha do utilizador, o <xsl:value-of select=”$style”/> irá expandir para natural.css ou dark.css.
Chaves do Parâmetro Inteiro
Um parâmetro inteiro permite ao utilizador seleccionar um inteiro com um campo incremental. Para além do valor predefinido, poderá definir os valores mínimo e máximo, usando as chaves Min e Max.
Aqui está um exemplo:
[X-HTMLGallery Parameter size]
Name=Size
Type=int
Default=12
Min=4
Max=28
Chaves dos Parâmetros de Texto e Legenda
Um parâmetro de texto permite ao utilizador introduzir um texto simples para configurar regras de configuração, por exemplo. Um parâmetro de legenda permite ao utilizador introduzir um texto em várias linhas, com suporte para verificação ortográfica, para definir uma Descrição ou um Título.
Palavras Finais
This is the end of this chapter, so now is the time for you to get creative and start adding new themes.
When you are done, do not hesitate to submit your work for official integration in digiKam. Think of how proud you will be to see your new theme included in the official list. See the Contribute page from the digiKam project web-site for details.