Views Settings
The Views options for digiKam are set from . With this settings page, you can customize settings for digiKam Views, grouped into the following categories: Icons, Tree-Views, Preview, Full-Screen, Mime Types, and Categories.
Icon Settings
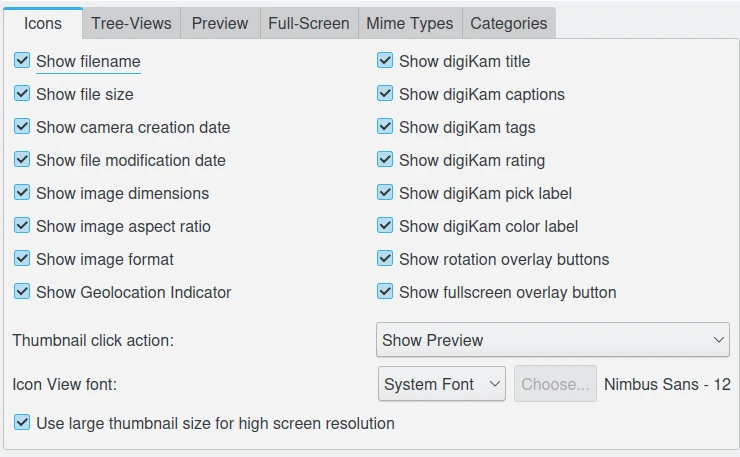
The digiKam Icon-View Configuration Page
The first series of settings on the left side of this view allow you to select the technical information shown below the icon thumbnail, such as filename, file size, creation date, image dimensions, and aspect ratio.
The Show file modification date option shows the file modification date only if it's different from the creation date. This function is useful to quickly identify which items have been modified.
The Show Geolocation Indicator option shows an icon over the image thumbnail if the item has geolocation information.
The options on the right side allow you to customize other properties to show over and below the icon thumbnail, such as Image Format, Title, Caption, Labels, and the Rating.
The Show rotation overlay buttons option shows overlay buttons over the image thumbnail to be able to rotate an image left or right.
The Show fullscreen overlay button option shows an overlay button over the image thumbnail to open it in fullscreen mode.
An example of an icon-view item is given below:
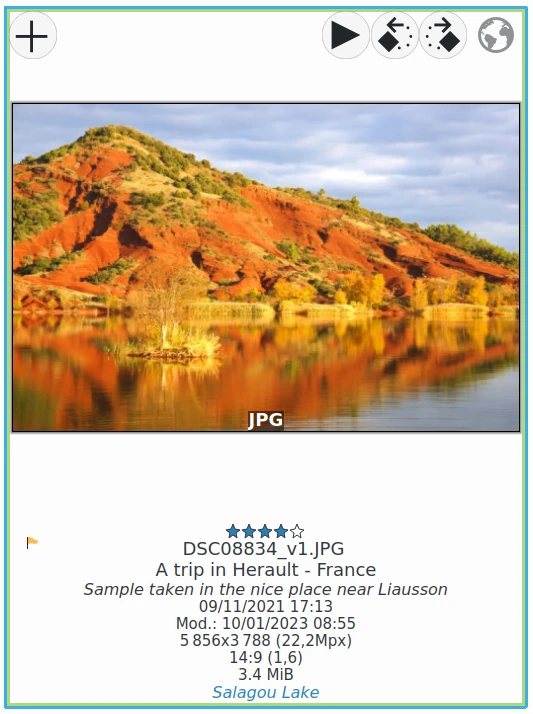
An Icon-View Item Example Using Large Thumbnail Size Option
Astuce
For technical and design reasons, the Icon-View only displays a minimal set of information under thumbnails. However, digiKam offers a practical workaround, the Table-View, where thumbnails are organized in rows, and columns can be fully customized to show any metadata stored in the digiKam database
The Thumbnail click action option allows to choose what should happen when you click on a thumbnail. Four settings are available:
Show preview to display the item in Preview Mode F3.
Start image editor to open the image in a separate Image Editor window F4.
Show on Light Table to open the image in a separate Light Table window.
Open with Default Application to open item in default desktop application.
The Icon View font option allows you to select the font used to display text under icon-view items.
The Use large thumbnail size for high screen resolution option renders the icon-view items with a large thumbnail size, which can be useful if you are using a 4K monitor. By default this option is turned off and the maximum thumbnail size is limited to 256 x 256 pixels. When this option is enabled, the thumbnail size can be extended to 512 x 512 pixels. This option will store more data in the thumbnail database and will use more system memory. digiKam needs to be restarted for the option to take effect and the Rebuild Thumbnails option from the Maintenance Tools dialog needs to be executed to reprocess the thumbnails for all collections.
Tree View Settings
These settings allow you to customize the tree views of the Left and Right Sidebar.
The Tree View icon size option configures the size in pixels of the Tree View icons in digiKam's sidebars. Use larger values for HiDPI screens.
The People Tree View icon size option configures the size in pixels of the Tree View icons in digiKam's people sidebar.
The Tree View font option sets the font used to display text in nested album hierarchies.
The option Show a count of items in Tree Views will display the number of items inside a folder or assigned to a tag behind the album/tag name. The count shown depends on whether the subfolders/-tags are folded out or not and on the and the settings in the main menu.
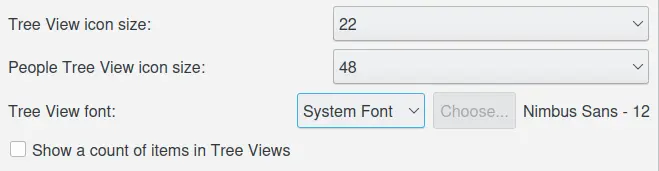
The digiKam Tree-View Configuration Page
Preview Settings
Instead of opening the image in the editor, the digiKam preview mode F3 will show the image within the Image Area of the main window. The advantage of the main window preview is that it is faster than opening the image editor and that the icons of the other images remain visible so that you are able to review the list of current images quickly. Depending on your computer features, you can customize the best way to load images into the preview. Raw files can be processed differently, as this kind of container can require long computation.
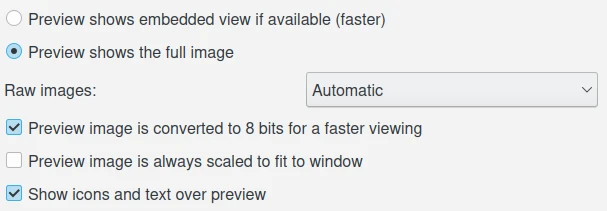
The digiKam Preview Configuration Page
The option Preview shows embedded view if available will try to open a small version of the photograph embedded in the file. Small embedded images can be found in all RAW files and in all files that support IPTC or XMP like PNG, JPEG, TIFF, JPEG2000, PGF. If an embedded preview cannot be found, some image decoders (JPEG, JPEG2000, and PGF, WebP) are able to create a reduced version of the photograph by themselves which is still faster than using the whole image. Depending on the size of the image, the size of the embedded preview and the size available for the preview on your screen the effect of this option may or may not be evident.
The option Preview shows the full image will always use the full image data for the preview regardless of whether there is a reduced version embedded in the file or not. This can result in a higher quality preview but is usually slower.
If the last option is checked, the drop-down field to the right of Raw images is accessible. It offers three options: with Automatic selected, the Libraw decoder will decode the RAW data automatically without any adjustments from the user. This sometimes leads to weird results. The algorithm also takes screen resolution and CPU speed into account to try to balance speed and rendering quality. Embedded preview will try to use the (JPEG) preview embedded in RAW files. Raw data in half size will show unprocessed RAW data in reduced size.
The option Preview image is converted to 8 bits for a faster viewing must be unchecked if you do not want to convert a 16-bit preview image to 8 bits. This will improve performance.
The option Preview image is always scaled to fit to window will enlarge the image to always fit the free space available on the canvas. More precisely, fit to window means that it would downscale larger images to fit, as well as upscale smaller images to fit. Shrinking an image is usually not a problem, but enlarging a small image can introduce artifacts. If you don't want your small images enlarged, leave this option off.
The option Preview image use Anti-aliasing scale up will blur details in an image when you zoom-in to the pixel level. Disable this option to show pixel artifacts when zoomed in.
The option Show icons and text over preview will show elements for rotation, face tags, full screen mode, etc. in the top left corner of the image preview and text indicating which data the preview is showing in the top right corner.
Full-Screen Settings
The options in this tab apply only to the Full Screen Mode you can access via the Full Screen button on the Toolbar or via Ctrl-Shift-F in the main menu or the context menu. It does not apply to the Full Screen Mode you access by clicking the “Show Fullscreen” icon either on a thumbnail or on the preview.

The digiKam Full-Screen Configuration Page
If the Hide toolbars option is activated, the only way to leave the Full Screen Mode is the context menu, or the keyboard shortcut Ctrl-Shift-F. You can work on the images also by choosing functions from the context menu of an icon or preview.
Mime Types Settings
digiKam can understand lots of different image file types as well as some video and audio formats. To control which types of files digiKam will try to display you can add or remove file extensions from these lists. digiKam ignores any files that are in the digiKam Album folders that do not match these extensions.
Note
The default settings can be easily restored by clicking on the update buttons to the right of each category.
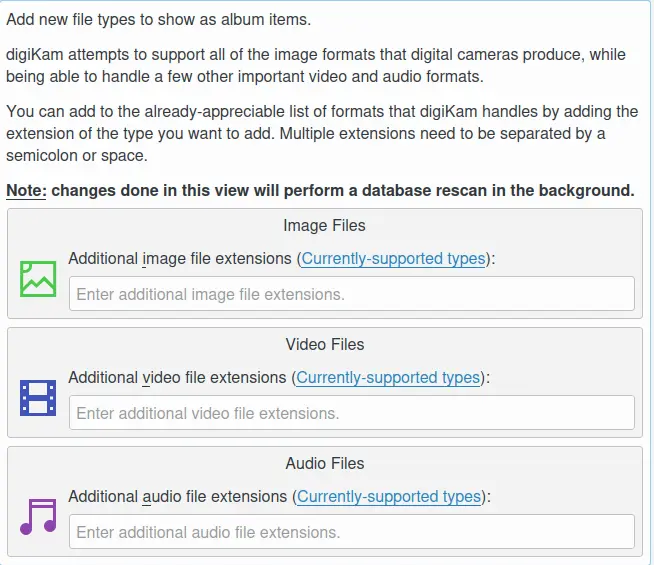
The digiKam Mime-Type Configuration Page
You can add the extensions of image files (including RAW files) to be displayed in the Album view. Just put xyz abc to display files with the xyz and abc extensions in your Album view. You can also remove file formats that are shown by default by putting a minus sign in front of the extension: e.g. -gif would remove all GIF files from your Album view and any trace of them in your database. They would not be deleted, just not shown in digiKam.
Avertissement
Removing files from the database means losing all of their tags and ratings.
Album Categories Settings
In the Album View you can choose from to have the Albums in the Album Tree of the Left Sidebar sorted by category. Here you can manage these categories by using the Add, Remove, and Replace button. Use the Replace button to rename a category. To assign categories to an Album you must use the Album Properties dialog.
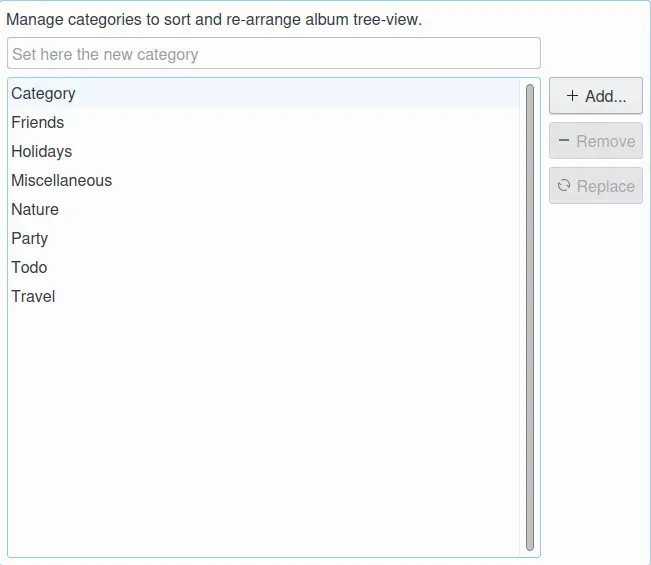
The digiKam Album Categories Configuration Page