Effects Tools
Blur Effects
The digiKam Blur Effects tool can apply a series of blurring effects for digital still images.
With this filter set, you can transform an ordinary photograph into a work of art suitable for framing.
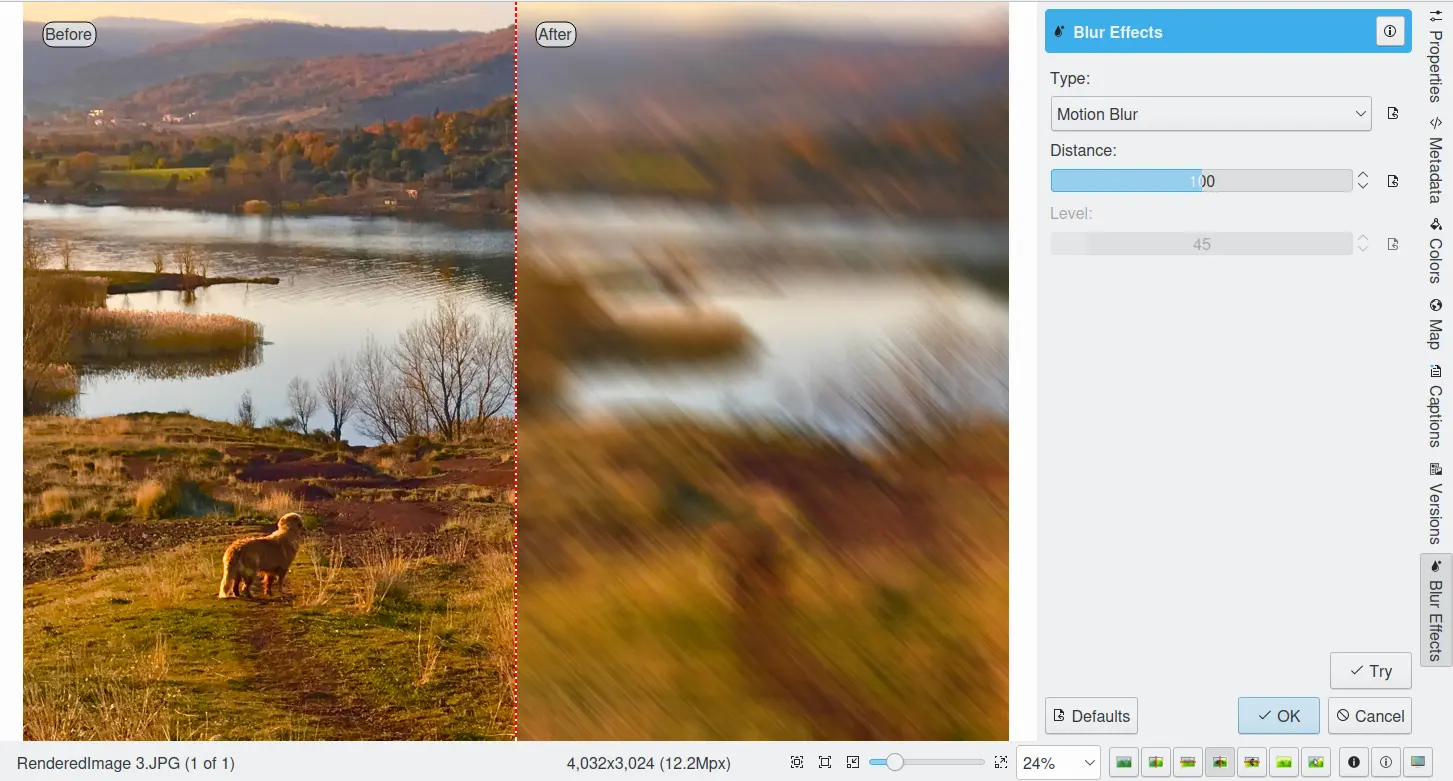
The digiKam Image Editor Blur FX Tool
The available blurring effects include:
Zoom Blur: blurs the image along radial lines starting from a specified center point. This simulates the blur of a zooming camera, thereby giving the photograph a dynamic expression as often seen in sports photography.
Radial Blur: blurs the image by rotating the pixels around the specified center point. This simulates the blur of a rotating camera.
Far Blur: blurs the image to simulate the effect of an unfocused camera lens. The subject seems to recede into the background.
Motion Blur: blurs the image horizontally, simulating the blur of a linearly moving camera, i.e. like a shot taken from a car or train.
Focus Blur: blurs the image corners to reproduce the astigmatism distortion of a lens.
Softener Blur: blurs the image softly in the darker tones and strongly in the high lights. This gives photographs a dreamy and glossy soft focus effect (Hamilton effect). It’s ideal for creating romantic portraits, glamour photography, or adding a warm and subtle glow.
Shake Blur: blurs the image by randomly moving the pixels simulating the blur of an arbitrarily moving camera.
Smart Blur: finds the edges of color in photograph and blurs them without muddying the rest of the image.
Frost Glass: blurs the image by simulating randomly dispersed light filtering through coarse frosted glass.
Mosaic: blurs the image by dividing the photograph into rectangular cells and then fills those cells with the average pixel value from the cell.
Warning
Some effects can take a long time to run and cause high CPU load. You can always abort an effect by pressing the Abort button during preview rendering.
Charcoal Drawing
The digiKam Charcoal Drawing tool is an effect filter that creates a charcoal sketch-like result.
The digiKam Charcoal Drawing filter uses the gradients of color and luminosity to produce a grey-scale charcoal sketch. The lines defining the outline of the image are pronounced. Images with slowly changing gradients are not ideal for this effect. When selecting an image to use with this filter, it might be helpful to imagine what scene you would pick to do as a hand sketch yourself.
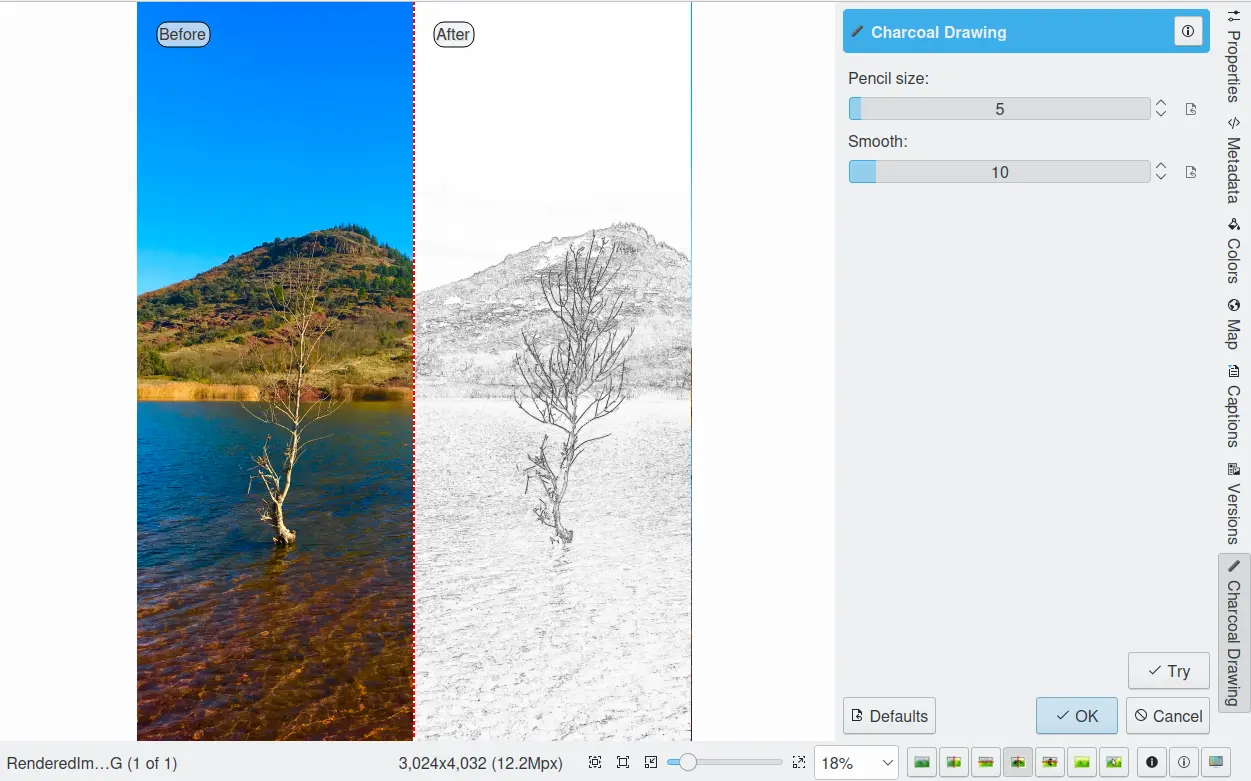
The digiKam Image Editor Charcoal Tool
There are two sliders to control the effect on a scale of 1-100. The upper slider selects the Pencil size, whereas the second slider adjusts the contrast (Smooth).
Note
The result can often be improved by adjusting the luminosity levels.
Color Filter Effects
The digiKam Color Effects tool provides five color effects: a Solarization effect, a Vivid filter, a Neon effect, an Edge filter, and a Lut3D filter.
The Solarization Effect
In the age of chemical image processing, solarizing (also known as Sabatier) was an effect created by exposing a partially developed print to a brief flash of light, then completing the development. The colored, darker areas shield the additional light from the sensitive photo layers, which has the net effect of making the lighter areas darker and inverting the colors. The result resembles a partially negative image.
The Level control helps to preview the solarization by simply increasing it. At about 50% intensity the image shows what was once chemically possible. If you further increase the effect it will finally become a negative image, a stage of inversion not achievable on photographic paper.
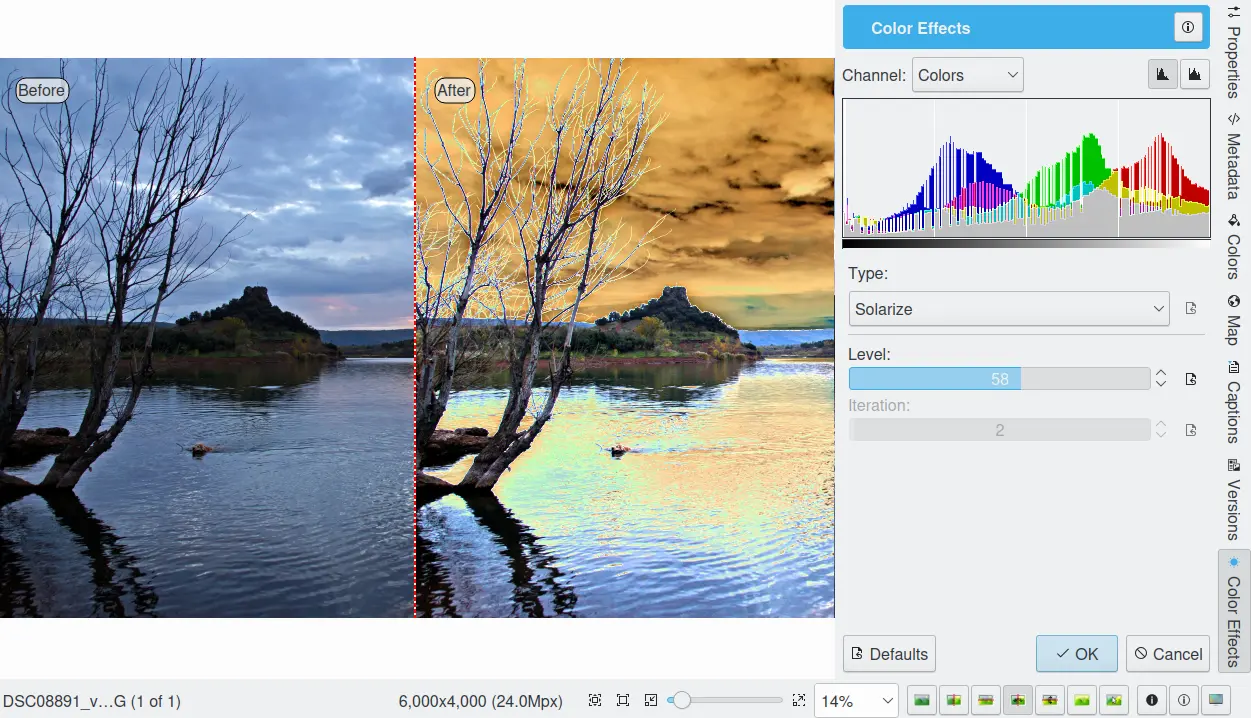
The digiKam Image Editor Solarize Tool
The Vivid Filter
The vivid filter simulates what is known as Velvia effect. It is different from saturation in that it has a more pronounced contrast effect that bring colors brilliantly alive and glowing. Try it, it can a beautiful effect for many subjects.
Velvia is a brand of daylight-balanced color reversal film produced by the Japanese company Fujifilm. The name is a contraction of Velvet Media, a reference to its smooth image structure. Velvia has very saturated colors under daylight, high contrast. These characteristics make it the slide film of choice for most nature photographers. Velvia’s highly saturated colors are, however, considered overdone by some photographers, especially those who don’t primarily shoot landscapes. You can control the Velvia intensity with the Level setting.
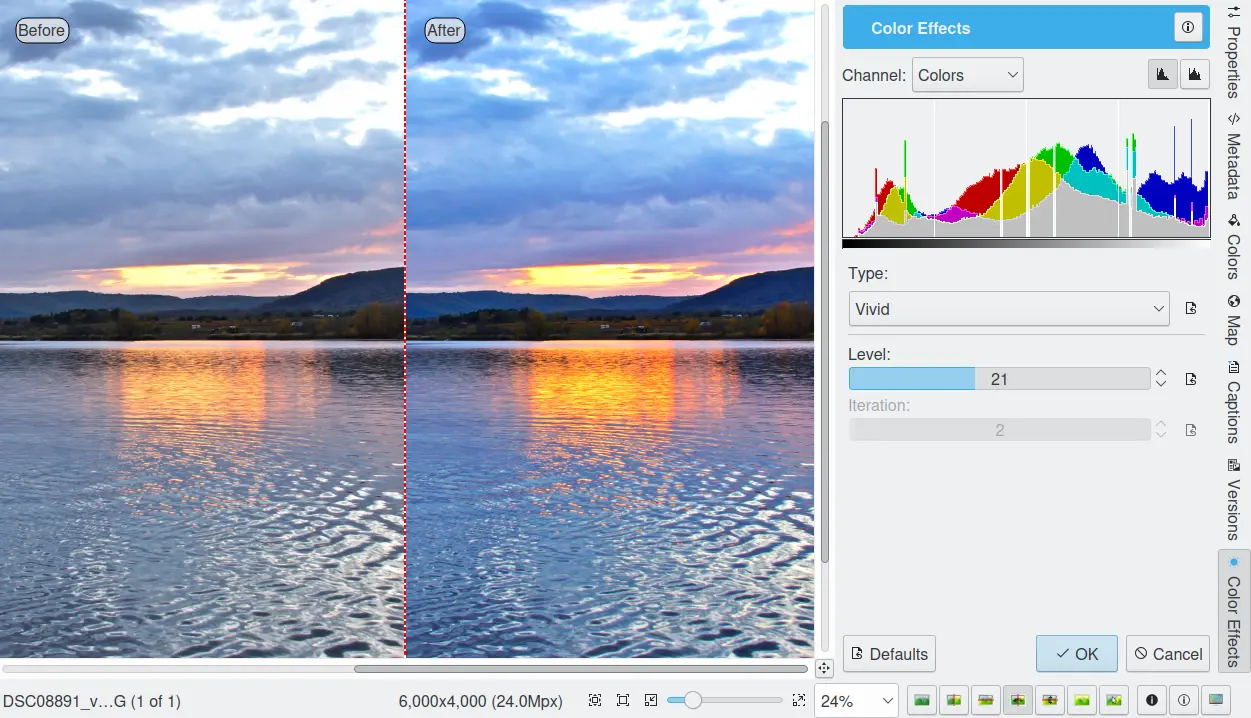
The digiKam Image Editor Vivid Tool
The Neon Filter
The neon filter simulates neon light along the contrast edges. The Level parameter controls the lightness of the result, whereas the Iteration slider determines the thickness of the neon light. With big images, the filter might keep your CPU busy for a moment or two.
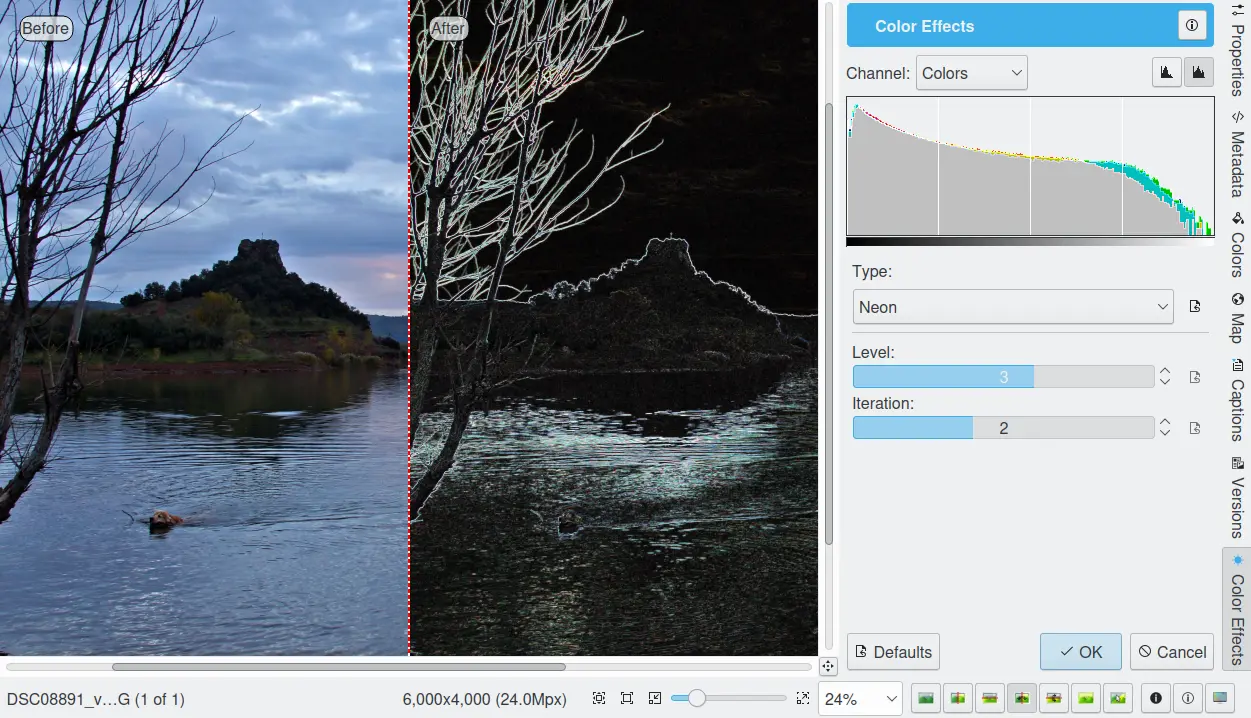
The digiKam Image Editor Neon Tool
The Find Edges Filter
The find edges filter detects the location and gradients of edges in a photograph. A low value for the Level parameter results in a light, low-contrast image with thin edges. A high value results in thick edges with high contrast and more colors in dark areas. Iteration allows you to increase or decrease the density of edges in the image.
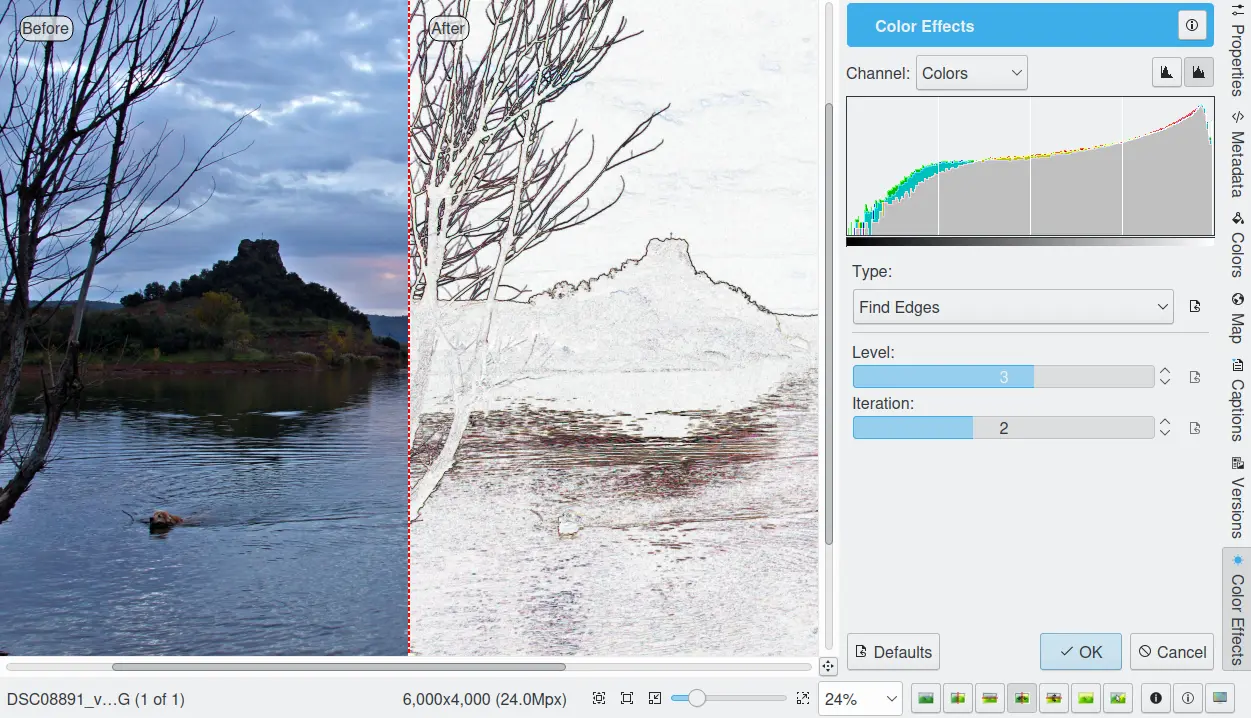
The digiKam Image Editor Find Edges Tool
The Lut3D Effect
The Lut3D filter colors images by applying a transformation based on a 3D lookup table.
In the film industry, 3D lookup tables are used to map one color space to another. They are commonly used to calculate preview colors for a monitor or digital projector to show how an image will be reproduced on another display device, typically the final digitally projected image or release print of a movie. A 3D LUT is a 3D lattice of output RGB color values that can be indexed by sets of input RGB color values. Each axis of the lattice represents one of the three input color components, so the input color defines a point inside the lattice. Since the point may not be on a lattice point, the lattice values must be interpolated; most products use trilinear interpolation.
The tool provides a list of 3D lookup tables to apply to the image. The Intensity setting is used to adjust the percentage of the effect that is applied to the image.
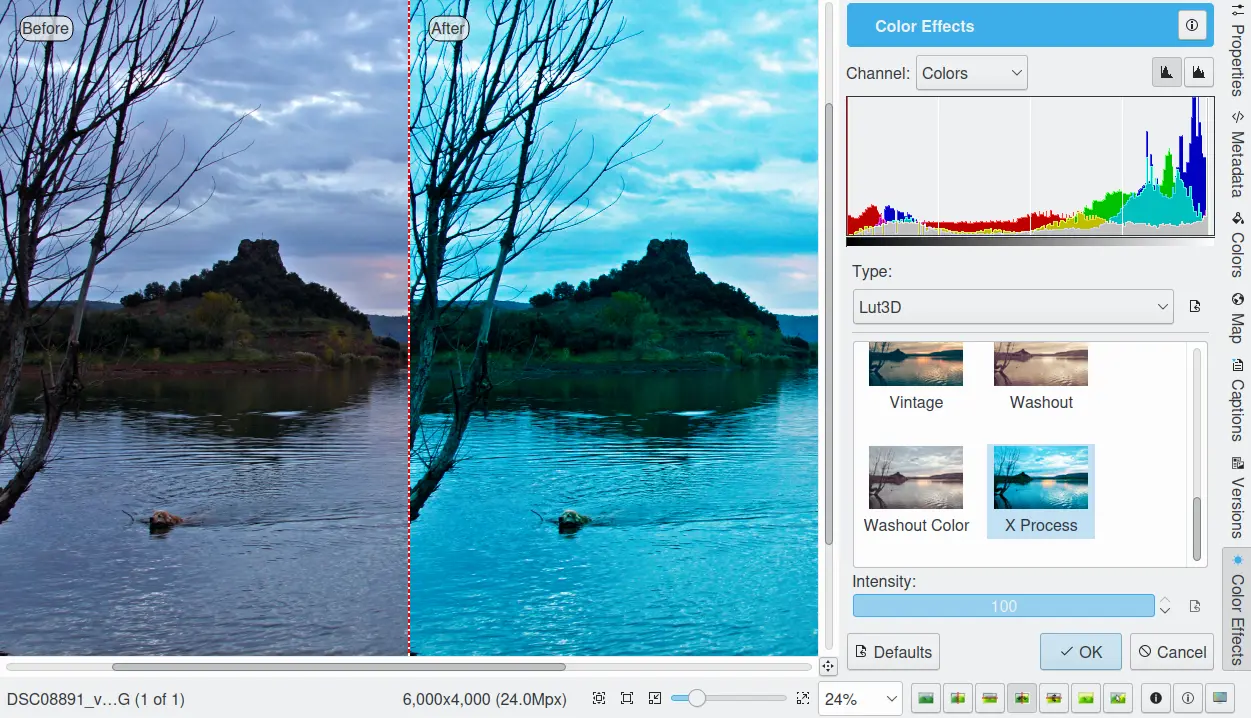
The digiKam Image Editor Lut3D Tool
Distortion Effects
The digiKam Distortion Effects tool provides a series of geometric distorting effects for digital still images. This would be a very bad tool to use for correct lens distortions.
With this filter set, you can transform an ordinary photograph into a work of art suitable for framing.
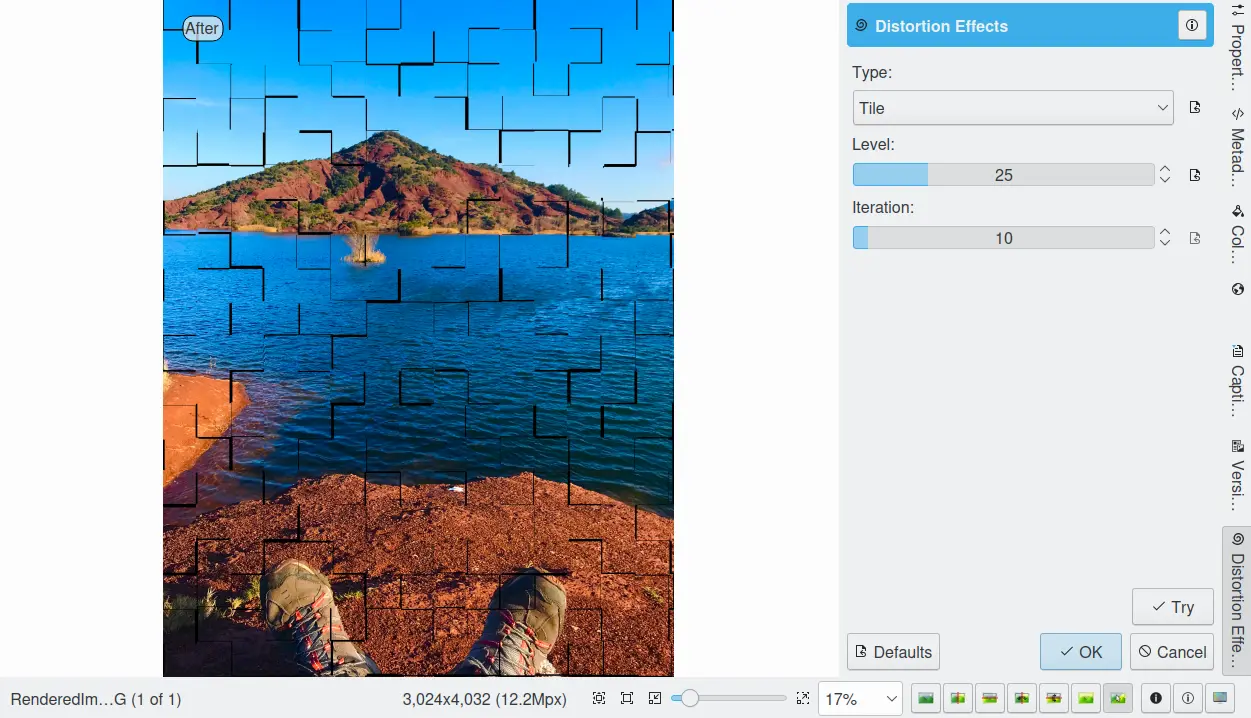
The digiKam Image Editor Distortion FX Tool
The distorting effects provided by this tool include:
Fish Eyes: warps the photograph around a 3D spherical shape to reproduce the common photograph ‘Fish Eyes’ effect.
Twirl: spins the photograph to produce a Twirl pattern.
Cylinder Horizontal: warps the photograph around a horizontal cylinder.
Cylinder Vertical: warps the photograph around a vertical cylinder.
Cylinder H/V: warps the photograph around 2 cylinders, one vertical and one horizontal.
Caricature: distorts photograph with an inverted ‘Fish Eyes’ effect.
Multiple Corners: splits the photograph like a multiple corners pattern.
Waves Horizontal: distorts the photograph with horizontal waves.
Waves Vertical: distorts the photograph with vertical waves.
Block Waves 1: divides the image into cells and makes it look as if it is being viewed through glass blocks.
Block Waves 2: like Block Waves 1 but with another version of glass blocks distortion.
Circular Waves 1: distorts the photograph with circular waves.
Circular Waves 2: other variation of the Circular Waves effect.
Polar Coordinates: converts the photograph from rectangular to polar coordinates.
Unpolar Coordinates: Polar Coordinate effect inverted.
Tiles: splits the photograph into square blocks and moves them randomly inside the image.
Warning
Some effects can take a long time to run and cause high CPU loading. You can always abort an effect by pressing Abort button during preview rendering.
Emboss
The digiKam Emboss filter sculptures your image into 3-D as if it was stamped into wax.
The digiKam Emboss filter is a quick tool to render your images in a 3-D effect. It works particularly well on images with simple structure where color is not the most important content. The filter uses the difference between colors and luminosity to convert it into a grey, moon-like landscape lit from the 10 o’clock position.
The Depth control allows you to define the contrast of the filtering. A value of 30 (10%) is standard.
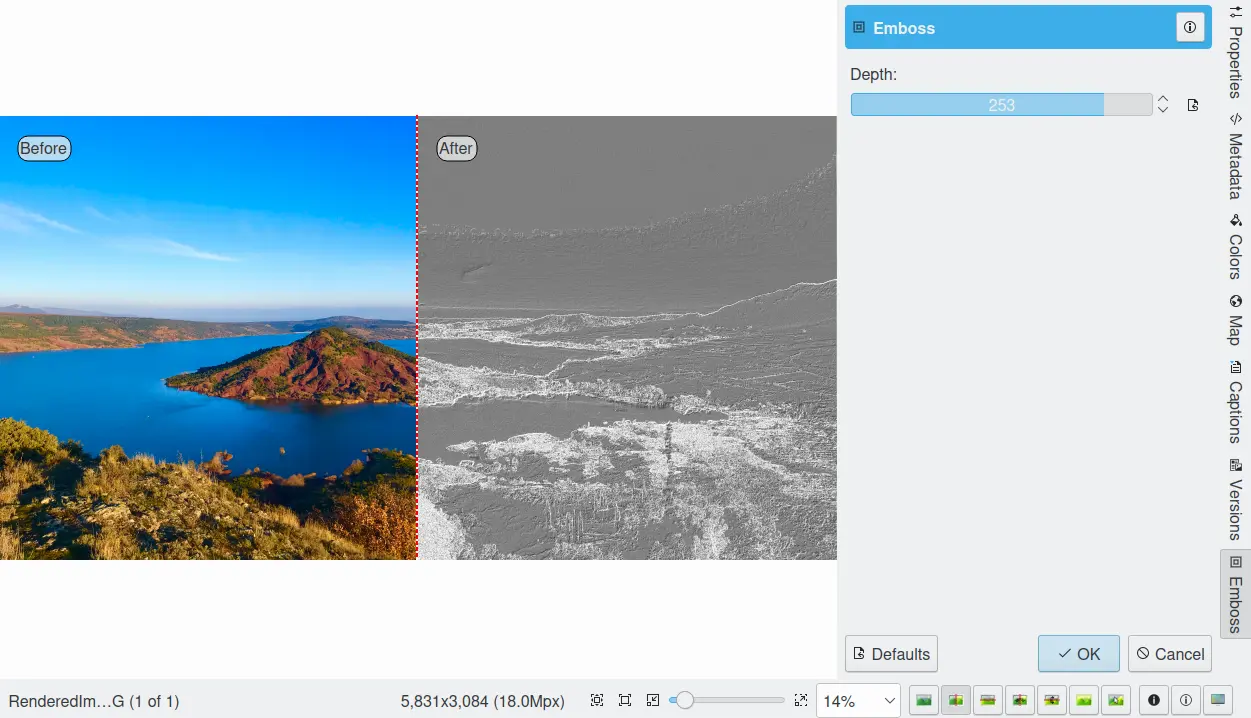
The digiKam Image Editor Emboss Tool
Add Film Grain
The digiKam Add Film Grain filter reproduces the traditional film grain associated with high speed films.
This filter adds film grain to your images as if they were taken with classical high speed film material such as the famous B/W KodaK Tri-X. In order to increase film sensitivity, manufacturers employed larger silver grains in the photo emulsion.
The film grain effect can give your shot a particular mood, transporting it backwards in time. The treated image acquires a timeless atmosphere, detached from every day life. If you want that gritty, art-house, street-photography grainy film look, especially in monochromatic photos, use this filter.
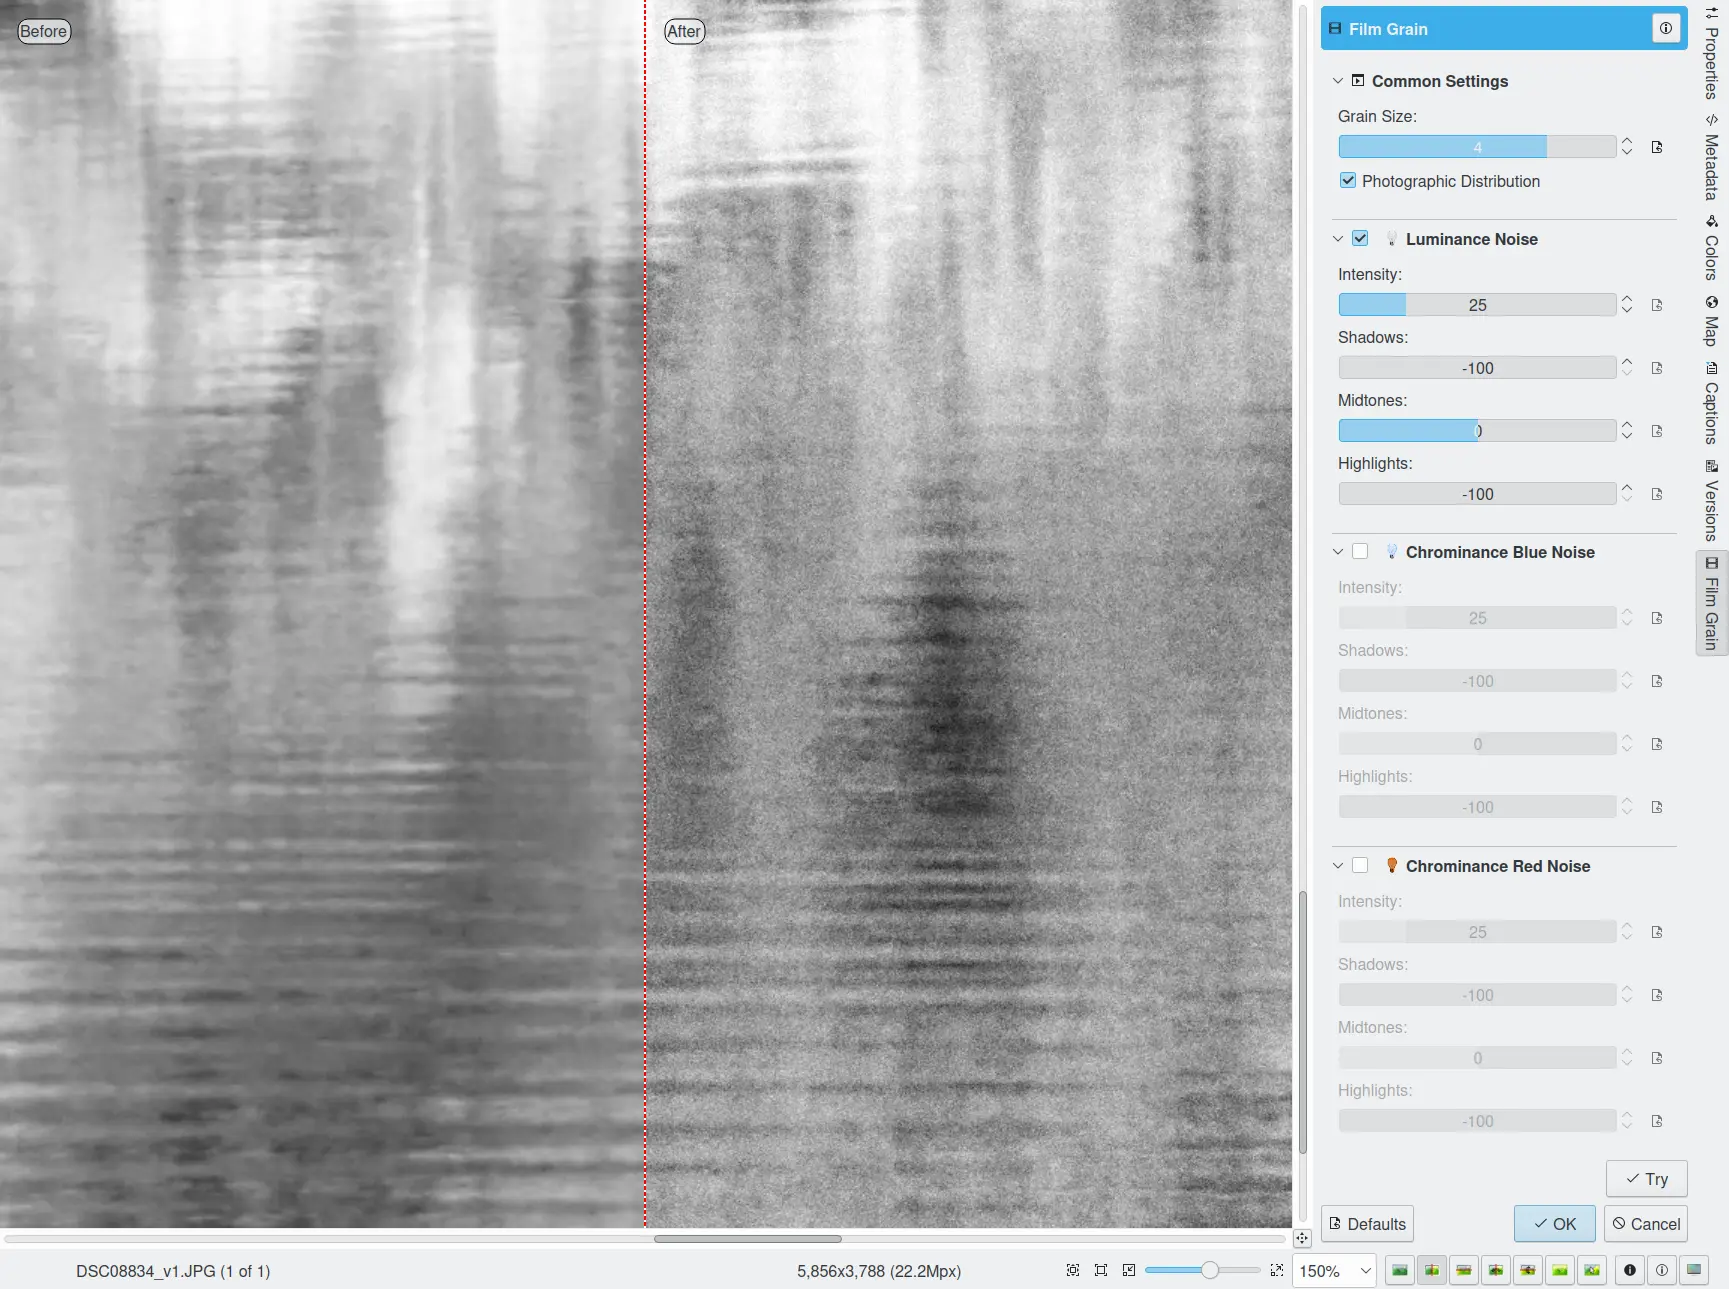
The digiKam Image Editor Film Grain Tool
A common slider controls the Grain size, and you can turn on the granularity simulating a photographic distribution. Separate Luminance, Chrominance Blue, and Chrominance Red channels allow you to adjust the grain Intensity with differing effects on Shadows, Middletones, and Highlight.
Note
If you process a black and white image, the grain needs to be applied only on the Luminance channel.
Oil Paint
The digiKam Oil Paint filter gives your image the look of an oil painting.
This filter gives your digital images a nice oil painting-like look. Images of nature and still lives are well suited for this effect.
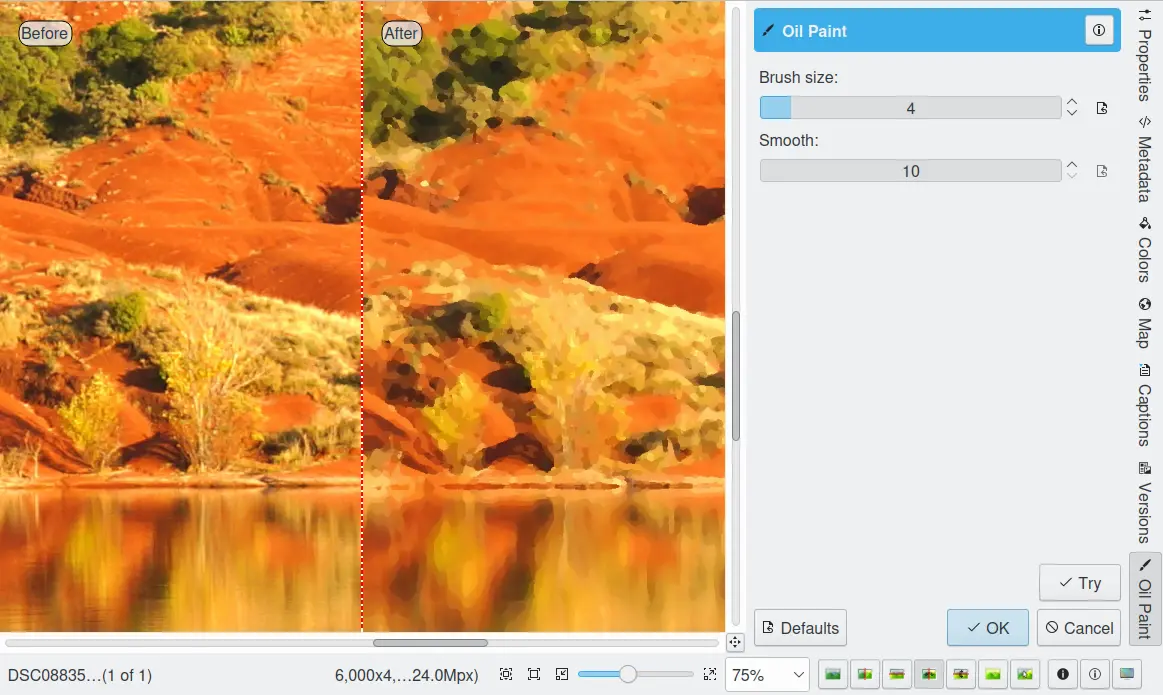
The digiKam Image Editor Oil Paint Tool
There are two sliders to control the effect. The upper slider selects the Brush Size between 1 and 5. Bigger brushes are better suited for large images. Smooth controls the smoothness or jaggedness of the effect.
Raindrops
The digiKam Raindrops filter puts beautiful raindrops on your image. Naturally, it gives your image a kind of wet look. It can also be used in combination with the Oil Paint tool to make your photos look like a Donald Roller Wilson painting.
Three sliders give you control over the effect filter: Drop size obviously allows you to change the size of the drops. The drop size doesn’t automatically scale with the image size, so it is often necessary to reduce the size for small images. Number changes the number and density of drops. and Fish eye changes the optical effect of the drops across the image.
Note
You can keep a zone clear of raindrops with the digiKam Image Editor Select tool. Selecting the area to avoid (for example a face) before launching the Raindrops filter will keep it free from rain drops.
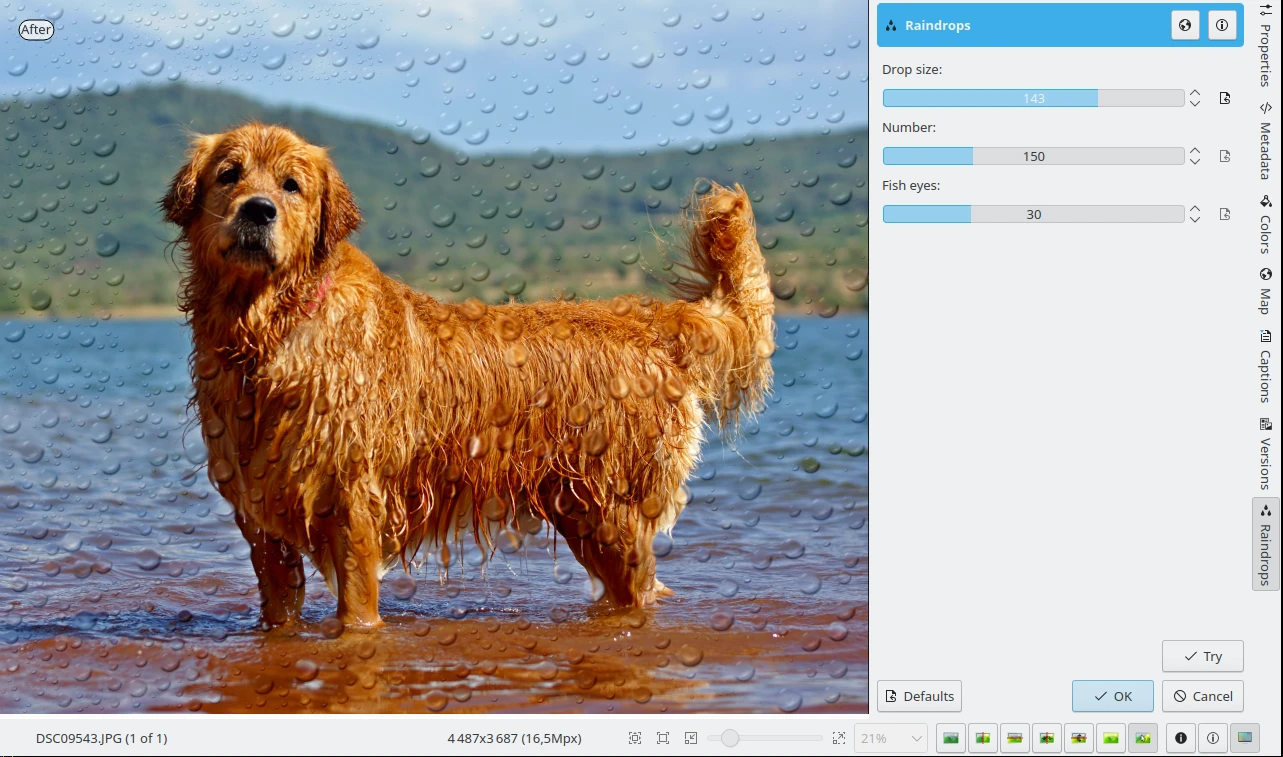
Rain Drops Tool Applying Effect to Whole Image Excepted on Dog’s Face