Import From Scanner
This tool can scan images using a flatbed scanner. It uses an interface for the SANE Library to control the scanner. It can save scanned images into all of the main image formats that digiKam supports.
Note
You can check the status of your scanner support from the SANE project website by using this manufacturers list.
If the selected scanner cannot be opened, or if no default scanner is provided, a scanner selection dialog is displayed. Select the scanner to be used and press OK to open the scanner. Pressing Cancel will exit the tool.
In the case where no device is found, check that the scanner is plugged in or switched on. The Reload device list can be used to reload the list of scanners.
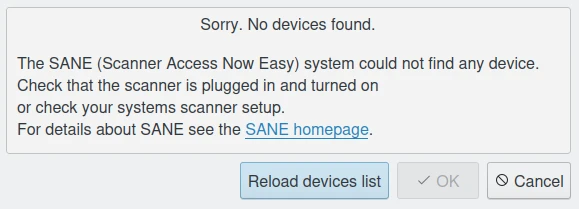
The Scanner Import Error Dialog
Note
Not all drivers or backends support the Reload feature. In this case, quit the tool, connect your scanner and restart digiKam.
The main window presents the user with three sets of scan options: Basic, Advanced, and Scanner Specific. The Basic Options tab contains the most common parameters that the SANE scanner backends provide.
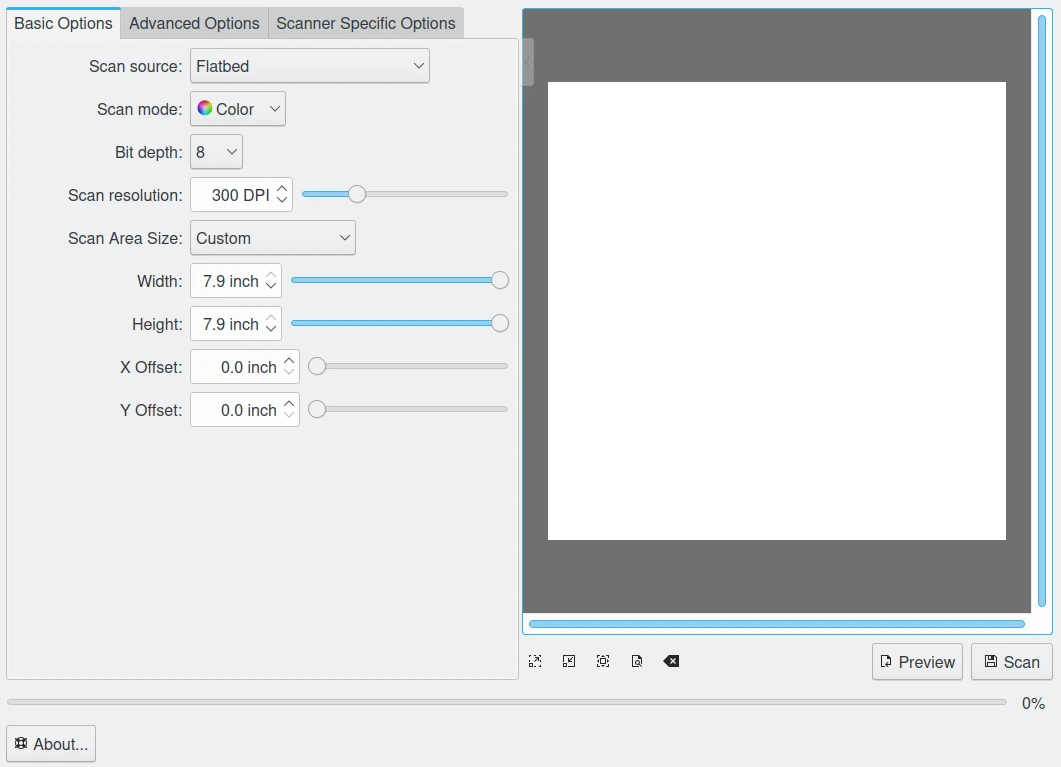
The Basic Options View from Scanner Import Dialog
The Advanced Options tab contains the analog gamma tables, along with some less common options.
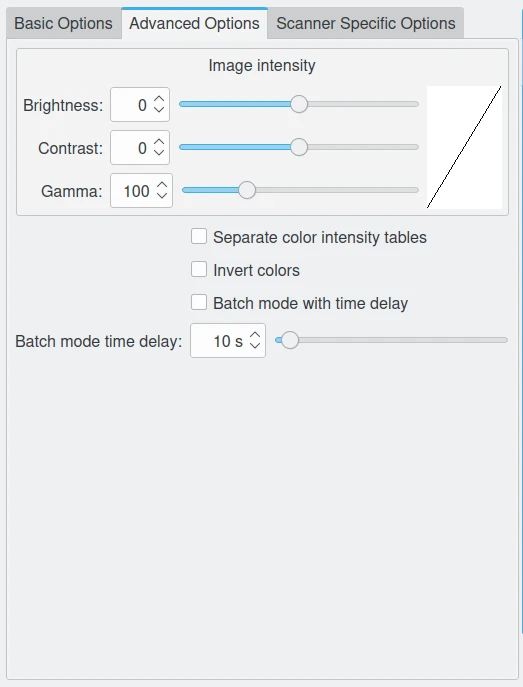
The Advanced Options View from Scanner Import Dialog
The Scanner Specific Options tab contains all of the scanner specific options. The options listed here depend on the SANE parameters supported by your driver. The scanner import dialog should be able to display most of the parameter types that SANE provides.
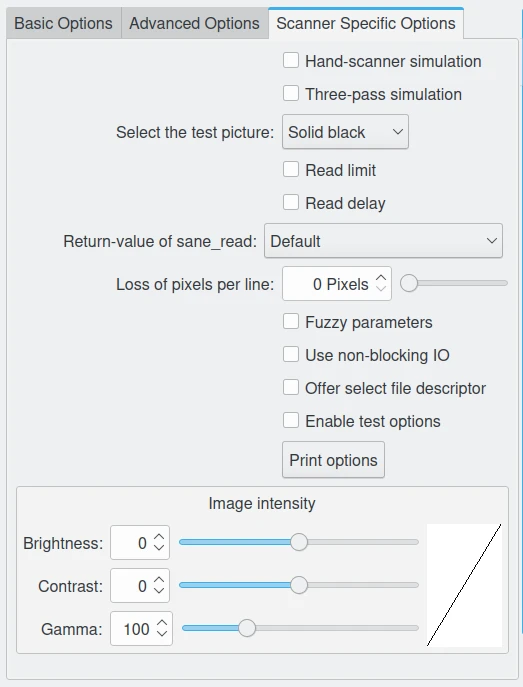
The Specific Options View from Scanner Import Dialog
The settings area in the Scanner Import Dialog can be collapsed or expanded by clicking on the little arrow on top of the options splitter. The collapser can overlap the preview area, but fades away when the mouse cursor moves out of the collapser.
Click on the Scan button to scan the entire image.
The Digital Preview from Scanner Import Dialog
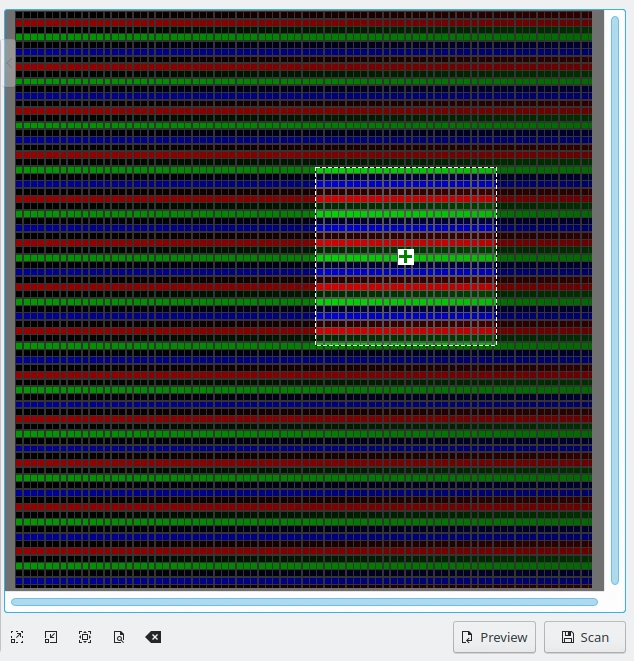
To scan a selected portion of an image, first click the Preview button to perform a quick preview scan. Then select the part of the scan area to perform the final scan, before clicking the Scan button. The progress of the scan will be displayed.
Sometimes you need only specific parts of an image. Instead of scanning the whole picture and then using the Image Editor to save different parts of the image into separate files, you can use the multiple selection feature of the tool.
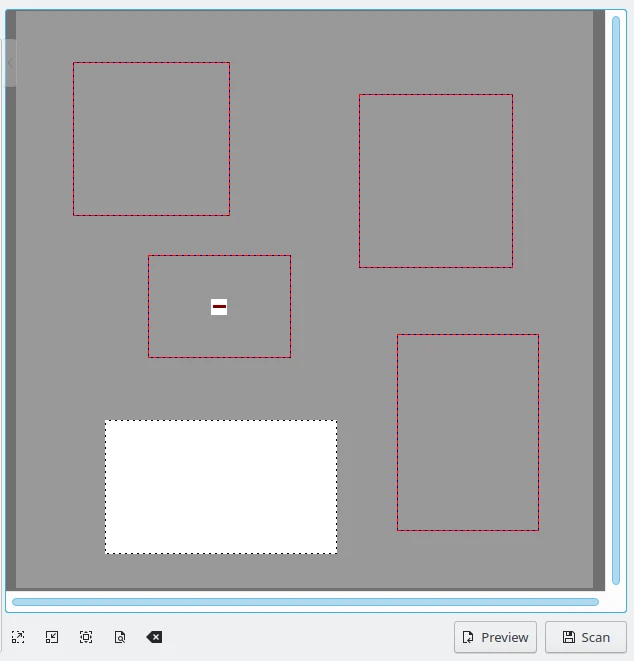
The Multiple Selection over Preview from Scanner Import Dialog
Scan a preview and then use the left mouse button to select the first part of the image from the preview. Hover over the selected area with the mouse cursor and click on the Green Plus button to select the area. Selected areas are indicated by a red border. Now select the next parts of the image in the same way.
To remove a single selection, hover over the area with the mouse cursor and click on the Red Minus button. All selections in the preview can be removed by selecting the Clear Selections item from the context menu displayed by clicking the right mouse button.
If you place two separate images or photos on your scanner and run a preview scan, the tool will automatically preselect the different areas.
Once satisfied with the selected areas, start the final batch scan to scan all the selections. The selected parts of the image are scanned and saved separately into different files.