Import From Camera
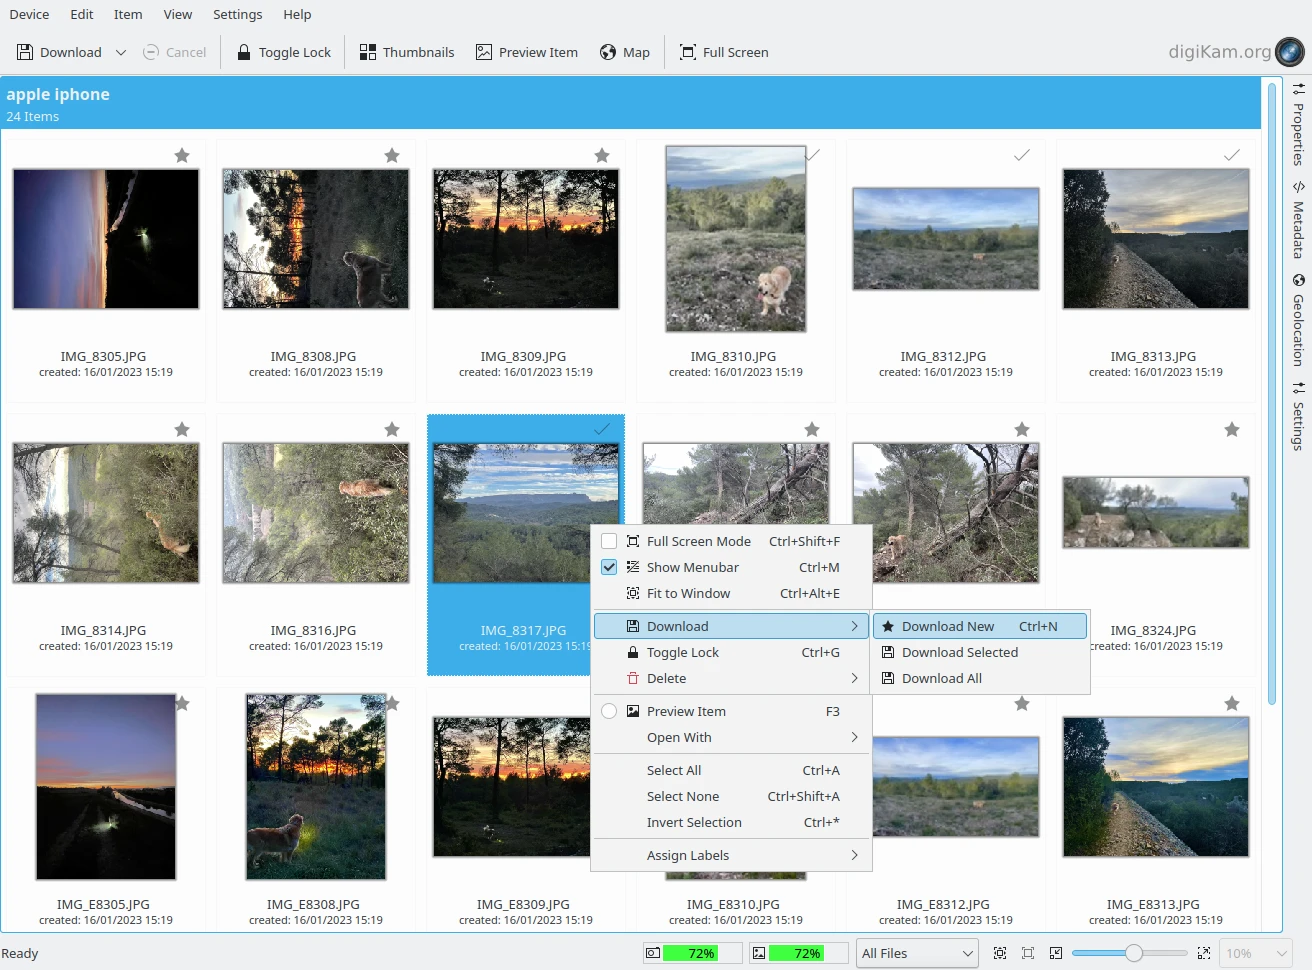
The digiKam Import Tool Main Interface
Getting Information About the Photographs
Before downloading photographs to your computer, you can view information about the photographs stored on the camera from the Properties and Metadata tabs on the Right Sidebar.
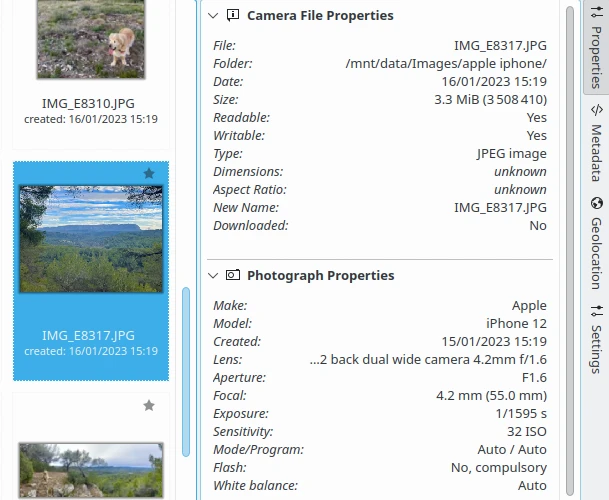
The Item Properties Sidebar Tab from Import Tool
The Properties tab displays file information recorded by the camera and a selection of photographic information describing how the image was taken. A flag indicates if the image has not yet been Downloaded to the computer. Note that this information may only be available with some digital cameras. Another label will show you the New Name of the file after it has been downloaded to the computer.
The Metadata tab displays the picture's Exif, Makernotes, and GPS metadata. This information is the same as Metadata from the digiKam Right Sidebar. Note that all these metadata may be unavailable for some digital cameras.
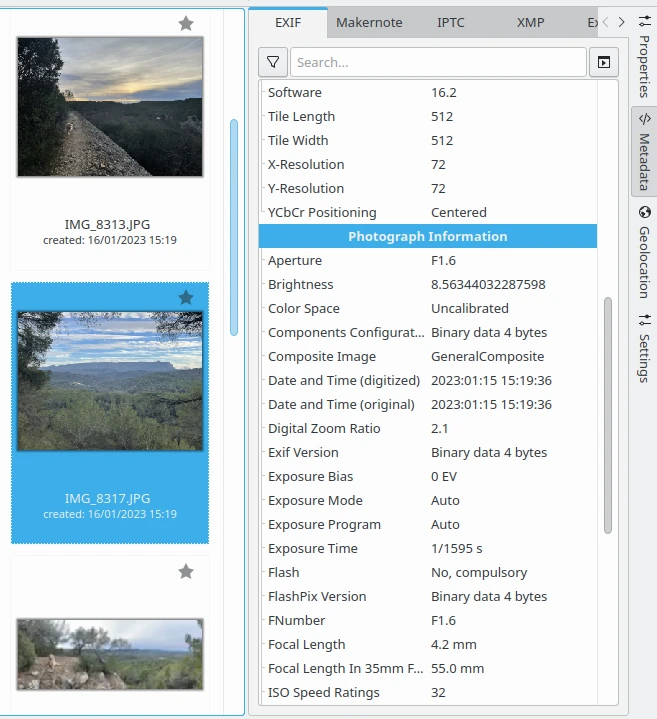
The Item Metadata Sidebar Tab from Import Tool
Geolocation Tab
The Geolocation tab opens a map that allows you to view and edit the GPS location of the selected photographs. For a detailed description, see the Geolocation section of the Right Sidebar chapter of this manual.

The Item Geolocation Sidebar Tab from Import Tool
Downloading Photographs To Your Computer
To download photographs from your camera to your computer, click the Download button on the main toolbar and then click Download All (or select from the main menu). This will download all of the photographs on the camera with the settings you used with your last download (Settings tab). The download process will not remove the photographs from the camera. Be sure to check that the photographs have downloaded safely into the specified Album before deleting them from the camera.
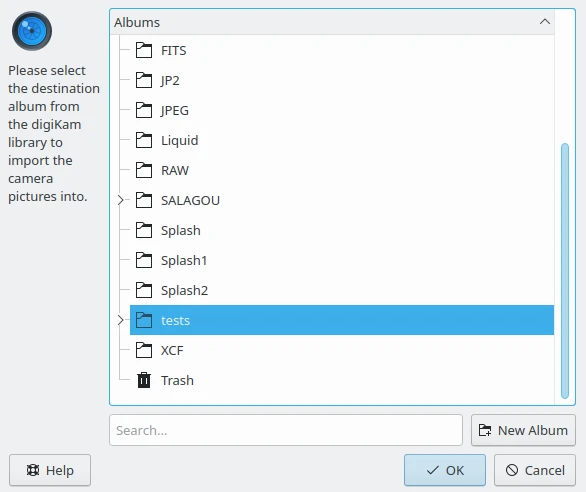
The Selection of Target Album to Download New Items from Camera
You can also download selected photographs. Select one or more photographs for download using the standard selection methods. Then click Download and Download Selected. Note the Download Selected button will be grayed out until you have selected some photographs.
Another option is Download New to only download new images. All new images are marked with a star in the upper right corner of the image icon. Once images are downloaded, a downloaded already entry will be made in the digiKam database and they are marked with a check.
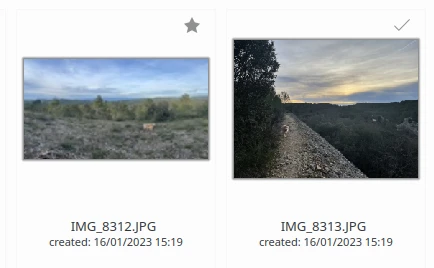
Left: Items not yet Downloaded from the Camera have a Star in the Top Right Corner. Right: Item that have been Already Downloaded from the Camera have a Check Mark in the Top Right Corner.
The status bar will indicate progress while downloading items to your computer.
Astuce
To download quickly from your camera, you can setup a common target album from your collection where all new files will be automatically stored.
Import Tool has a few options in the case that the files to be downloaded already exist on your computer. See this section of the manual for details.
Uploading Photographs To Your Camera
To upload photographs from your computer to your camera select Ctrl+U in the Import Tool menu. A standard file selection dialog will appear to select the files from your computer for copying to your camera. You can select more than one file using the standard selection methods.
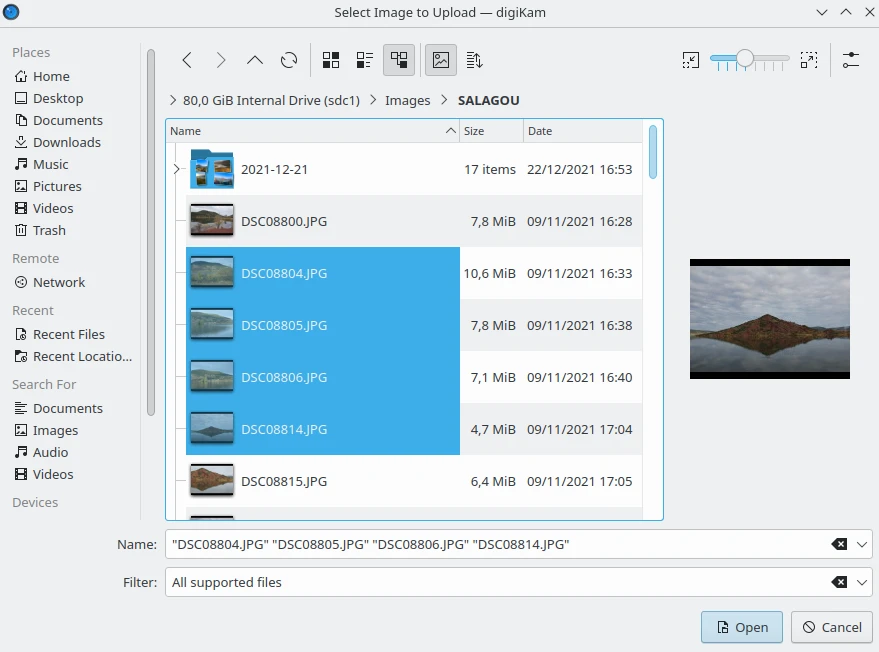
The Selection of Items to Upload to the Camera
When image selection is done, digiKam will ask you where you want to upload the files on your camera. A camera folder selection dialog will appear. Just select one folder and press OK to start uploading. No images will be removed from your computer.
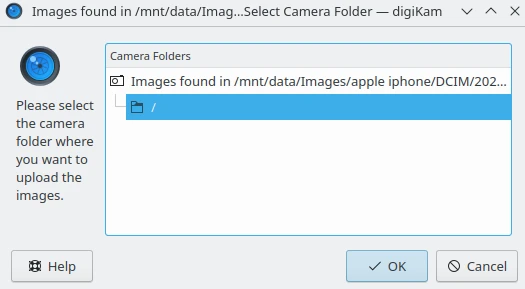
The Selection of Camera Folder to Upload Items
Note
The uploading feature is not supported for all cameras.
The status bar will indicate progress while uploading items to your camera.
Deleting Photographs From The Camera
Once you have verified that your downloaded photographs are on your computer, you are ready to delete the photographs from your Camera. You can delete all of the photographs on your camera at once by selecting . If you just want to delete a selection of the photographs, you have to select those that you want to delete and select . You may also select , for example if you feel that the images that have not been downloaded are not worth keeping.
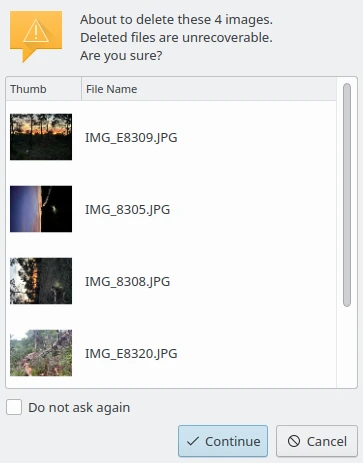
The Warning Dialog When Items Must be Deleted from Camera
Prudence
Please note that there is no way to restore a photo that you have deleted from the camera. The photographs are not moved to the internal Trash Can, they are removed completely. It is best to double check that you have successfully downloaded a photograph into a digiKam album before you delete it from the camera. Also note that it is likely much faster to erase a memory card using the camera's built-in menu.