DNG Converter
digiKam comes with a nifty batch utility that allows you to convert RAW files to the DNG format. The question is, of course, why you would want to do that. After all, digiKam can handle RAW files without any problem, so what’s the point of adding one more step to your photographic workflow?
As you might know, RAW is not a file format, but rather an umbrella term that describes multiple file formats controlled by multiple hardware manufacturers. The RAW formats themselves are specific to digital camera manufacturers. For example, Canon cameras store RAW files in the CR3 format, while Nikon cameras use the NEF format. Besides being proprietary, RAW formats are often poorly documented and encumbered by patents.
The Digital Negative (DNG) format introduced by Adobe Systems, Inc in 2004 is designed to overcome these shortcomings by providing an open, well-documented universal format based on TIFF-EP standard for storing RAW files. If you would like to know more about the DNG format, see the Digital Asset Management section from this manual. The DNG articles and links Web site also provides a wealth of valuable information on the topic.
Being an open and well-documented format, DNG is particularly well suited for long-term archiving of digital photos. Of course, the CR3 and NEF and other RAW formats are widely adopted and supported, so they are not going away anytime soon. But there is no reason why you shouldn’t save your RAW files in the DNG format to be on the safe side. After all, storage is cheap nowadays, and the Batch Queue Manager DNG Converter utility makes it extremely easy to convert RAW files to the DNG format.
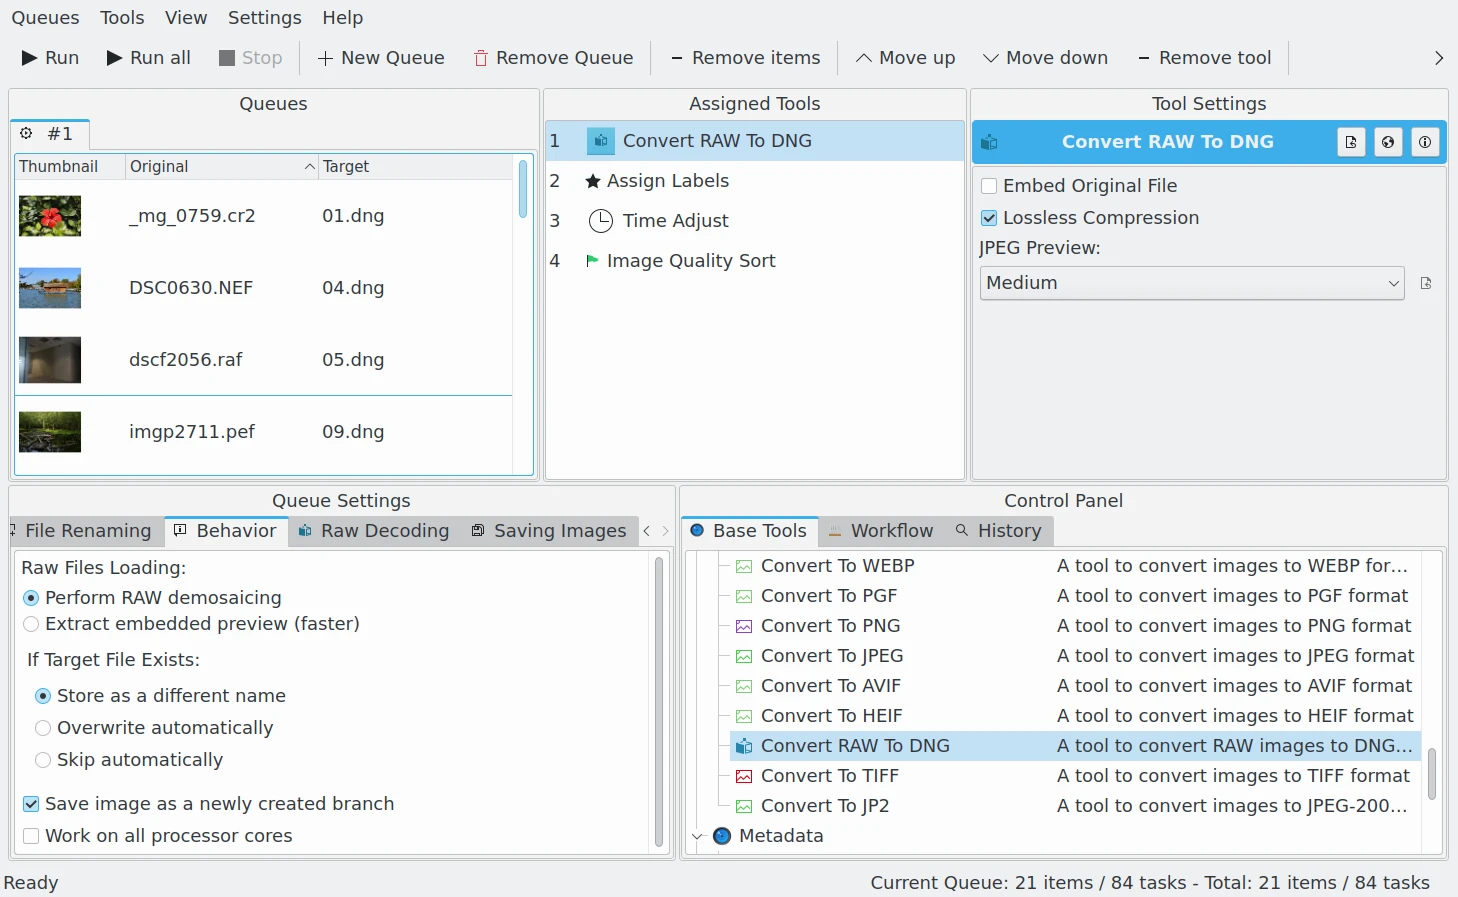
The Batch Queue Manager With a Workflow to Convert RAW files to DNG Container by Applying Metadata Adjustments
Note
Unlike the RAW Converter tool which decodes RAW data to an RGB color space, DNG stores the RAW data in an open-standard container. DNG is another RAW format, but it is not proprietary. So you cannot apply Batch Queue Manager filters to DNG images without first converting them to another format such as JPEG, PNG or TIFF. However, the metadata can be post-processed after DNG conversion, as this will maintain the integrity of the RAW image data stored in the container.
Using the Batch Queue Manager DNG Converter is easy. Place the tool on the top of workflow list (this point is mandatory), add the RAW files to the queue, specify a few options, and hit the Start button. For complete peace of mind, you might want to enable the option which embeds the source RAW data into the resulting DNG file.
Lossless Compression: enable a non-destructive compression method to encode image data. We recommend turning this option on to obtain the best quality, except if you need to minimize space disk.
JPEG Preview: with this option you can tune the quality of preview image stored in the container. This JPEG preview is used to quickly visualize the contents without decoding the RAW data. The available choices are None to not store a preview, Medium to store a half-sized preview, and Full Size to store a preview with same dimensions as the original RAW image.
Embed Original File: for complete peace of mind, you might want to enable this option which embeds the source RAW data into the resulting DNG file. Do not turn on this setting if you want to preserve space disk.
Important
To backup the original metadata from the RAW file to the DNG container, the famous ExifTool engine is used in the background. If ExifTool is not available on your system, the DNG Converter will show this message: Warning: ExifTool is not available to post-process metadata. In this case, not all metadata will be backported from the RAW file to DNG.
Note
The DNG conversion tool is also available in the Import Tool as a post-process converter while downloading RAW files from a camera. See this section from the manual for details.