RAW Converter
With the Batch Queue Manager, you can import and convert your images stored in RAW format to a demosaiced target formats such as (JPEG, TIFF, or PNG).
There are some things to be considered before you process, or even shoot in RAW format. Uncompressed RAW image file formats store all of the information obtained by the camera for each image. There are also some compressed RAW formats that store the same information after application of reversible, lossless compression algorithms. Many photographers prefer to take pictures in RAW mode because digital image post-processing can often produce better quality images than the camera’s built-in conversion algorithms.
The RAW files include data from each physical pixel in the camera’s focal plane. For most digital cameras this means recording four color channels for each color pixel in the final image: one red, one blue, and two green channels. Often these channels are recorded to a bit depth greater than the 8 bits used in most common image formats. In addition, the white balance of the digital camera is stored in a RAW image, so it can be applied to the image in post-processing. Demosaicing is the step taken to convert this raw 4-channel data to the standard 3-channel RGB representation used in standard image formats like JPEG and TIFF. That is the job of the RAW Converter tool.
The RAW conversion in digiKam is based on Libraw, which supports many, but not all, RAW formats. Don’t expect to produce exactly the same images as software provided by the camera vendor, but sometimes libraw gives better results. See this section of this manual for details.
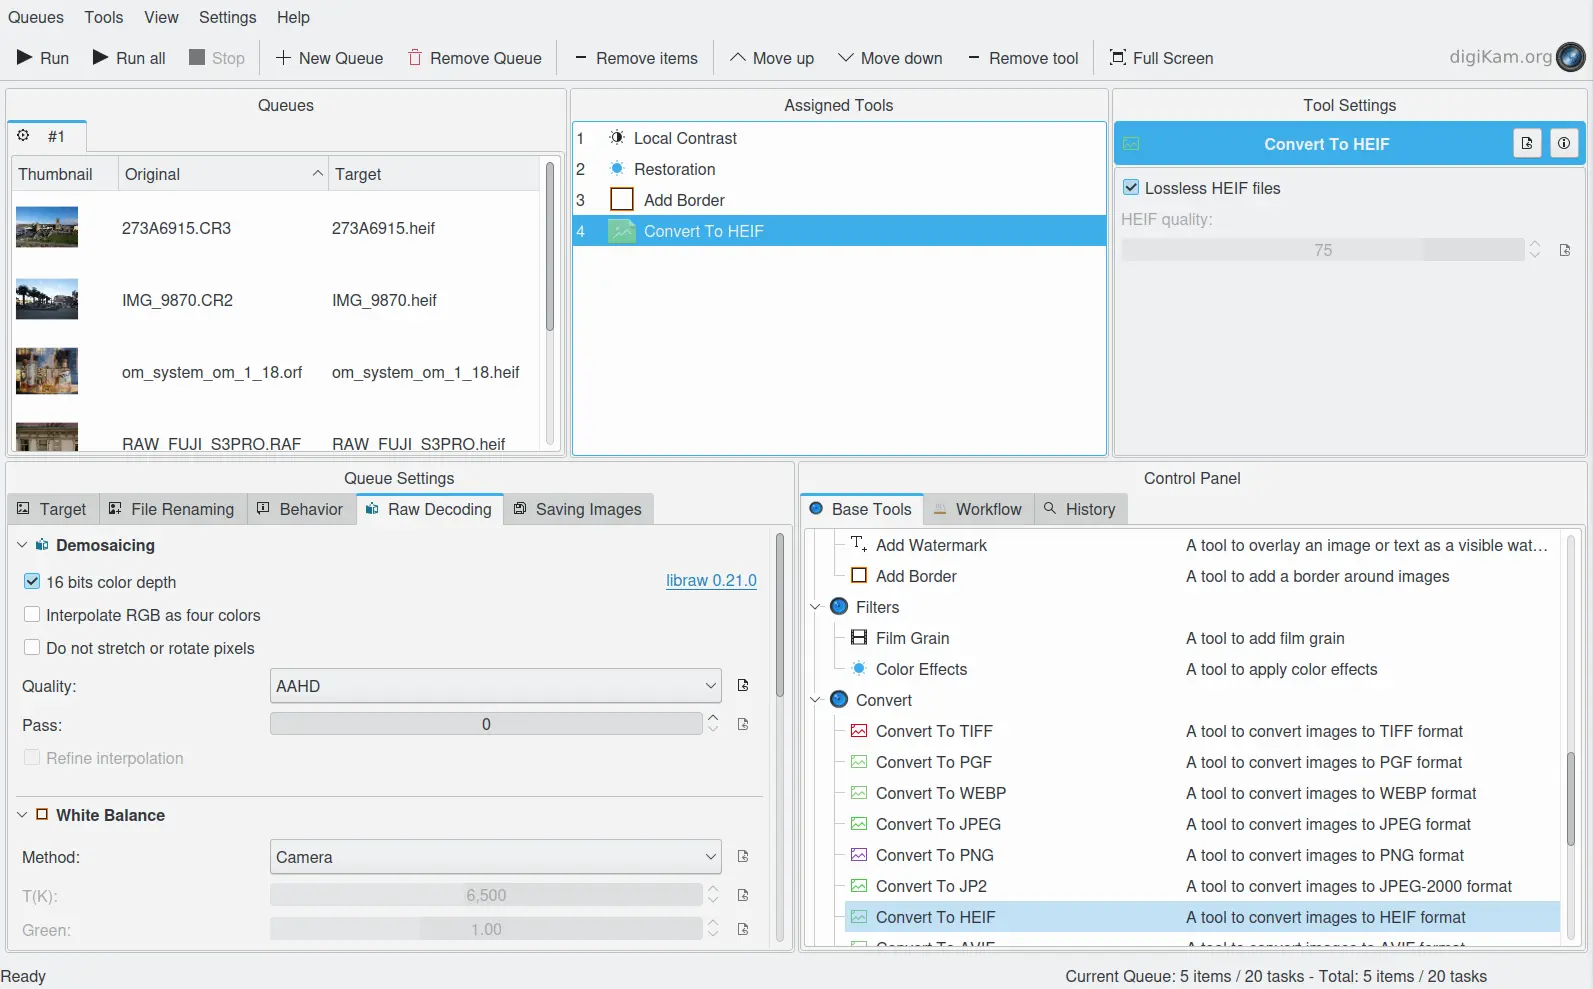
To use the RAW converter in the Batch Queue Manager, select the RAW files to convert and load them into a dedicate batch queue.
Next adjust the available check and value boxes to optimize the RAW conversion process in the Batch Queue Manager settings view. Settings are available to adjust demosaicing and white balance, apply noise reduction, or manage the color profile. If you find the results of a RAW conversion are not quite optimal, don’t worry, it is always possible to fine-tune the image later on. A detailed description of the RAW Decoding settings is provided in this section of this manual.
For RAW files, you must add a format conversion tool to the end of Assigned Tools list that specifies the output format used to save the results file. The file name will stay the same by default, only the extension changes. JPEG uses a lossy algorithm that often produces the smallest output file size. In contrast, the tagged image format (TIFF) preserves all image information using a lossless LZW compression.
Truco
Don’t use the JPEG format if you intend to perform a lot of editing on your images or if it is likely that you have to later reuse the images. The JPEG format allows only a limited number of operations before image quality visibly deteriorates. TIFF and PNG are better suited to maintain the quality of the original data.
Nota
If you choose JPEG, or TIFF, or PNG as the Save Format then the metadata included in the RAW file will be included in the target files as Exif information.
When you have finished setting up the queue, click the Process button to start the conversion. If you want to abort image conversion, press the Abort button.

The Batch Queue Manager with a Workflow to Convert RAW files to HEIF Container by Applying Filters