Interface Layout

区域和栏

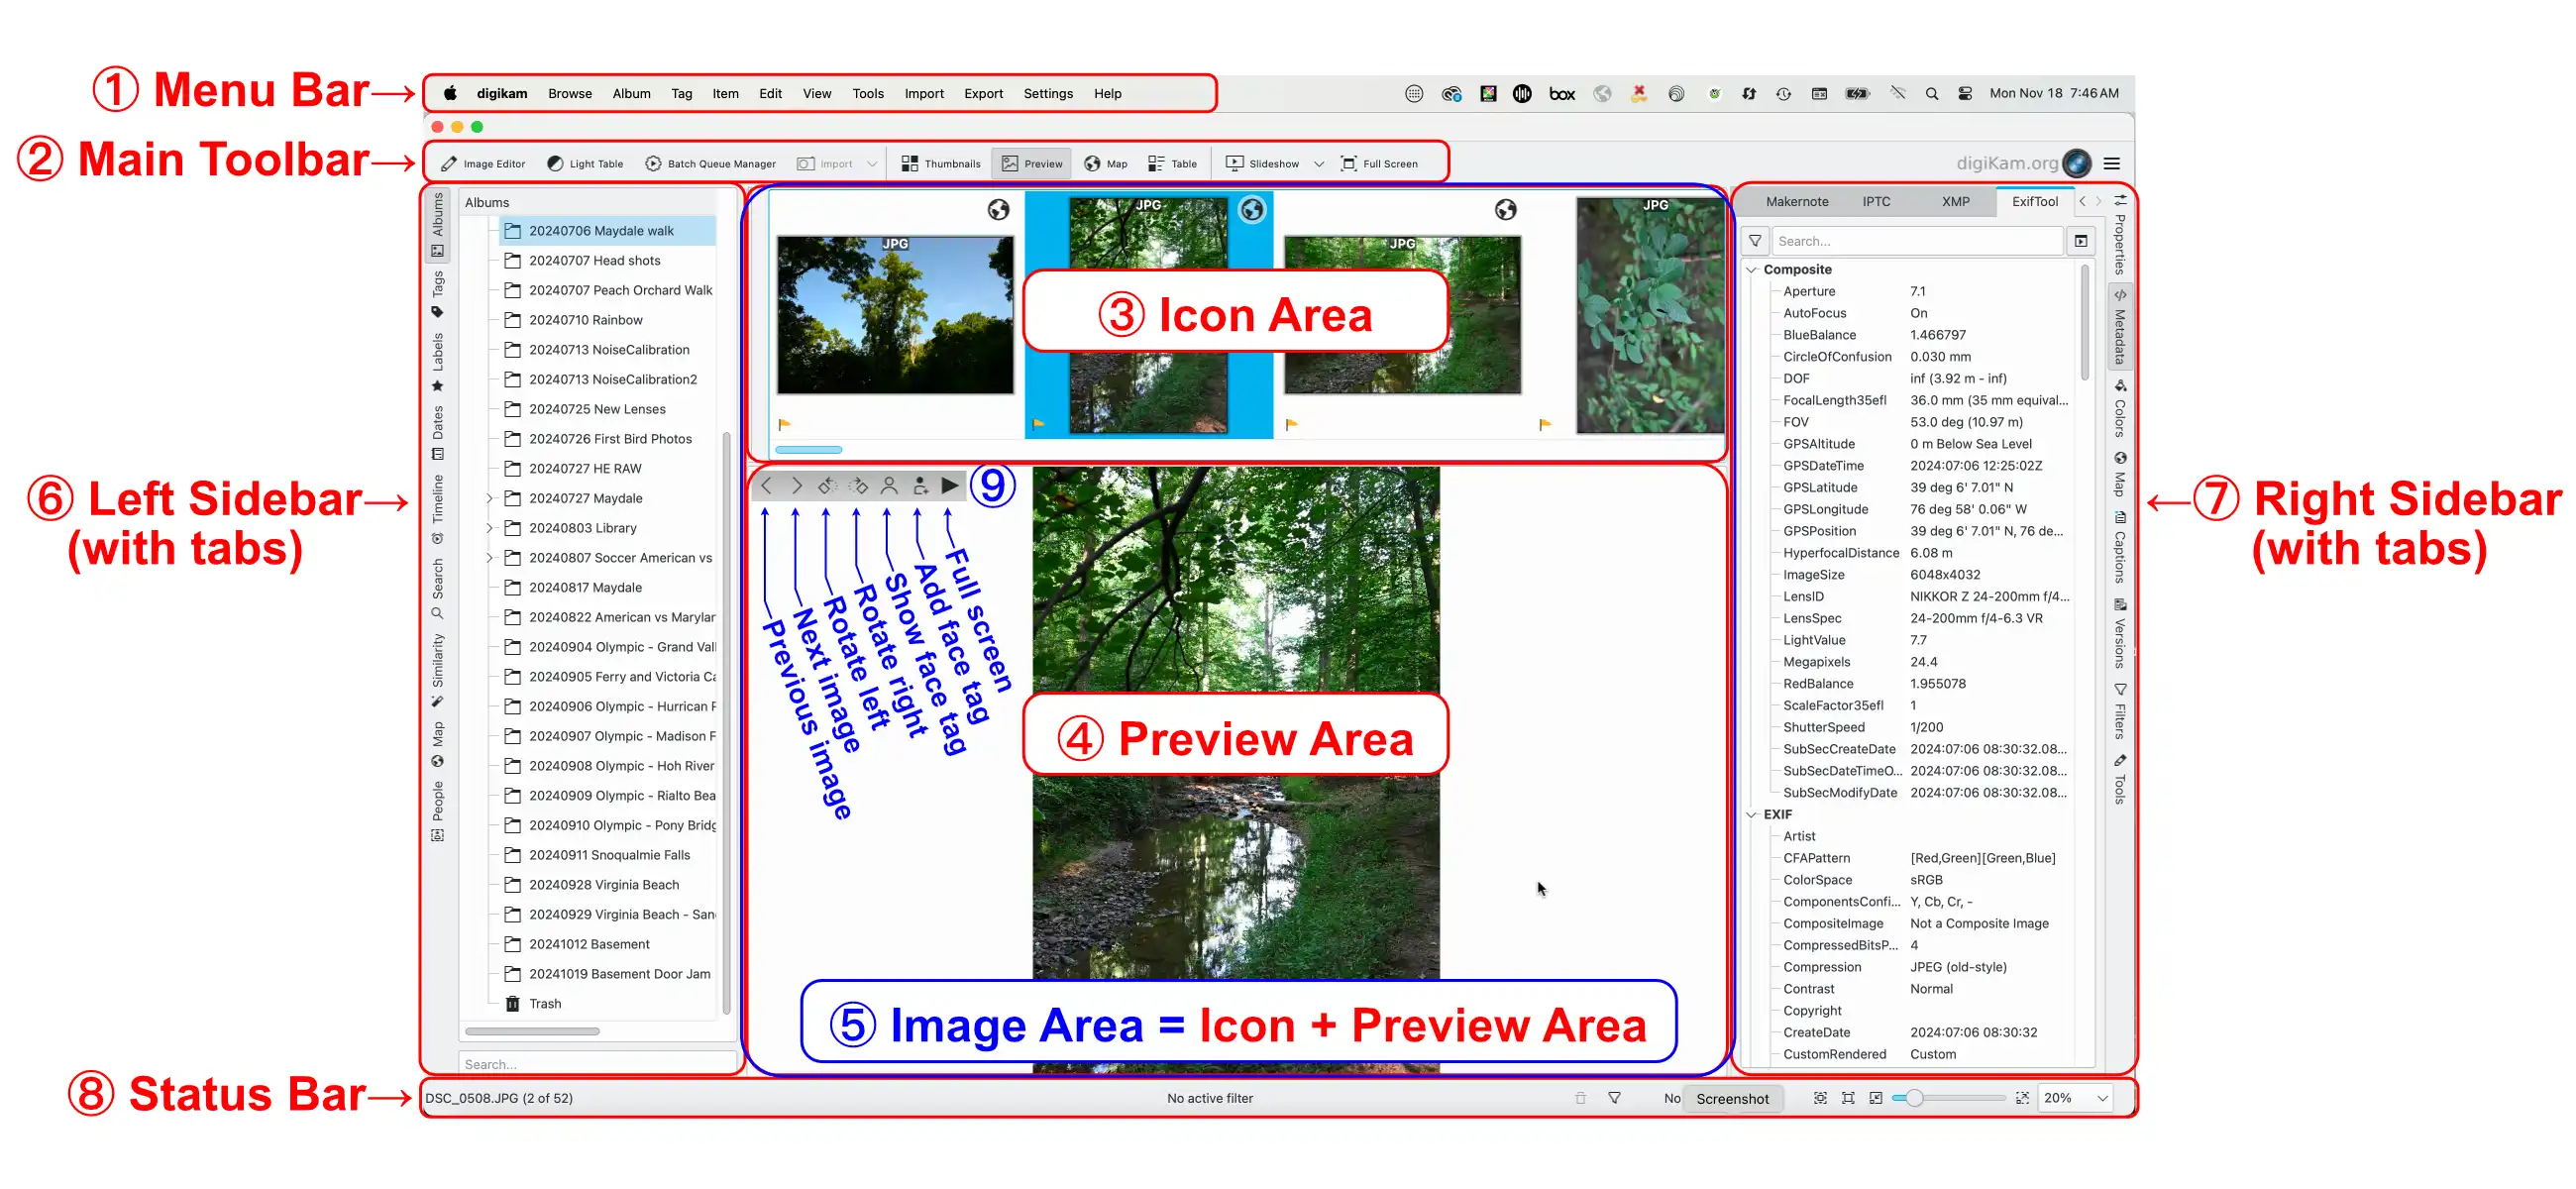
digiKam’s main window has two areas in the center showing your photographs. One is the Icon Area ③, showing thumbnails of the content of the selected album or of a search result, and the other one the Preview Area ④, showing the selected image. Together let’s call them the Image Area ⑤. In the top left corner of the preview we have a few buttons ⑨ for moving back and forth through the content of the album, for rotating the image, for showing or adding face tags and to switch to full screen mode. Clicking on the preview makes the preview disappear, and clicking on the picture area of a thumbnail makes the preview appear again.

The digiKam Main Window

Interface Areas, Toolbars and Buttons in the Main Window:

① Menu Bar
② Main Toolbar
③ Icon (Thumbnail) Area
④ Preview Area
⑤ Image Area = Icon + Preview Area
⑥ Left Sidebar (with tabs)
⑦ Right Sidebar (with tabs)
⑧ Status Bar
⑨ Buttons: Navigation, Rotation, Face Tags, Full Frame

The Image Area in the center is surrounded by the menu bar ① and the Main Toolbar ② at the top, the Status Bar ⑧ at the bottom, as well as the Left Sidebar ⑥ and Right Sidebar ⑦. The Left Sidebar lets you switch between nine “Views”: Albums (shown here), Tags, Labels, Dates, Timeline, Search, Similarity, Map and People. The Right Sidebar can be used to show information about your images, to apply filters to select images, and to select actions to be applied to selected images. You can use all these views to organize and find your photographs. You can collapse or expand the sidebar areas by clicking on the sidebar tabs.

Don’t worry if your main window looks different than the image above. You will soon learn how to switch the different areas on and off and at some point you might get a look very similar to the above screenshot.

Drag & Drop of images works about everywhere: Drag & Drop an image into another branch of the album tree, across the horizontal album separation line, or to another application window. The only restriction is that you cannot Drag & Drop into tag, date or searches.

状态栏

digiKam 主窗口的状态栏

底部的状态栏会显示:

  • 选择单个文件时的文件名。

  • 信息提示,告诉你有几个图片已选择。

  • 快速过滤器:

    • Information on how many filters are active.

    • 垃圾桶按钮,点击可以重置所有生效的筛选过滤设置。

    • 漏斗形状按钮,用于打开过滤器设置面板。

  • A progress bar for batch processes, such as assigning tags or rebuild fingerprints.

  • A thumbnail and preview image size slider with buttons for “Fit to Window” and “Zoom to 100%”.

  • A size selection pop up list measured in % for the preview image.

主工具栏

The Main Toolbar appears at the top of the window.

digiKam 主窗口工具栏

  1. Open Image Editor with the selected image

  2. 打开 看片台 L

  3. 打开 批处理管理器 B

  4. 导入 (有下拉菜单,显示已连接的相机和 USB 大容量存储设备)

  5. 切换到缩略图视图

  6. 进入预览模式,预览所选图像

  7. 切换到地图视图,可现实照片的地理信息数据

  8. 切换到详情视图,可自由设置

  9. 幻灯片下拉菜单

  10. 进入全屏模式 Ctrl+Shift+F

  11. 访问 digiKam 官方网站。也是显示正在进行的进程的进度条。

You can customize the Toolbar by choosing Settings ‣ Configure Toolbars… or click on the Toolbar with the right mouse button and choose Configure Toolbars… from the context menu.