Image Quality Sorting Settings
The Image Quality Sorter options for digiKam are set from . These settings refer to the Image Quality Sorter tool which you can access via . This tool uses a neural network that has been trained to assess the aesthetic quality of images and assigns a Pick Label value based on that assessment. By default the neural network-based sorting is enabled to simplify the workflow, but you can turn off this feature and use customized settings based on some basic factors.

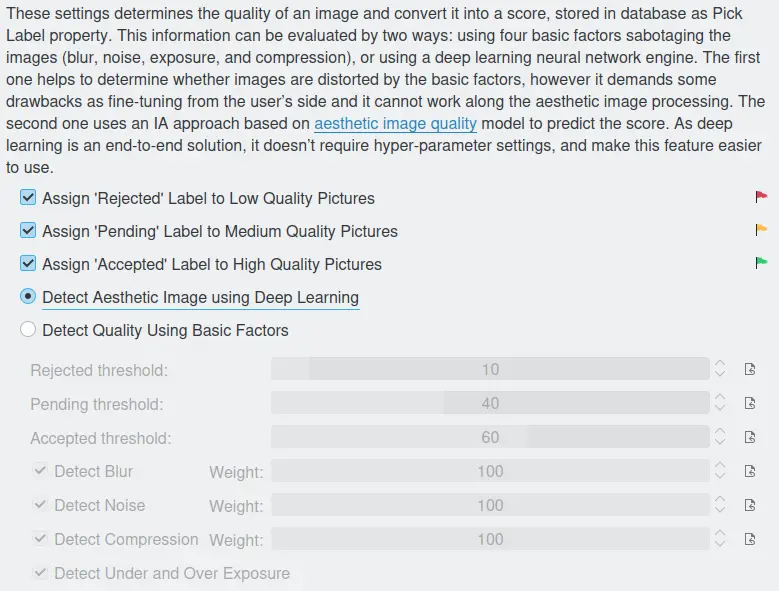
The digiKam Image Quality Sorter Settings Page
The first three options allow you to automatically assign rejected/pending/accepted flags based on the image quality assessment. Un-checking all three options renders the Image Quality Sorter functionally useless.
The Detect Aesthetic Image using Deep Learning option enables the automatic assessment of quality using the trained neural network. This is the simplest method and is the default option.
The Detect Quality Using Basic Factors is also an automatic process, but has far more controls to adjust. Enabling this option means the images are evaluated in terms of 1 to 4 quality factors, in order to produce a quality score that ranges from 0 to 100.
The thresholds levels for low, medium and high-quality images are set through the three ... threshold adjustment bars. It will normally take some experimentation to find the settings that best suit your needs.
The four Detect ... options allow you to choose which kind of images faults (blur, noise, compression, or under/over exposure) should be weighed in quality evaluation. And the relative weights of three of these factors are also adjustable.
The quality of the images the process has to investigate, will influence how well this works. An album containing images which are all more or less o.k. will produce quite different results than an album where some of the pictures suffer from bad blur, noise, ... So you'll have to experiment with the threshold settings and weights to get useful results. You should also consider where in your workflow you want to perform this operation. You may find it most useful to apply this operation right after importing the files from your camera.
For more details about the Maintenance Quality Sorter tool, see this section from the manual.