OCR Text Converter
The OCR Text Converter tool parses the contents of an image, detects areas with text, and converts that text into editable and translatable characters files.
The tool can perform batch optical character recognition (OCR) over images, and produce translations in many languages using an online translator engine. It also allows you to review the text with the aid of spell checking, and make corrections as needed.
The tool uses the Tesseract, a powerful open-source optical character recognition engine available for Linux, macOS, and Windows.
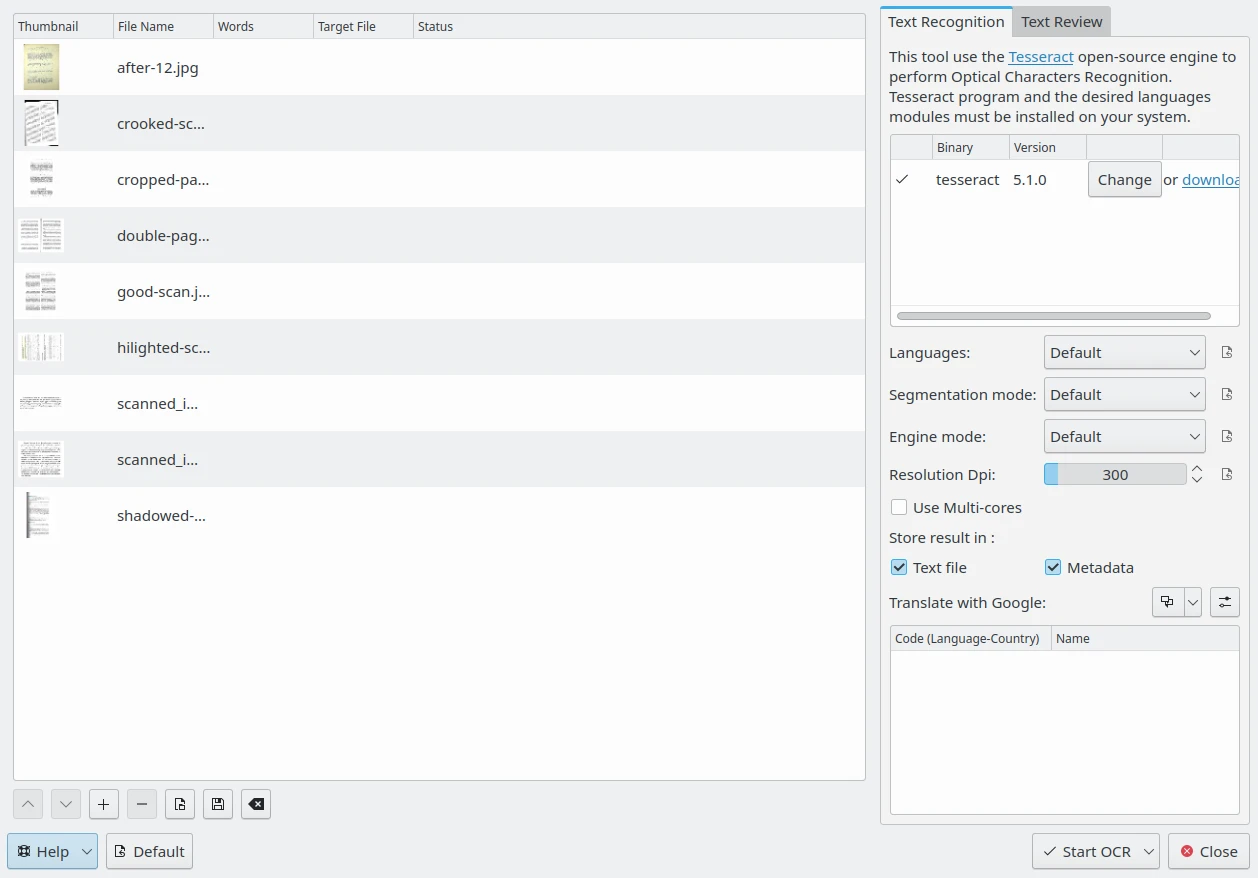
To perform text conversions, select the scanned images that include text to recognize, and start the tool from the menu , or use the icon OCR Text Converter from the Tools tab on the right sidebar. The following dialog will appear:

The digiKam OCR Text Converter Dialog
On the right side, the Text recognition tab indicates whether the Tesseract binary program version is detected on your system. If the binary is not present, you will need to install it onto your system. The lower portion of the Text recognition tab contains the Tesseract options you can set.
The Languages option specifies the language used for OCR. In the Default mode, when processing digital text with multiple languages, Tesseract can automatically recognize languages using Latin alphabets such as English or French, but it's not compatible with languages using hieroglyphs such as Chinese or Japanese. You can use the Orientation and Script Detection mode instead, or a specific language module if available.
The Segmentation mode option specify the Tesseract page segmentation mode to use while processing images. Possible choices are:
OSD only: Orientation and Script Detection (OSD) only.
With OSD: Automatic page segmentation with OSD.
No OSD: Automatic page segmentation, but no OSD, or OCR.
Default: Fully automatic page segmentation, but no OSD.
Col of text: Assume a single column of text of variable sizes.
Vertically aligned: Assume a single uniform block of vertically aligned text.
Block: Assume a single uniform block of text.
Line: Treat the image as a single text line.
Word: Treat the image as a single word.
Word in circle: Treat the image as a single word in a circle.
Character: Treat the image as a single character.
Sparse text: Sparse text. Find as much text as possible in no particular order.
Sparse text + OSD: Sparse text with OSD.
Raw line: Treat the image as a single text line, bypassing hacks that are Tesseract-specific.
If you want more details about the Tesseract Segmentation Mode you can read this online tutorial.
The Engine mode option specifies the Tesseract OCR internal engine to use while processing images. Possible choices are listed below:
Legacy: Legacy engine only (older engine not based on a neural network).
LSTM: Neural network LSTM (Long Short-Term Memory deep-learning) engine only.
Legacy + LSTM: Both legacy and LSTM engines will be used.
Default: Default value. Let Tesseract choose the best engine based on what is available.
The Resolution Dpi option specifies the resolution of the input images, measured in Dots Per Inch (DPI).
If the Use Multi-cores option is enabled, Tesseract will process files from the list in parallel.
The Store result in option specifies where to place the text contents recognized by Tesseract while processing images. Possible choices are:
Text file: Store OCR result in a separate text file in the same directory as the processed image.
Metadata: Store OCR result in an alternative-language XMP tag in the image metadata.
On the bottom of this view, the OCR result can be translated into different languages using one online translation engine. You can set more than one translation language to process images. Corresponding translations will be hosted in separate text files or in extra metadata entries depending on the Store result in option. See this page from the manual for more details about the Localize Settings.
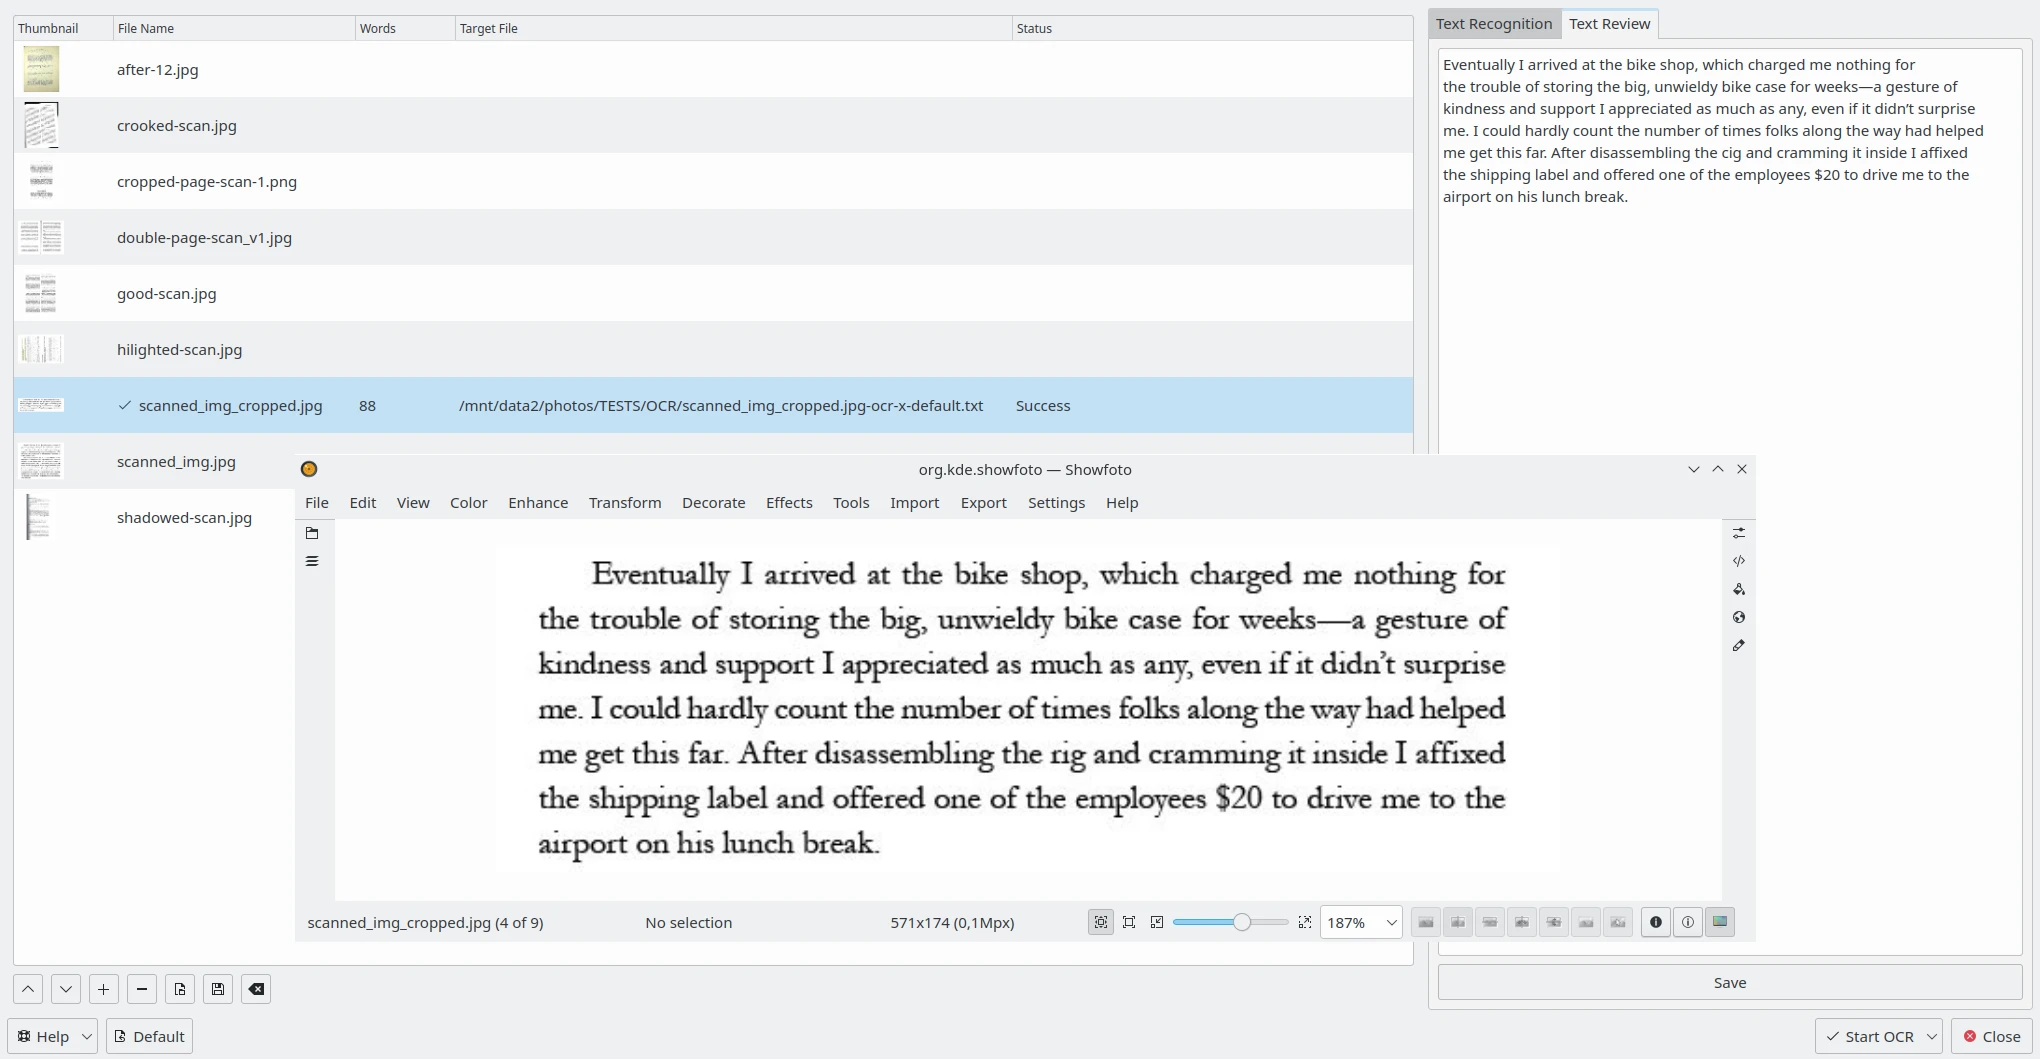
The Text Review tab on the right side allows you to edit the OCR result for each image processed with Tesseract. Select one item from the list on the left side and the OCR result will be displayed in a text editor. You can edit the text as necessary or apply spell-checking. See this page from the manual for more details about the Spell-Checking Settings.
On the bottom of the dialog, the Default button allows resetting all options to the default values. The Start OCR drop-down button initiates processing of the currently selected images from the list or all items. Finally, the Close button will stop all OCR processes, if any, and close the dialog.

The digiKam OCR Text Converter Content to Review on the Right Side with the Corresponding Image Open in Showfoto