Reverse Geocoding
The Reverse Geocoding tab uses a public geoname service to look up address details of the geographic position of one or more images, and convert them into tags. Before using reverse geocoding you should be already familiar with the concept of tags and how to create, edit and use them. The best summary of tags is found in the Tags View section of this manual.
First you should create a root tag in the Tag Manager or in the tag tree of the Left or Right Sidebar. You might name it Location or Places or ...
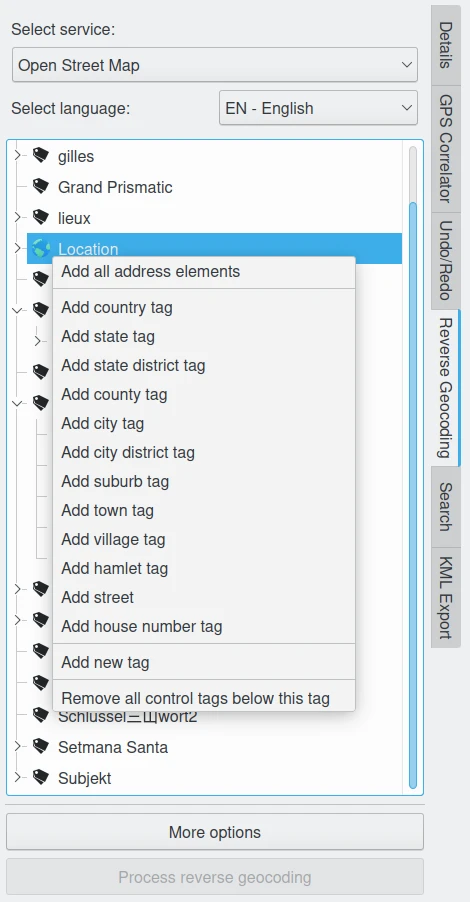
Then you select the image(s) you want to tag (they need to already have GPS data assigned), open the Geolocation Editor and click the Reverse Geocoding tab. You will see your tag tree and if you click with the right mouse button over a tag, preferably the one you created for the geo tags, you will see this context menu:

The digiKam Geolocation Editor Reverse Geocoding Context Menu
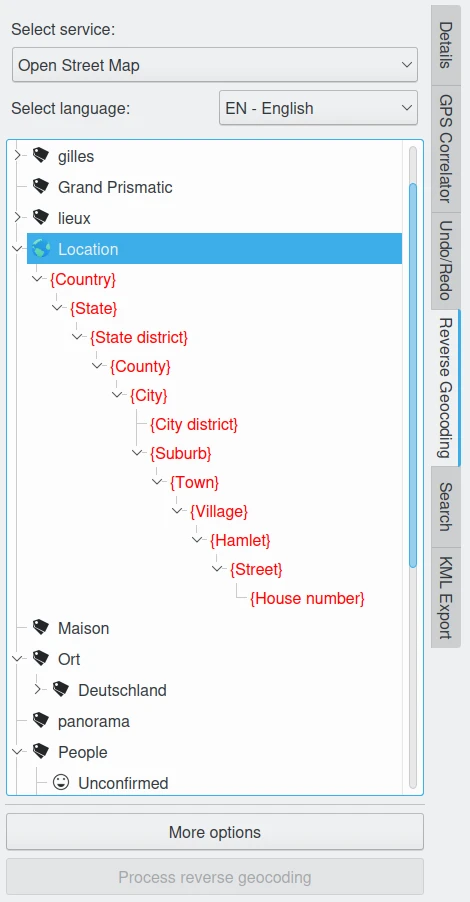
The tags in the main section, that allow you to add tags, are sorted from the largest region (country) down to the smallest (house number). If you choose Add All Address Elements and then fold out the Location tag and all the sub-tags you will have this:

The digiKam Geolocation Editor Reverse Geocoding Tags Hierarchy to Populate
These red tags in curly brackets are called control tags. They determine which address elements you want the reverse geolocation service (based on the Select Service option at the top of the sidebar) to look for. You can still delete some of the control tags with the help of the context menu if you feel that you don't need all of them. You can also modify the structure by deleting some control tags and adding them in other places of the tree. You can even build a new tree parallel to the first by adding a control tag to the root tag (here: Location). Arranging the control tags on the same level instead of a tree structure can reduce the number of redundant tags since the same city or town or street name exists in more than one state or country. But it can make the whole location branch of your tag tree quite long and therefore difficult to use. This is to say that you have to find your own solution to this problem depending on your needs. A mixed approach may be best for your applications, but the sooner you find an approach, the less work you have to invest in editing your tag tree and the control tags.
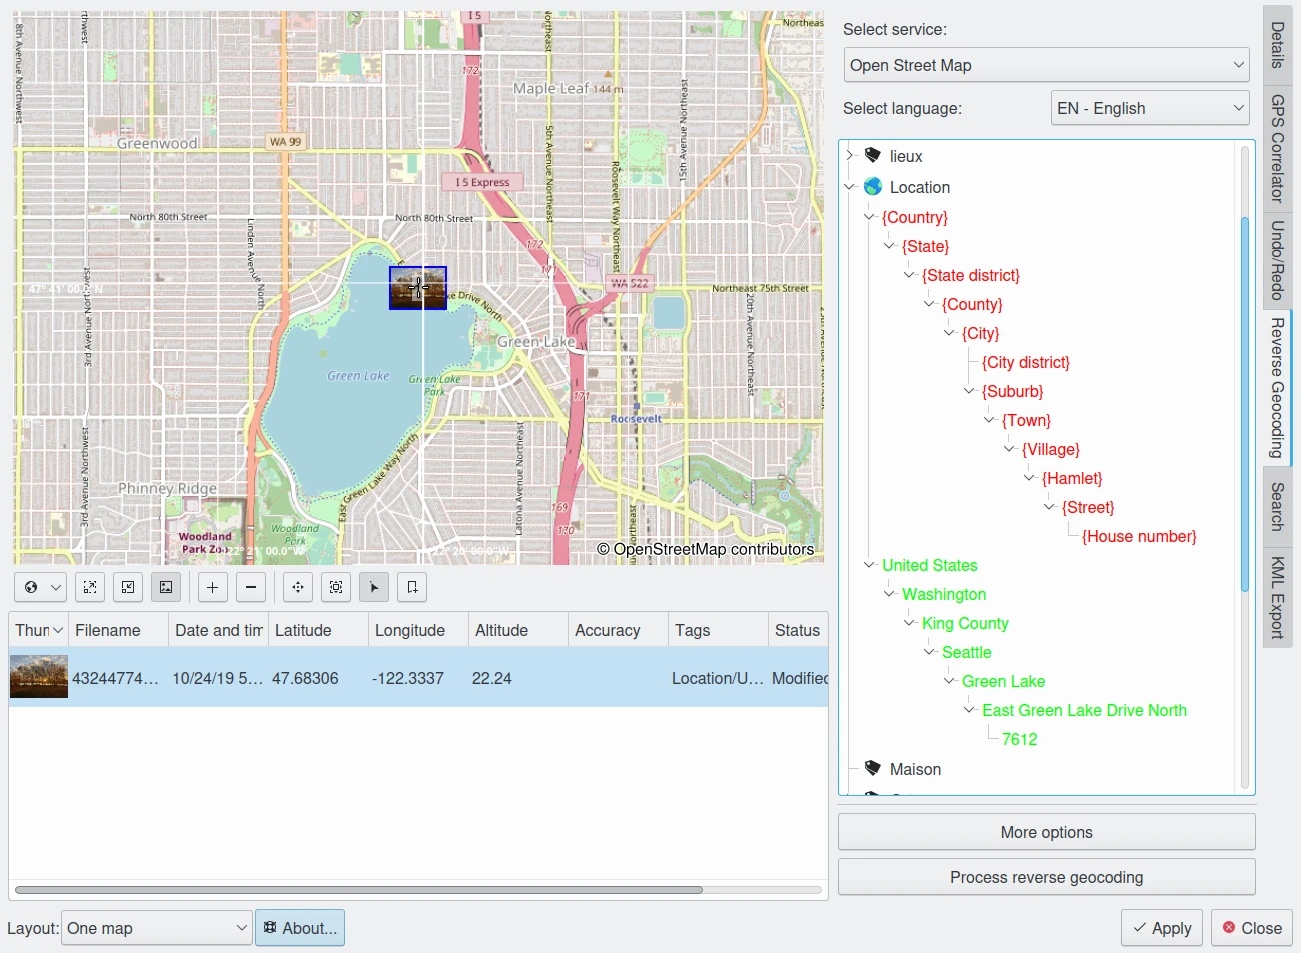
Assuming you use the control tags as shown in the above screenshot, select the images you want to tag from the list of images to the left and click Apply Reverse Geocoding. Then the tag tree might look similar to this:

The digiKam Geolocation Editor Reverse Geocoding Tags Hierarchy Populated
The green tags represent the search result of the selected public reverse geocoding service and are already assigned to the image(s). To save these tags to the image file and the digiKam database click Apply. The tags will appear as regular tags in your tag tree, which is viewable here or in the tag trees of the Left or Right Sidebar. Of course you can still edit the tags like any other tag in the Tag Manager or in the Left or Right Sidebar, but you can't edit the tags from within the Geolocation Editor.