Resumen

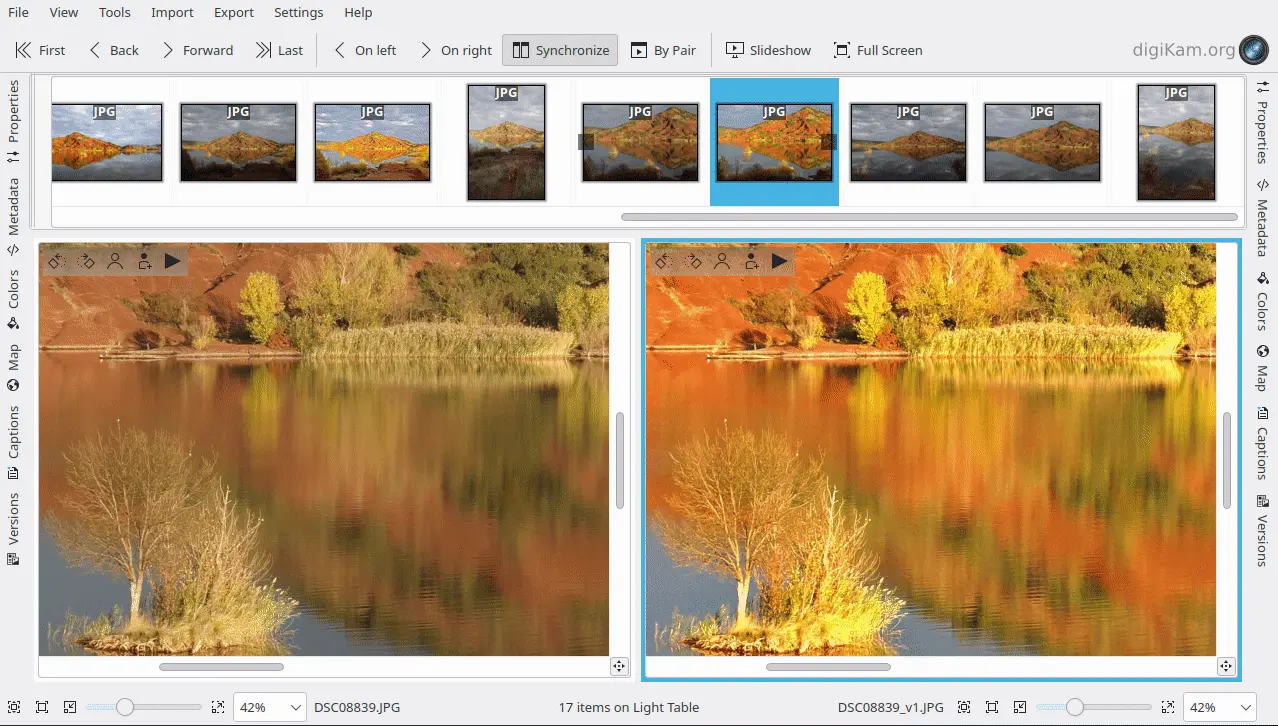
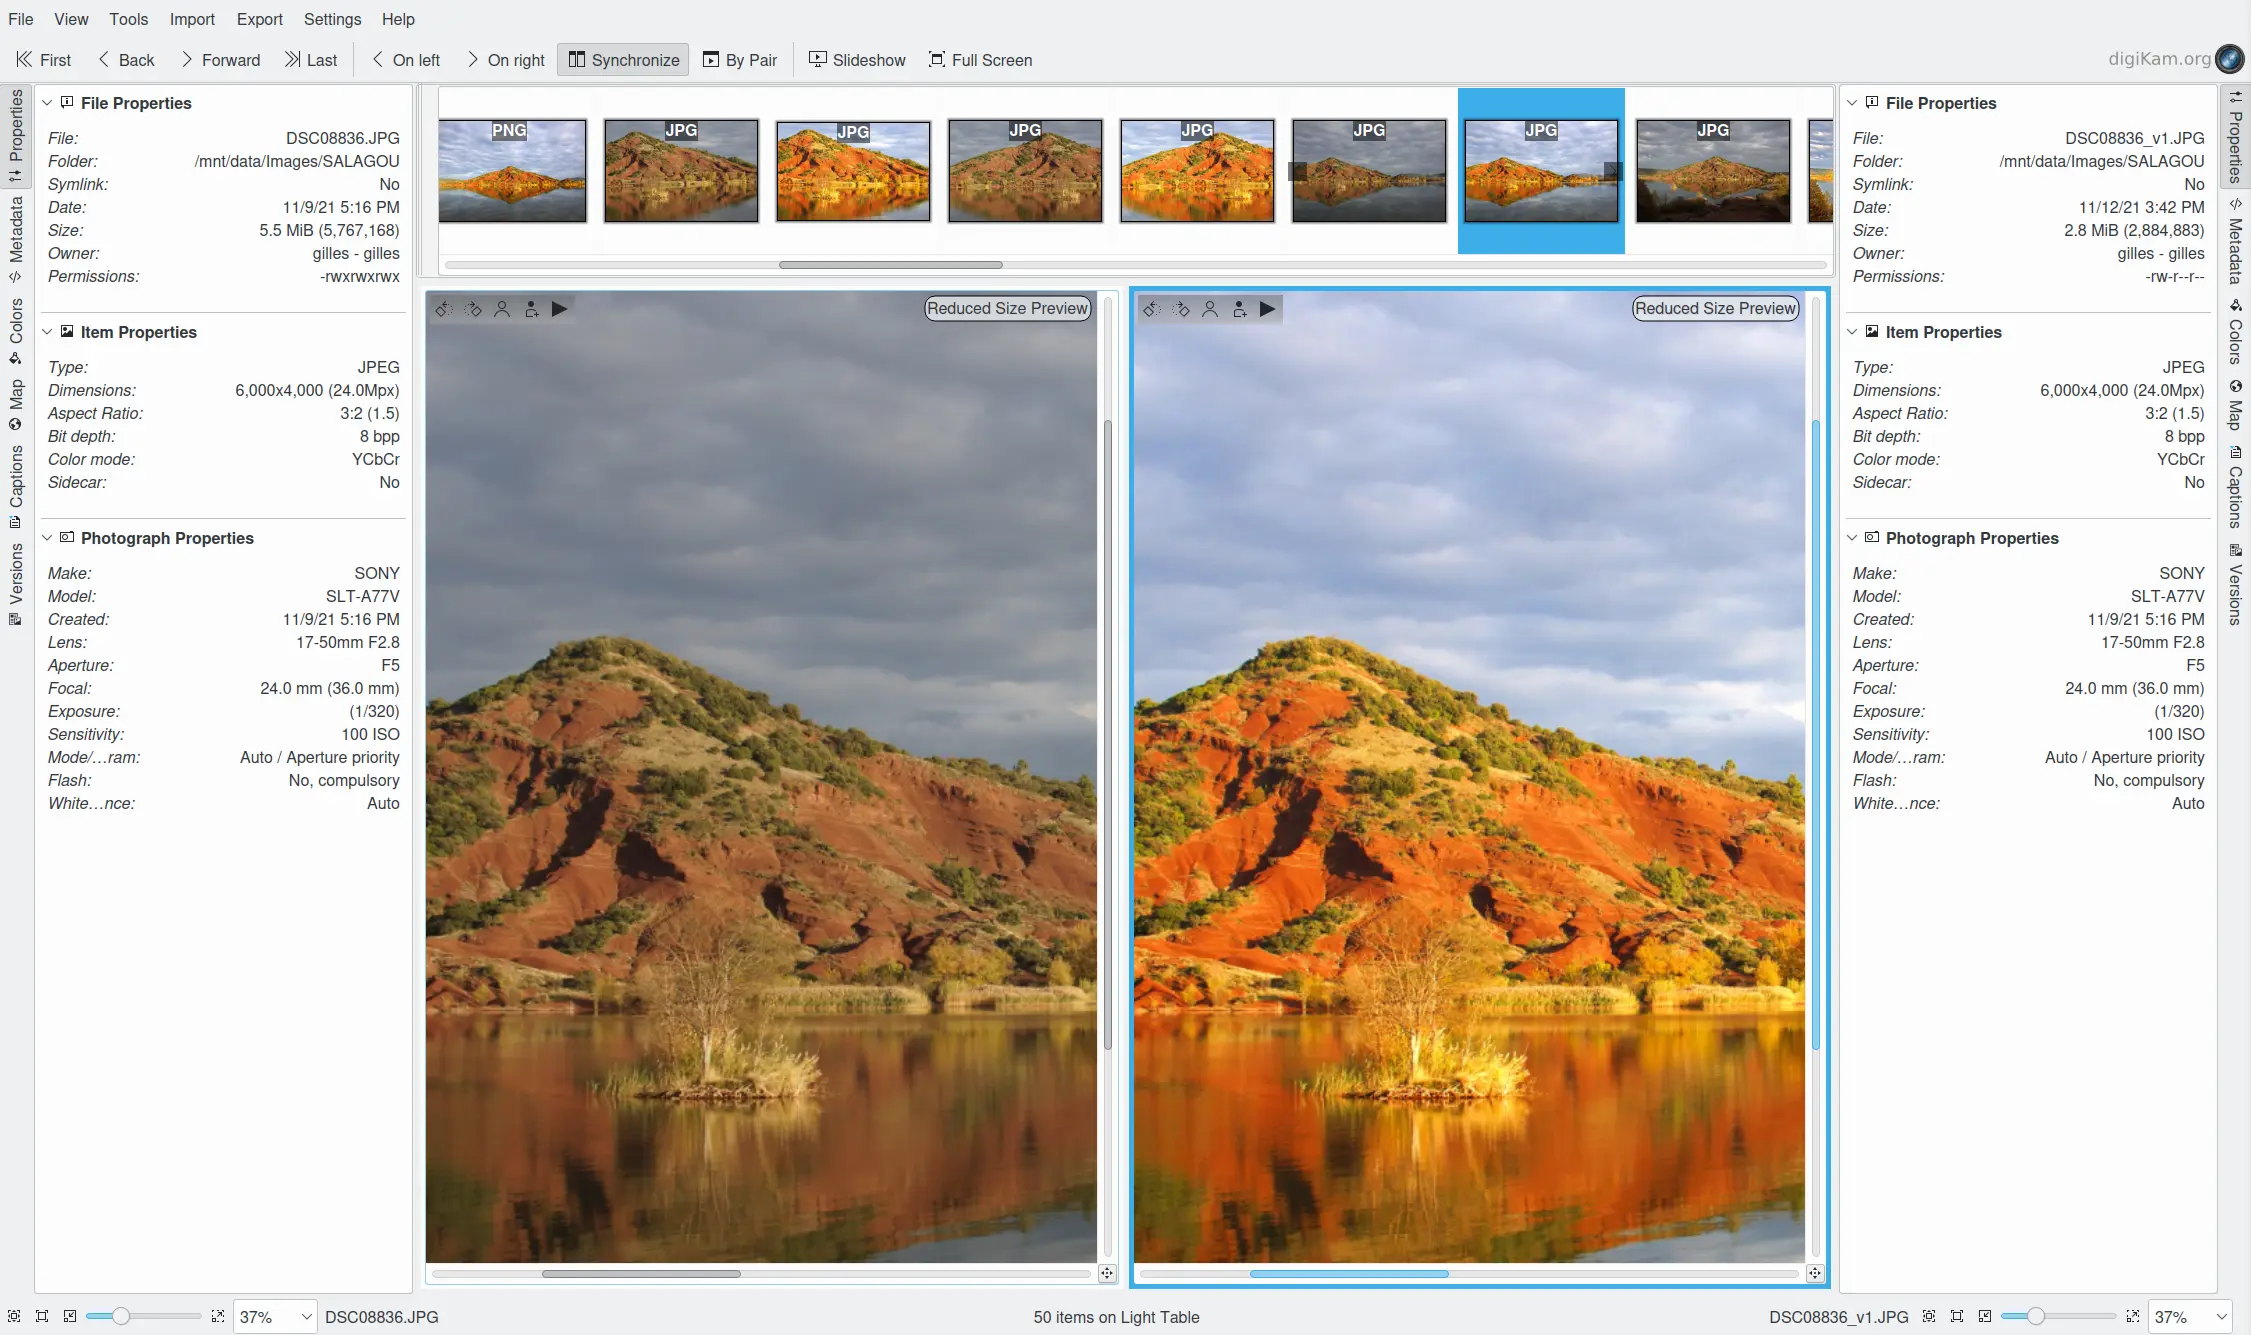
La mesa de luz comparando dos archivos RAW uno al lado del otro

digiKam features a light table in a separate window to easily compare images. It works with all supported image formats including RAW files.
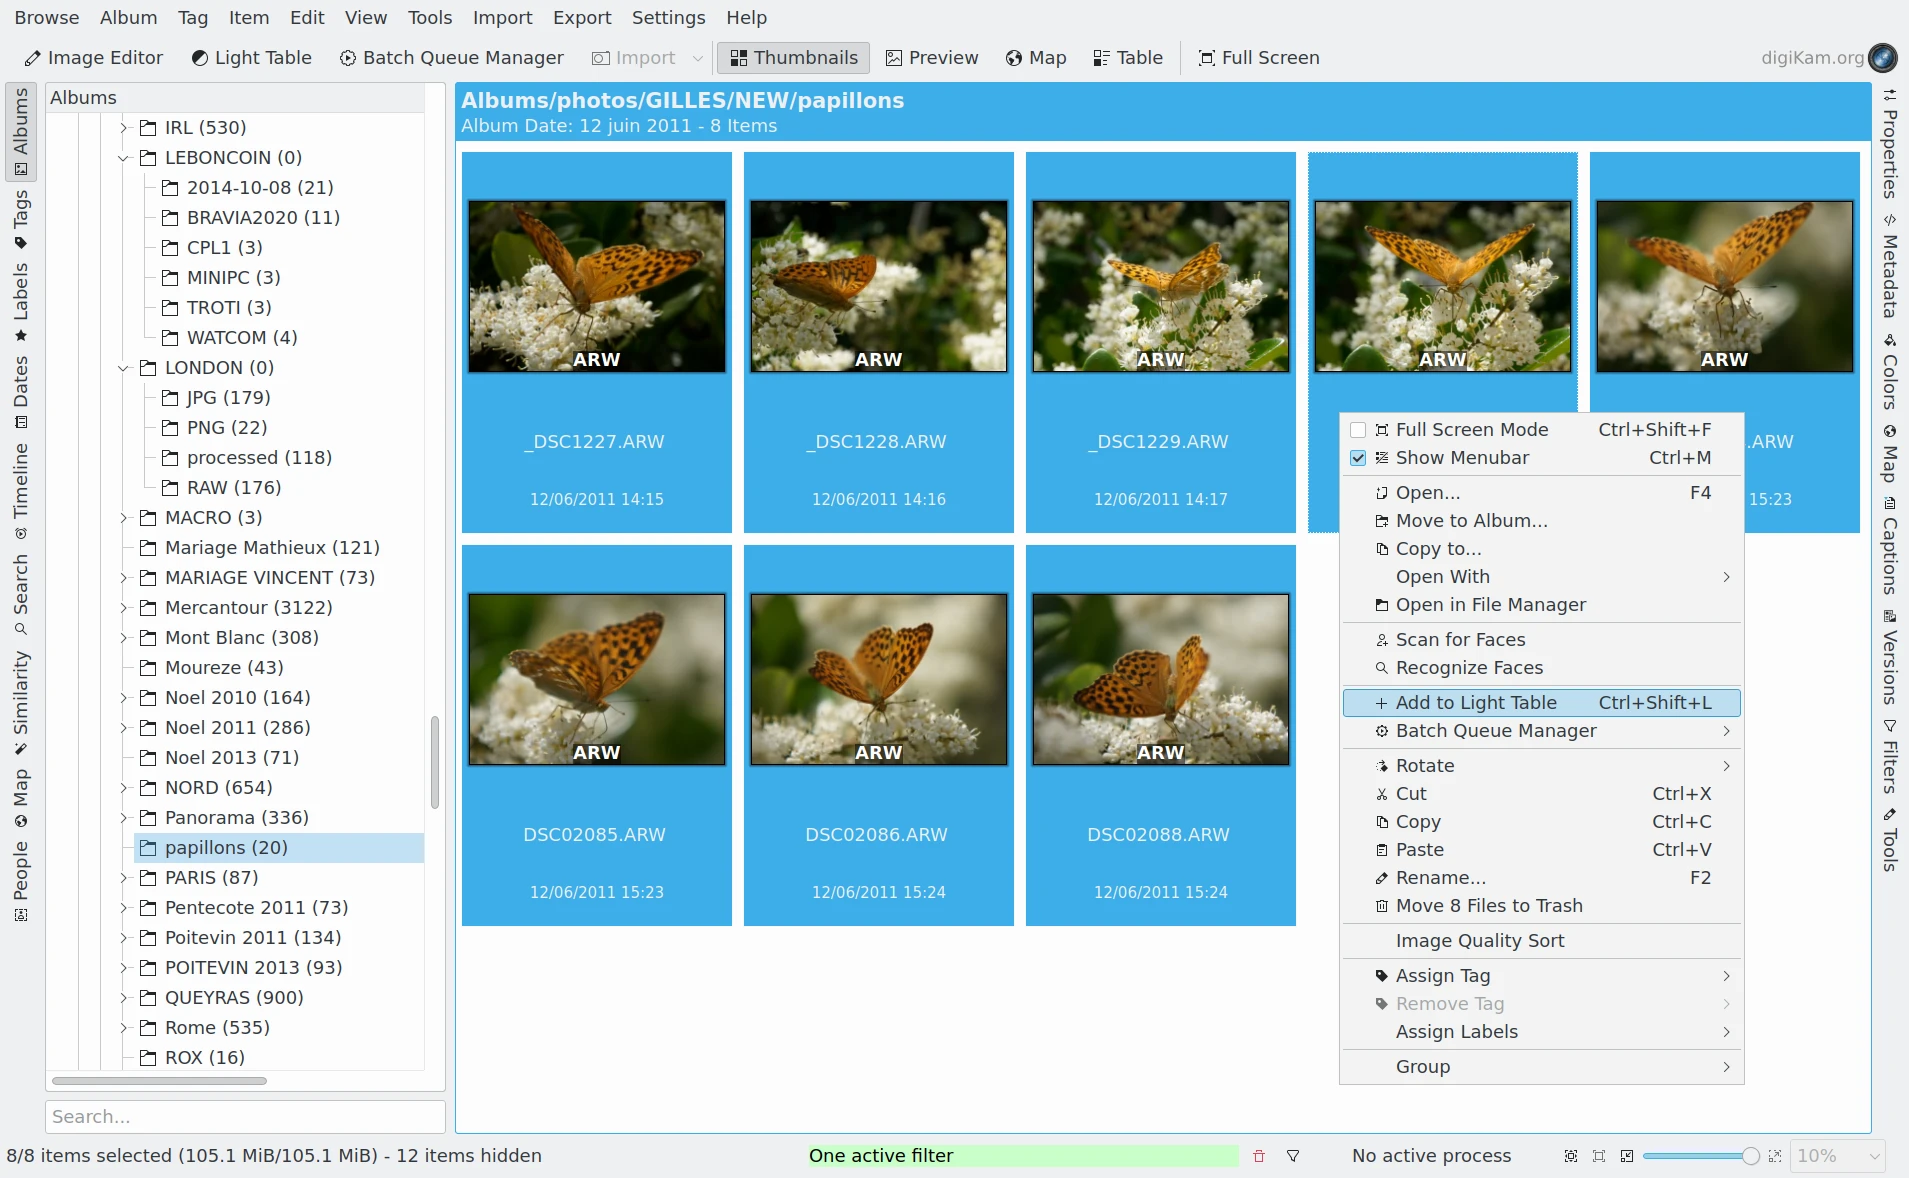
The Main Icon-View Context Menu To Place Items To Compare On Light Table

Select one or several images in any view from the main window, call Place onto Light Table Ctrl+L from the context menu. The selection will be added to the light table, and its separate window will open. When you are back to the digiKam main window you can quickly access the light table with Tools ‣ Light Table L.

Screencast Of The digiKam Light Table Item Selection From the Thumbbar

Playing With The Stack Contents

Synchronized Mode

From the thumbbar drag & drop images to the left and right comparison pane below. A little arrow will indicate which copy is shown in which pane. The current selected pane will be highlighted by frame. If you choose Synchronize from the toolbar, any zoom and panning in one window will be synchronously executed in the other pane, so that you can compare the same areas of two images.

Screencast Of The digiKam Light Table Using The Synchonize Mode With Side By Side Views

By Pair Mode

Another mode is better suited for quickly culling from a series of images. If you choose By Pair from the toolbar, the first two images will be automatically inserted into the comparison panes. Click on any thumbnail to make it the left side preview, the adjacent thumbnail to the right will be inserted into the right pane. That make it easy to sift through a series of similar images.

Screencast of the digiKam Light Table Using The By-Pair Mode With Side By Side Views

Of course, the usual edit actions work from the light table directly using File ‣ Edit… F4. This open current selected preview canvas in Image Editor.

All image information from the main window right sidebar is available for each of the two previews in the light table. The Light Table Left Sidebar is dedicated to the Left Pane, and the Right Sidebar for the Right Pane. This makes it easy to link visual differences to exposure data for example.

In the lower right corner of each pane there you find a built-in panning action (crossed arrows). Click on it and keep the left mouse button pressed to pan across the image (with Synchrone mode, both images will show the same viewing point).

Zooming works the same as in other views: use indifferently the zoom slider below the panes or Ctrl-scroll wheel to zoom in and out, with both images when Synchrone mode is selected.

Truco

If you use muti-screen on your computer, it’s a good idea to place Main Window on a screen and the Light Table on other one to increase your experience.

Nota

Light Table has a specific configuration page from digiKam setup dialog. For more details, read this section from the manual.