If you’re not just photographing machines or stars, Face Management could be a useful feature for you (even machines might have a human operator). In digiKam, this feature involves two main tasks: Face Detection and Face Recognition.
The face management workflow helps you identify and recognize people in your photos by using deep-learning neural networks. Face Detection identifies whose face appears in your images, which is a necessary step before recognition. Face Recognition then automatically identifies people in your photos, but it requires initial training by labeling a few detected faces with the corresponding names.
Important
For face management to work correctly, digiKam needs to download the deep-learning models from the web during its first run. See the Quick Start section for details.
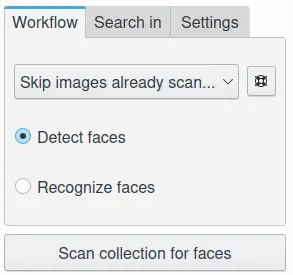
The first step is to let digiKam locate all the photos containing faces, without yet identifying who they belong to. To begin, click on the People tab in the left sidebar. At the bottom, you’ll find a settings view with a drop-down menu where you can select from various options:
Skip Images Already Scanned: Select this option for your first scan, or if you want to scan new images.
Scan Again And Merge Results: Select this option when you have changed settings. This will re-scan all images selected in the Search in tab, which can be time-consuming.
Clear Unconfirmed Results And Rescan: Select this option when you have changed settings and want to delete all unnamed faces from the database. This will re-scan all images selected in the Search in tab, which can be time-consuming.
The first option is the default for normal operation. Use it for your initial face detection scan or when you add new images to your library. The second and third options should be used when you change settings that affect the face detection results. These options do not affect the process of recognizing faces.
For this task, make sure to select Detect faces. Since face detection is time-consuming, it’s better to limit the scan instead of scanning right away. In Search-in, you can limit the scan to specific albums or tags. See the Search-in section for more information.
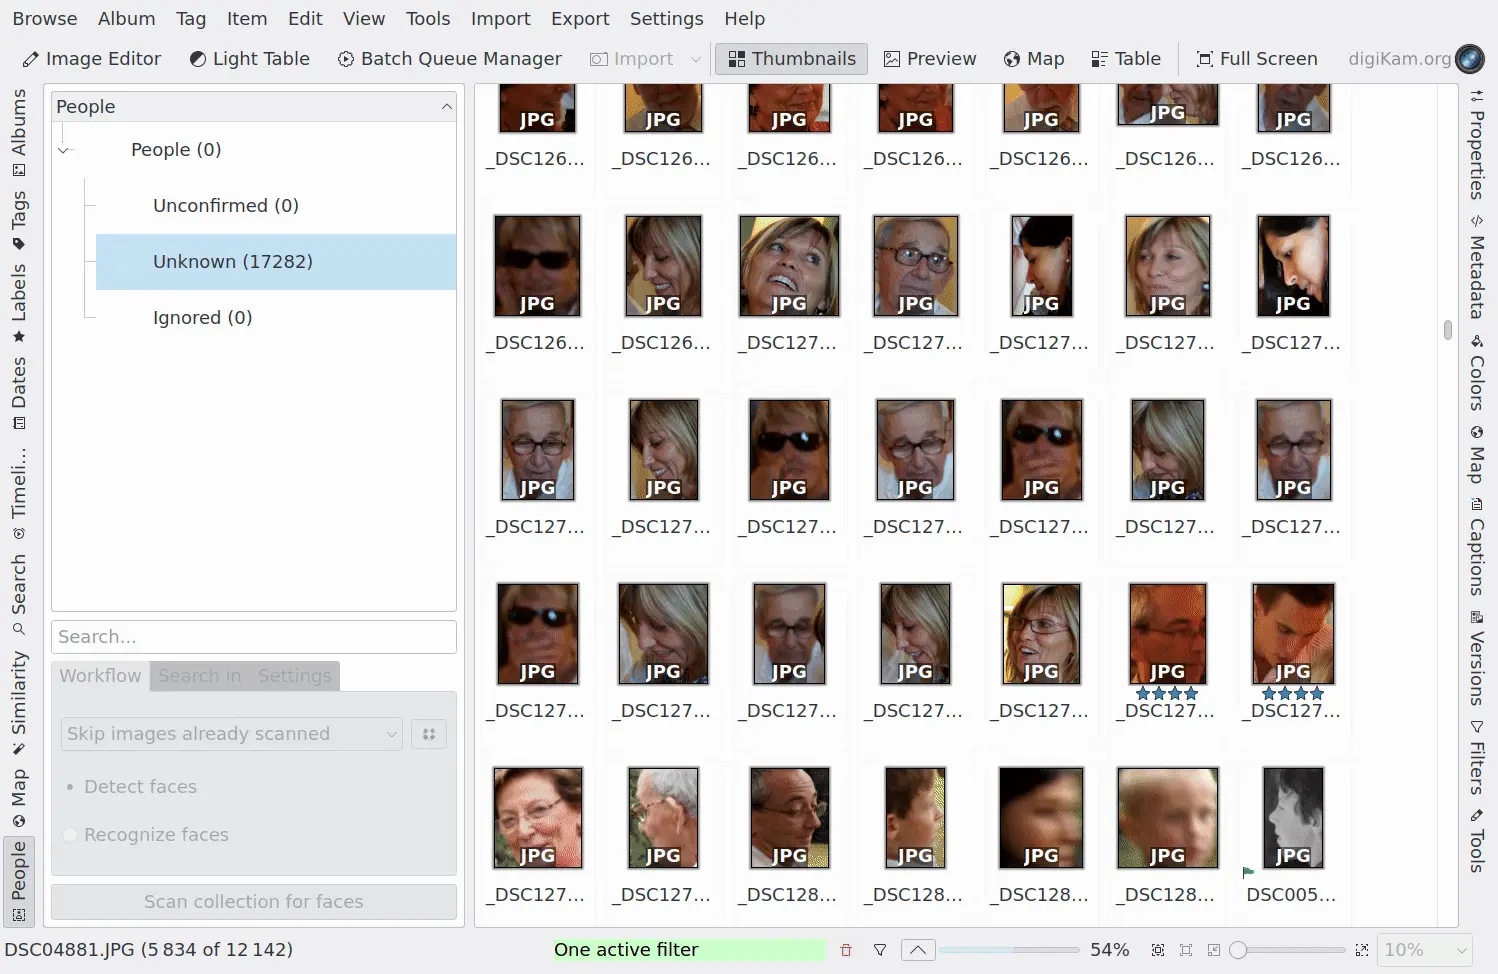
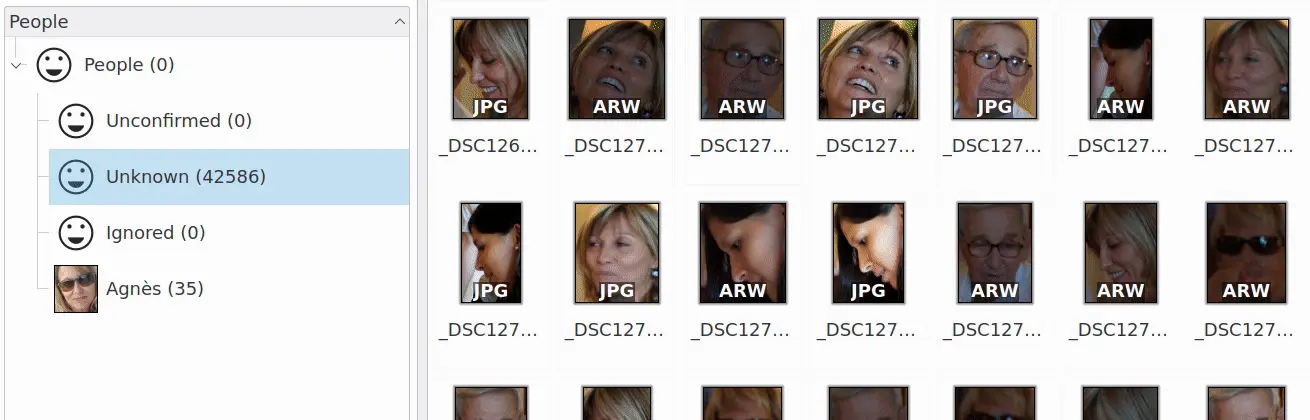
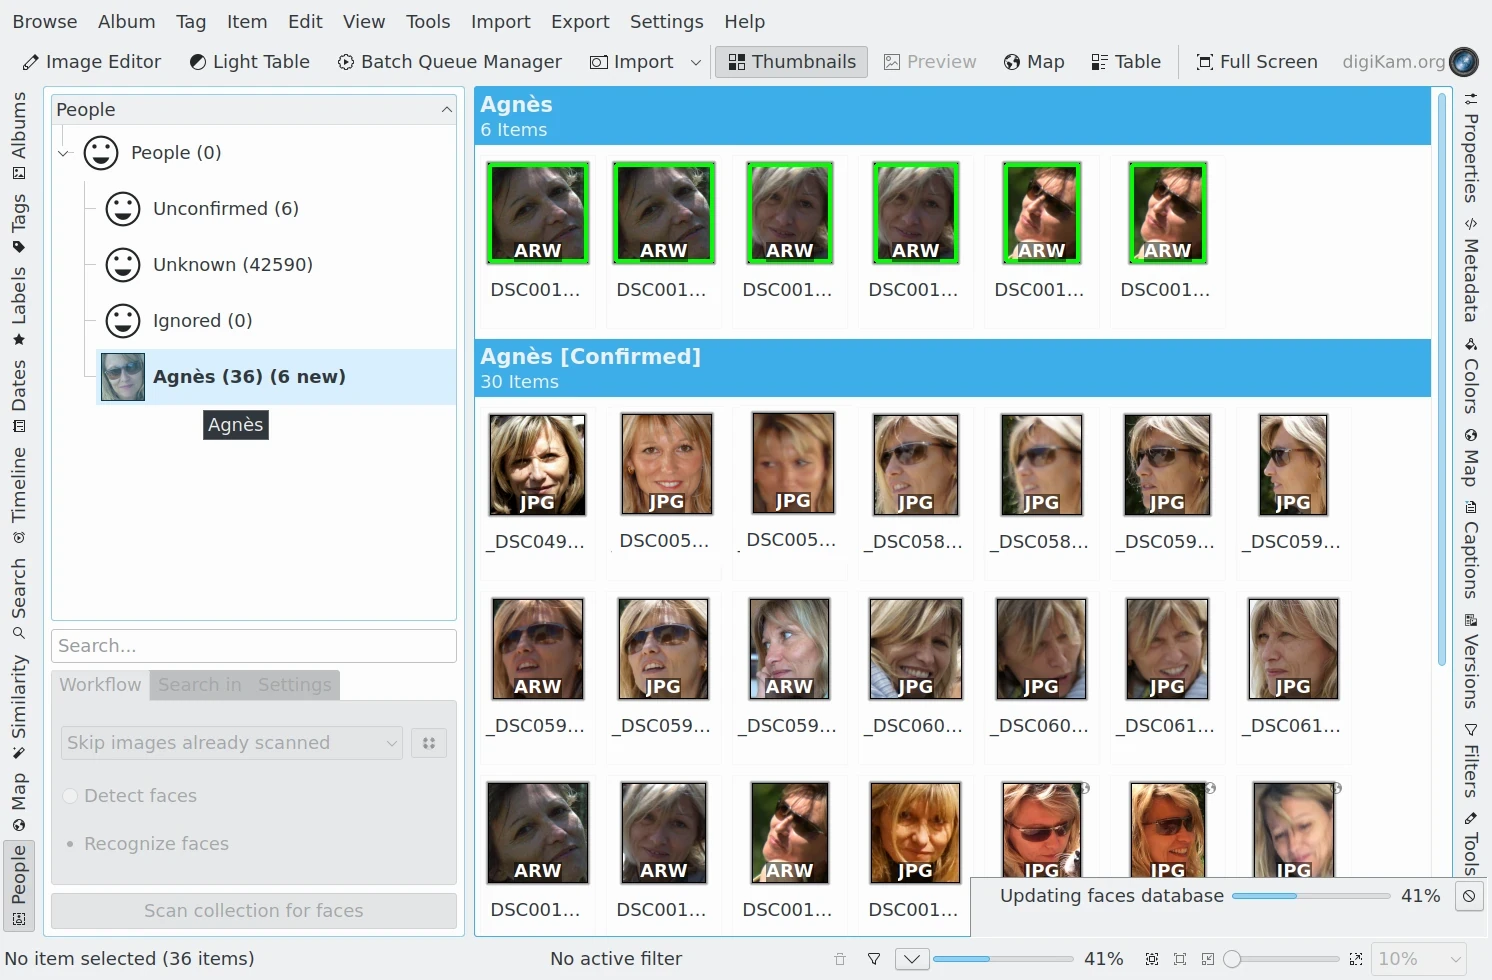
After carefully selecting your options, click Scan collection for faces. Depending on the scope of your selection, it may take a little while for the results to appear in the Image Area. In the Tags list on the Left Sidebar, you’ll see the People branch of your tag tree. To view the entire scan result, ensure the topmost tag People is selected. You’ll also notice a new virtual tag called Unknown, which includes all images where faces have been detected but not yet assigned to a person. If this is your first scan, you’ll find the entire result here as well.
Screencast of digiKam Faces Detection Process Running Over Collections and Populating the Database
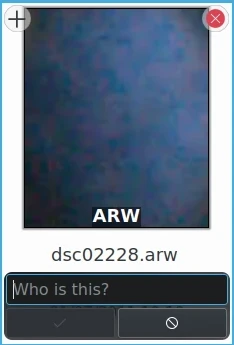
Note that the thumbnails presented here do not show the whole image. They show the area of the image where the face detection model added a Face Tag. You can see that if you click on the thumbnail. In the preview that opens, you will see the whole image with all the face tags on them. If you don’t see them, click the people button in the upper left corner of the preview. If there is more than one face tag on the image it will also be represented by more than one thumbnail.
The list of detection samples below comes from a huge collection of photos scanned by digiKam.
ID
Face Detected Samples
Comments
01
An under-exposed face
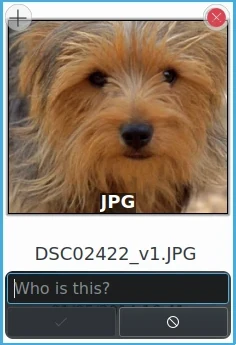
02
An animal face
03
A blurry child face
04
A non-human face
05
A very blurry and partial face
06
A rotated face
07
A face covered with a hood
08
A face in profile
09
An under-exposed and partial face
10
A false positive detection
11
An animal face
12
A face covered by a racket
Screenshots 02 and 11 were selected to highlight an important feature: the algorithm can detect animal faces. This is not a false positive, unless you specifically want to see only human faces in your collection.
Screenshot 10 demonstrates an important issue: the algorithm may sometimes identify details in an image that resemble a face but are not actually faces. This is where the Remove button comes in handy. It removes the face tag from the photograph, and if it is the only face tag remaining, the photograph will disappear from the scan results.
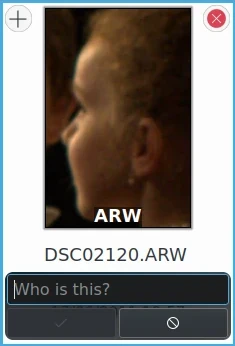
Screenshots 01, 03, 05, 08, 09, and 12 may be considered non-faces or can be filtered out by increasing the detection accuracy setting in the face management Settings view. However, these examples demonstrate the algorithm’s ability to detect faces even in challenging conditions.
Screenshot 04 shows the model can detect other non-human faces in images, including statues, paintings, and pictures within images.
Screenshot 10 is definitively an incorrect (false positive) result.
After the detection scan is complete, you should see a new tag labeled Unknown under People in the People view. You must manually tag some of these faces before proceeding with face recognition.
Assigning People tags to face tags is a crucial step for Face Recognition. digiKam can only recognize faces if it has reference faces for comparison. It’s your job to train it by identifying faces, such as labeling them as Lara, Juan, Peter, etc. Usually, you only need to manually tag one face for a person for the recognition process to identify additional faces.
After performing a detection scan as described in the previous section, you select the Unknown tag on the Left Sidebar.
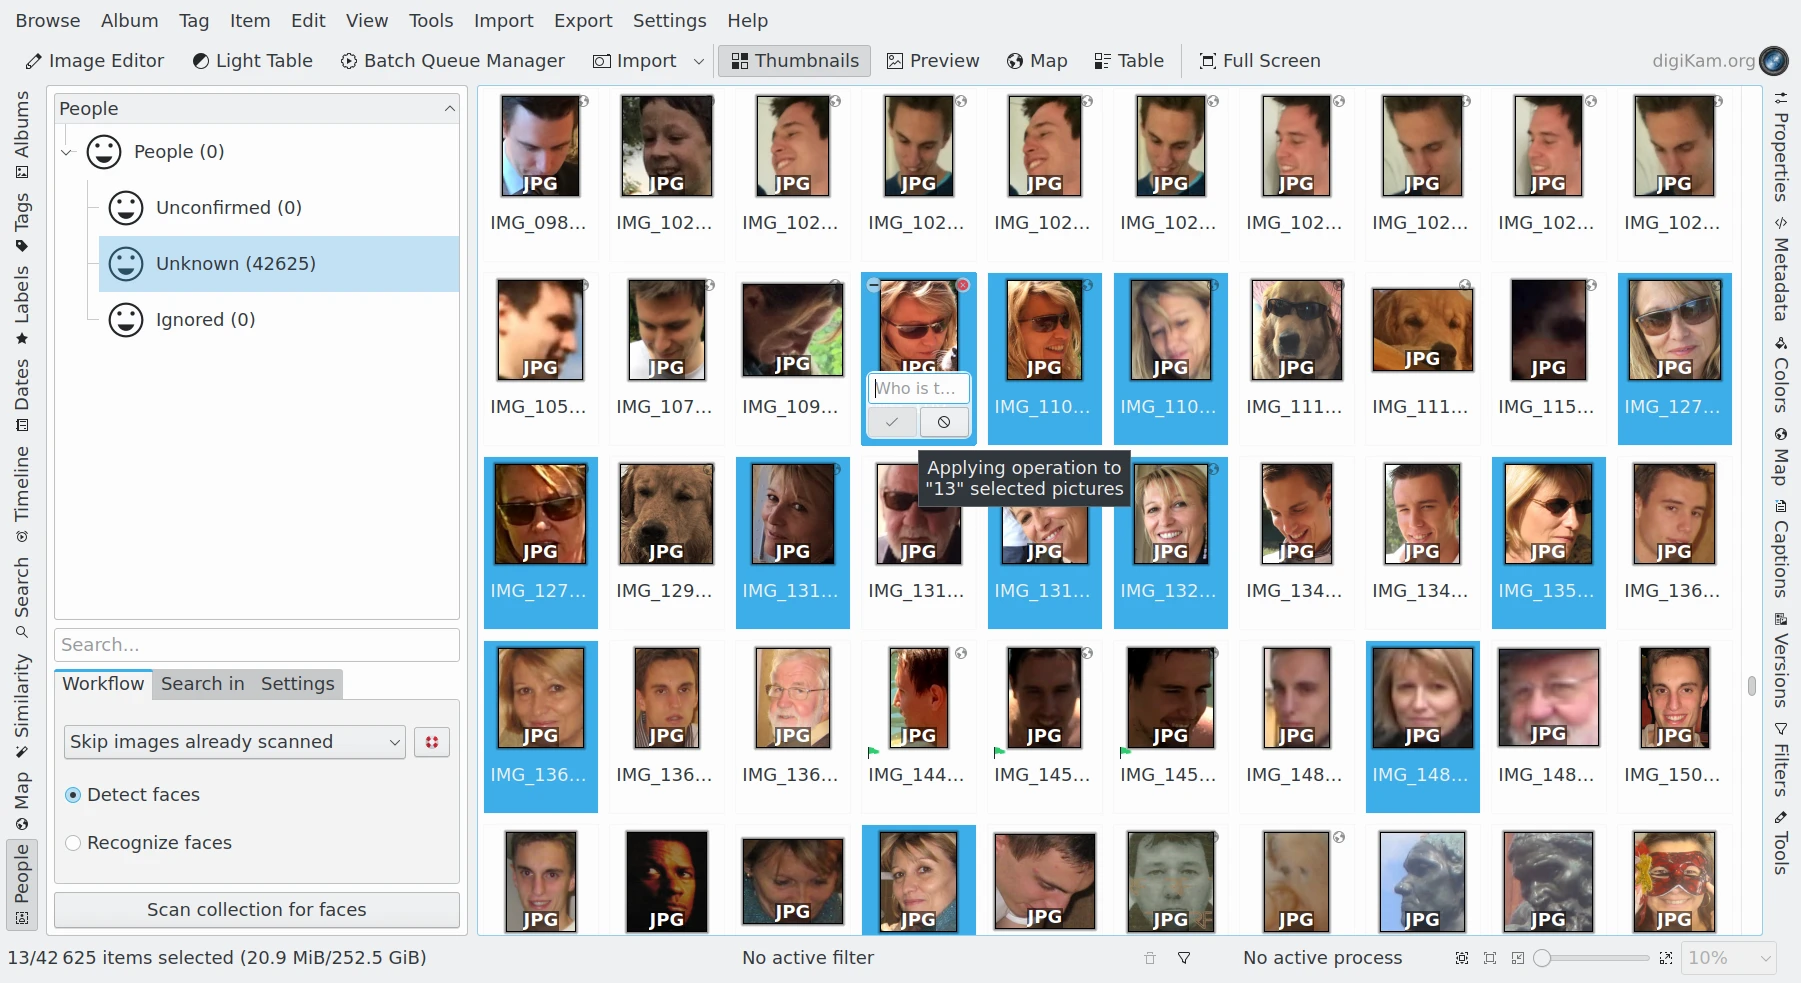
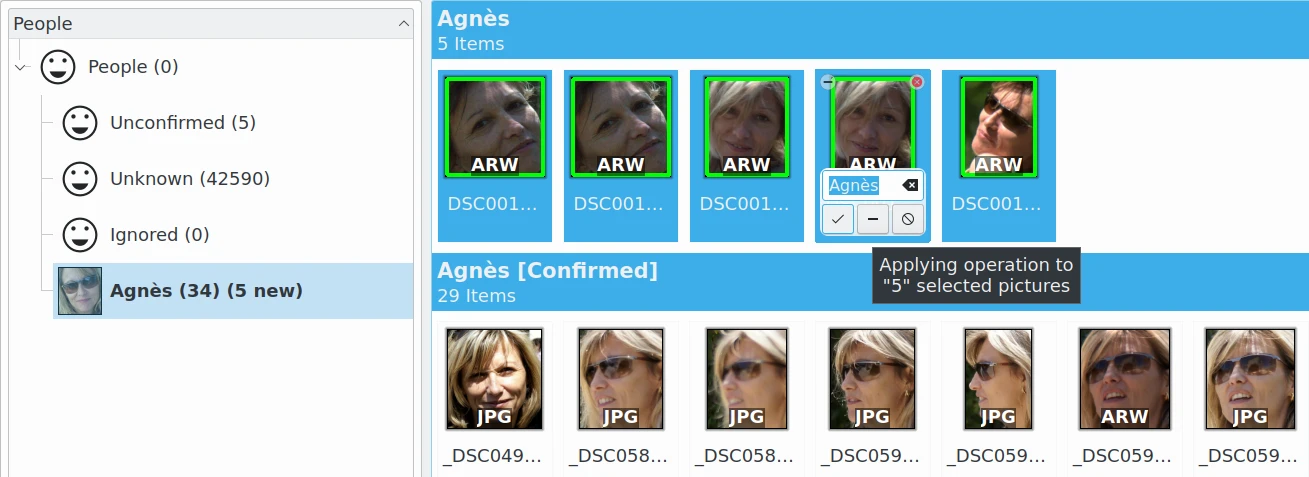
The digiKam Face Management Icon-View with multiple selections of similar faces to tag with the Agnès name.
In the field labeled Who Is This? you can either type in the name of an existing People tag out of your tag tree or use the drop-down function to show your tag tree and select a tag. You can also apply the same tag to multiple faces at the same time. Confirm saves the name to the database and moves the thumbnail from Unknown to the face tag.
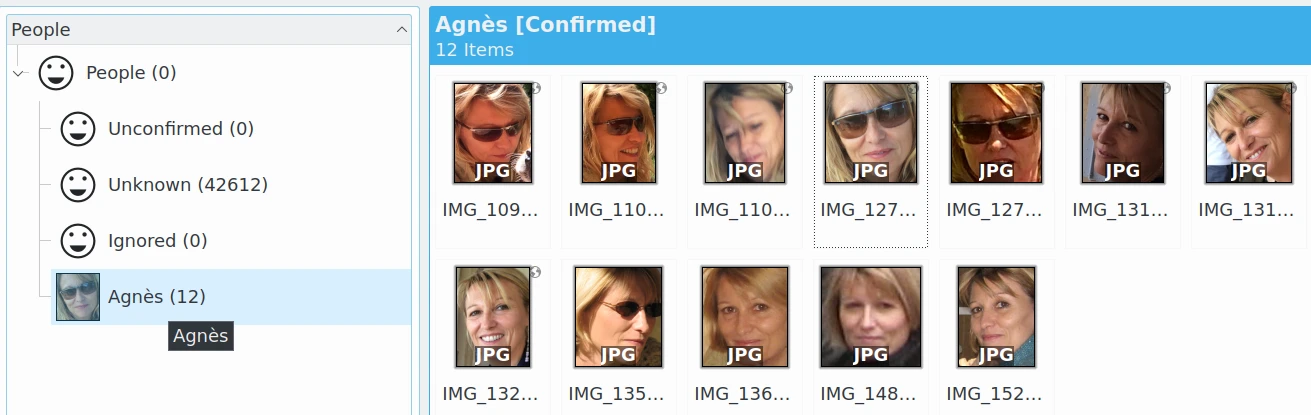
The digiKam Face Management Icon-View with a Confirmed Set of 12 Faces Using Agnès Name
Note
Using the context menu item Assign Tag instead of the procedure described above will not assign a face tag. Instead, it will assign a regular tag to the entire image.
If a face tag is confirmed and only shows the name without the buttons to remove, edit, or confirm it, but you need these buttons because the tag is incorrect and you want to edit or remove it, simply double-click on the name and the buttons will reappear.
For more information about automatic face tagging using digiKam’s face recognition engine see the next section of this manual.
You can manually tag people in different ways:
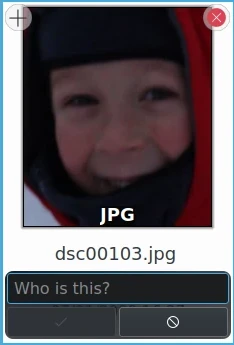
From The Unknown tag from People view: to manually identify a face, hover on any Unknown face from icon-view and use the text box to give it a name. This will lead to the creation of a face tag in case a person of that name doesn’t exist already.
From Left Sidebar People tab: use drag and drop between icon-view and face-tags tree-view. Select items labeled Unknown that you want to assign a face-tag. Perform a move with the mouse to the People items hierarchy. A pop-up menu will appear to confirm face assignment.
Screencast of Manual Faces Assignment Using Drag And Drop
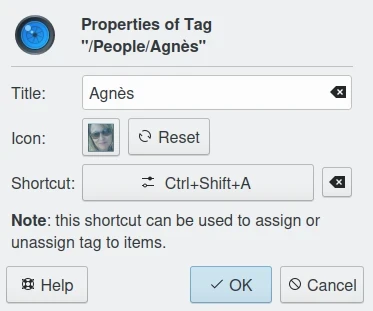
From keyboard shortcut: you can assign a magic key to a face-tag and quickly uses the keyboard to switch on the face-tag name to selected items.
The digiKam Face Tag Properties Dialog With a Keyboard Shortcut Assigned
In case there’s a face you don’t wish to be recognized, you can mark it as ignored. This leads to the creation of a new Ignored tag, you can later unmark the face if needed.
In addition to tagging auto-detected faces, you can manually add a face region:
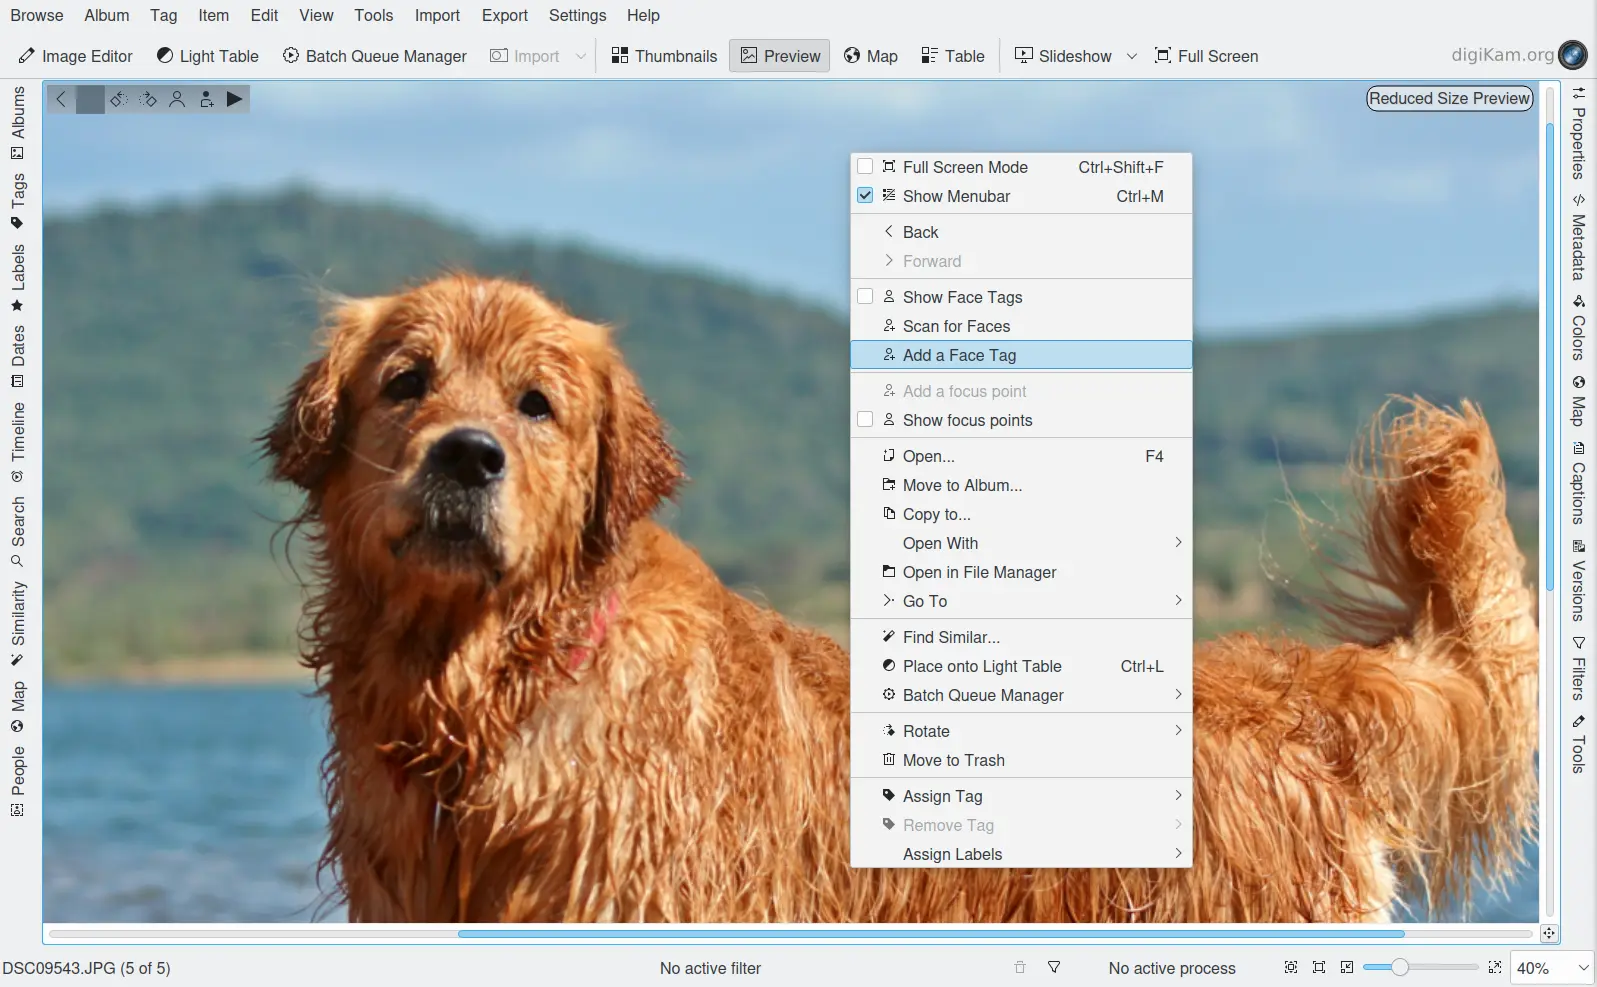
From Preview Mode: click on Add a Face Tag icon or select the option in the context menu, as highlighted in the screenshot below.
The digiKam Manual Face Tagging From Context Menu
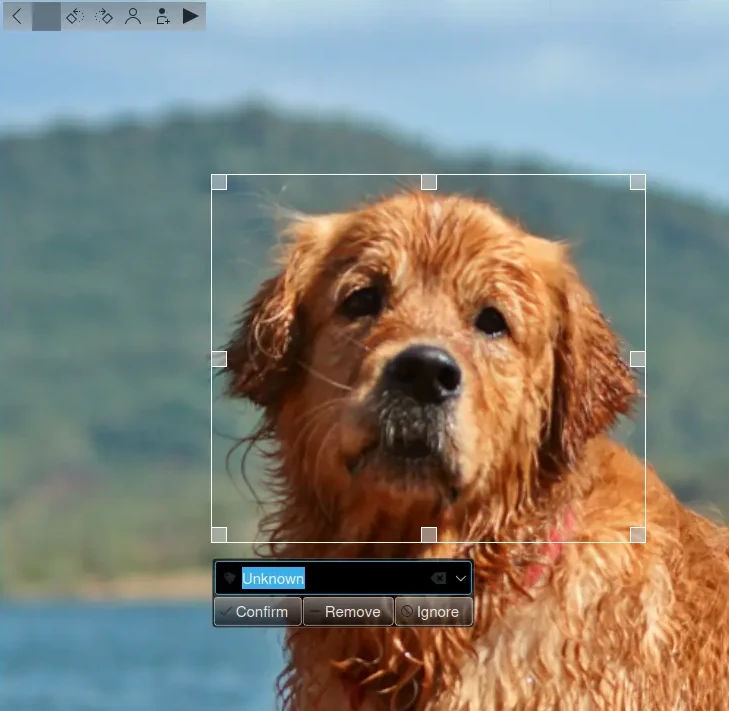
And then draw a rectangle around the face while holding the left mouse button followed by entering the person’s name and pressing Enter key. If you press Esc key, this will leave the person’s name editor.
Instead of clicking on Add A Face Tag icon, you can draw a face region while holding Ctrl key.
The Preview Mode context menu also includes two other options to use for manual face tagging:
Scan For Faces: This option triggers the face detection algorithm to automatically identify and mark face areas on the image. By default, these faces are labeled as Unknown in the database. The process is configured using the most recent Face Detection settings. If faces are detected, you can manually edit the face names as previously described.
Show Face Tags: This displays the visible face tag areas and automatically switches to edit mode when the mouse hovers over them.
Note
In the Miscs Behavior view of the configuration dialog, an option can be turned on to only populate the tags tree-view with the face tags assigned to a face while you enter a name.
Once you have assigned a tag to a few photographs, you can have digiKam try to match Unknown faces with similar faces that have already been confirmed (tagged). To start this process, go to the workflow tab, select Recognize Faces, and then click Scan Collection For Faces. The process will tag similar detected faces with the appropriate People tag from your tag tree, and the corresponding thumbnail will disappear from the Unknown tag selection. The thumbnail will appear in the Unconfirmed tag section and will be added to the suggested face tag section.
The digiKam Face Management Icon-View with newly recognized faces with a suggested tag of Agnès.
Face Recognition is faster than Face Detection but it still makes sense to use the Search-in tab to restrict the scan to certain albums or tags in the Albums tab, such as the Unknown tag. See the Seach-in tab.
Note
Face recognition only works well with faces that have been automatically detected by digiKam, not with manually drawn face rectangles or faces from other programs.
The digiKam Face Management Icon-View with newly recognized faces suggested as Agnès.
The results of facial recognition appear as unconfirmed results. These results will show up in the Unconfirmed tag and in the tag of the person suggested for each face. To complete the recognition process, you need to Confirm the newly recognized faces. Once confirmed, these faces will be permanently moved to the face tag. Hovering over unconfirmed faces will display several options:
The Confirm button allows you to save the suggestion. This assigns the suggested name to the face.
The Reject button moves the face back to Unknown if the suggestion is incorrect.
The Delete button removes the face region from the database if the suggestion is not a face.
By default, faces are categorized based on their name. You can change this behavior by going to View ‣ Separate Items. Using a different categorization order will result in Confirmed and Unconfirmed faces appearing mixed together. To adjust this, you can modify the sorting order within each category by going to View ‣ Sort Items ‣ By Face Type.
Note
digiKam does not keep a record of rejected faces. The same face might be suggested in future recognition scans. To avoid this, you can either label the face with a new name or choose to ignore it.
It is recommended you run several Recognize Faces scans when you are first building your library. Carefully review and confirm the suggestions between each scan.
Face recognition in digiKam is cumulative. More faces confirmed to tag name will help digiKam find more faces that are similar. When first building your library, it may take several recognition scans of your library to recognize all of the similar detected faces. This allows digiKam to learn different aspects of faces, and help recognize the same person at different ages.
Example 1: A picture of a face from the front will match with similar faces turned slightly to the side. Faces turned slightly to the side will match with similar faces turned mostly to the side. Faces turned mostly to the side will match with similar faces in full profile.
Example 2: A picture of a child will match with similar faces when the child is about the same age, and when the child is a year or two younger and older. Faces of the child when they are a few years younger or older will match with similar faces when they are even younger or older.
The accuracy of face recognition is very high once you have built and trained your library.
Important
Carefully review face name suggestions before confirming them. A single incorrect confirmation can lead to numerous inaccurate suggestions from the face recognition system.
To improve face recognition results, in addition to adjusting the settings mentioned below, you can also improve accuracy by rebuilding the training data. This can be achieved by navigating to Tools ‣ Maintenance ‣ Detect And Recognize Faces and selecting Rebuild all training data.
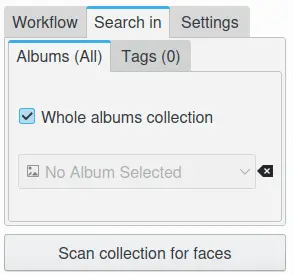
The Search-in tab lets you choose which albums and image tags to include in a scan. You can select specific albums or tags for detection and recognition.
For detection, digiKam will scan the images selected in the filter for faces.
For recognition, digiKam will attempt to match Unknown and Unconfirmed face tags in the images included in the filter with all confirmed face tags.
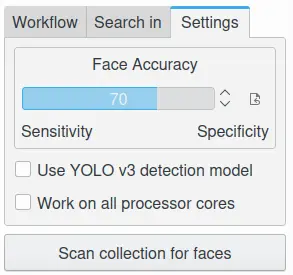
The Settings tab lets you fine-tune the results from detection and recognition scans. Here, you can adjust the detection and recognition models, set the accuracy levels, and configure face detection for special cases. Additionally, you can control the processor load used for face detection and recognition. The default values have been carefully chosen for normal use after exhaustive testing on multiple datasets, including industry standard datasets such as LFW, and personal datasets.
Note
Beginning with digiKam 8.5.0, YuNet is the recommended model for face detection, and SFace is recommended for face recognition.
For Face Detection, there are 3 settings the user can adjust to control how digiKam determines if there is a face in an image.
The digiKam Face Management Detection Settings View
Accuracy: Lower accuracy settings may detect more faces in an image, but it will also increase the number of incorrect areas identified as faces (false positives). The default setting of 7 is recommended for normal use.
Model: digiKam supports 3 different models for face detection. YuNet is the recommended detection model. It is faster and more configurable than YOLO v3 and SSD.
Face Size: This setting applies only to YuNet, and will be disabled if a different detection model is selected. Larger face size settings increase the speed of face detection but may miss small faces in group photos or in the background of images. See the Special Cases section below for more details.
For Face Recognition, there are 2 settings the user can adjust to control how digiKam matches Unknown faces to confirmed faces.
The digiKam Face Management Recognition Settings View
Accuracy: Lower accuracy settings will produce more suggestions but will increase the number of incorrect suggestions. The default setting of 7 is recommended for normal use.
Model: SFace is the recommended recognition model. It is much more accurate than OpenFace. Changing from one recognition model to another requires retraining your face library, which can be time-consuming.
Face detection and face recognition can be time-consuming tasks depending on the size of your library and filtering selected in Search-in. To help speed up the process, you can choose to use all processor cores. While this will make the process run faster, it can potentially make other processes run slower and make your computer feel unresponsive while faces are being processed.
Tip
Due to technical limitations on Windows, multi-core support with a MySQL/MariaDB database does not perform well. We recommend using an SQLite database instead for better performance.
Occasionally, you may encounter special cases where the recommended face detection settings don’t yield the best results. In those cases, you should tune the detection settings for a single image or small group of images. It is not recommended to change the default settings for normal use, and is recommended to change the settings back to their default values when you’re done with special cases.
Large Group Photos: You may have images of large groups of people, and you want to generate a face tag for every person in the image. Using the YuNet detection model, setting the Detection Accuracy to 1, and setting the Face size to Extra Small should detect most, if not all of the faces in the image. This will also incorrectly tag more areas of the image as faces (false positives).
Portraits: When shooting portraits from the shoulder up, especially with modern high-resolution cameras over 40 megapixels, face recognition may not detect the face or may tag multiple areas of a single face. Using the YuNet detection model, setting the Detection Accuracy to 8, and setting the Face size to Extra Large will detect only the face, and eliminate false positive tag regions.