HTML Gallery
Overview
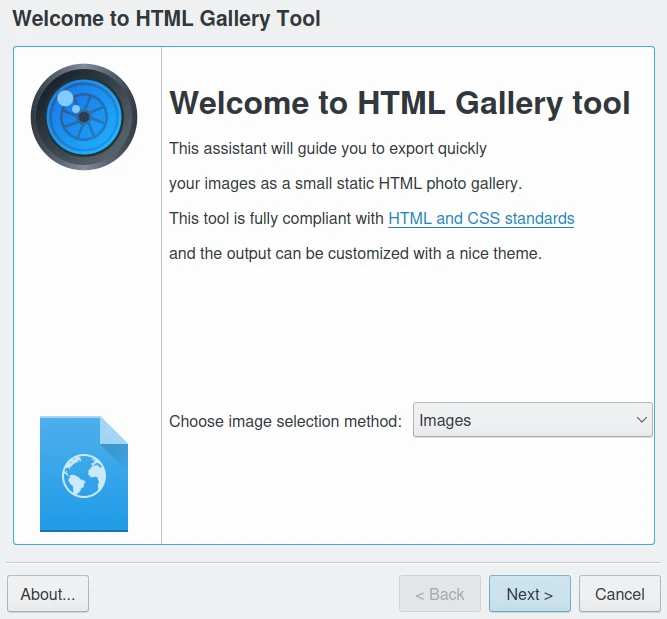
The HTML Gallery is a tool for exporting a set of albums or images to an HTML page.
This powerful tool can export your albums into an HTML-compliant web image gallery. You can easily select the images or the albums to export in an HTML page and set many designs and parameters for the HTML rendering. UTF-8 encoding is used for the best internationalization.
Using the Wizard
The HTML Gallery Page Selection Mode
To launch the tool, uses Ctrl+Alt+Shift+H menu entry, or the corresponding icon from the Tools tab in Right Sidebar. The tool will display a view to select the contents to export, either from current items selection, or from a list of albums. The Albums selection mode allows you to select items from albums that you want to export to HTML. Just check the respective albums from the hierarchical nested list. You can use the next three tabs Tags, Searches, and Labels to refine your selection based on tags, labels, or previous search results in digiKam.
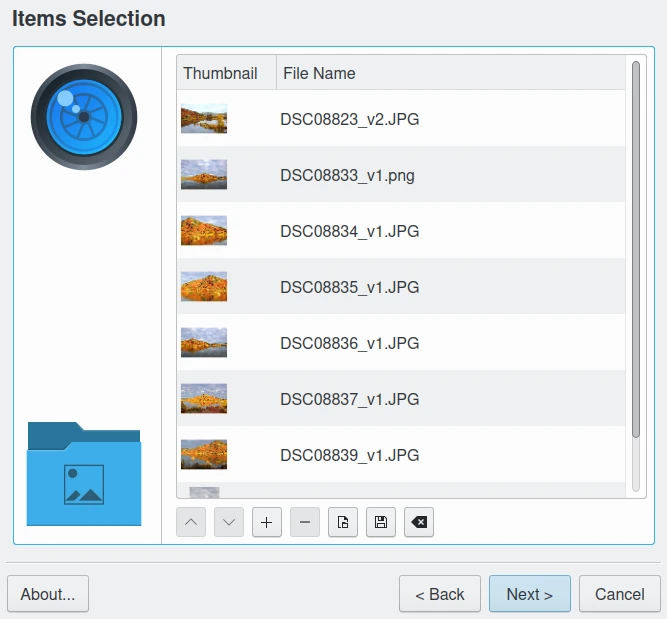
The HTML Gallery Page to Select Items
The next step is to select a Theme to generate the gallery.
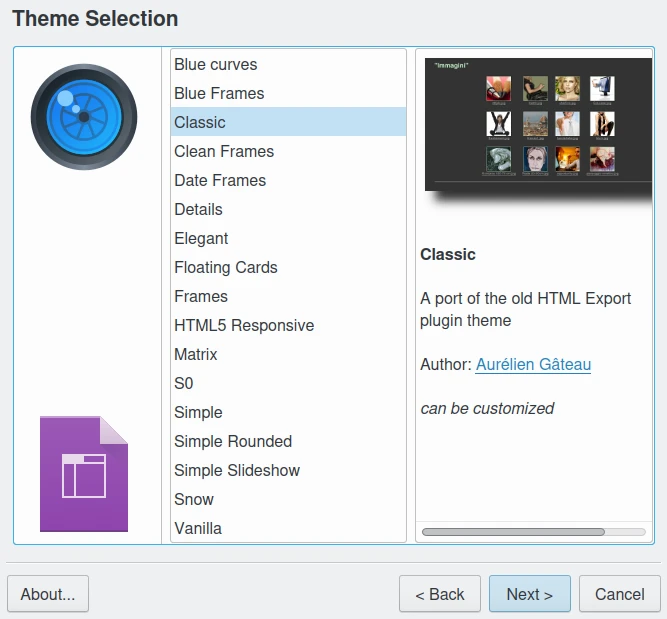
The HTML Gallery Page to Select Theme
Depending on the chosen theme you may have additional options to fine-tune the appearance of the gallery.
The next screenshot shows the theme parameters configuration (here the Classic theme for example).
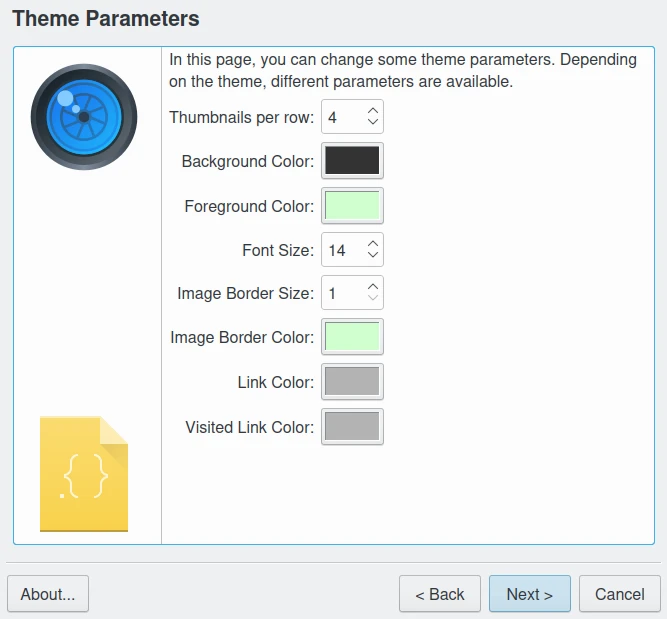
The HTML Gallery Page to Tune Theme Parameters
For all selected themes you can adjust the settings for the images and thumbnails in the gallery.
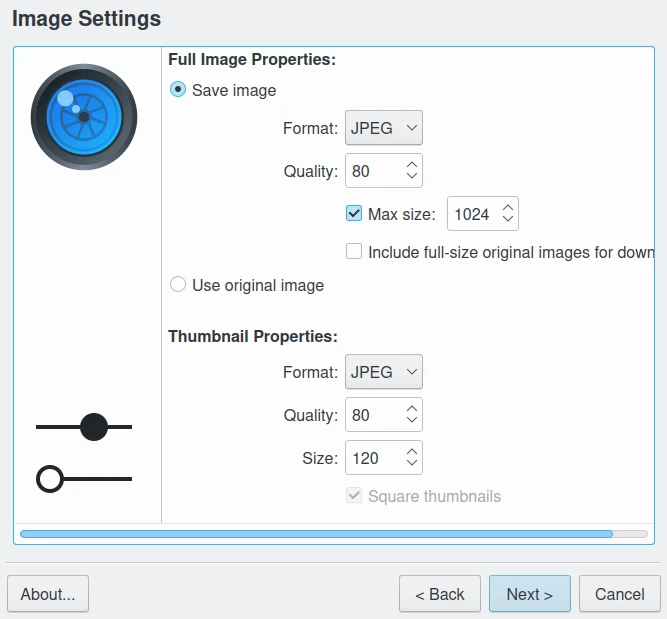
The HTML Gallery Page to Tune Images and Thumbnail Properties
In the Full Image Properties section you can either Save modified images or Use original image.
For modified images you can select as output format JPEG (smallest file-size, but lossy) and PNG (lossless and license free) and set specific image compression features. If disk space is of concern, check the target image compression and lower the compression level from the host application default value.
Checking the Max. size box you can fix the maximum target image size (in pixels) with the spin-box at the right. Images bigger than this value will be scaled down, but smaller images will not be modified.
Bemerkung
If JPEG file format is selected for target resizing images, all Exif information will be preserved from the original JPEG files.
The Thumbnail Properties section allows you to set the Format, Quality and Size for the thumbnails in the gallery.
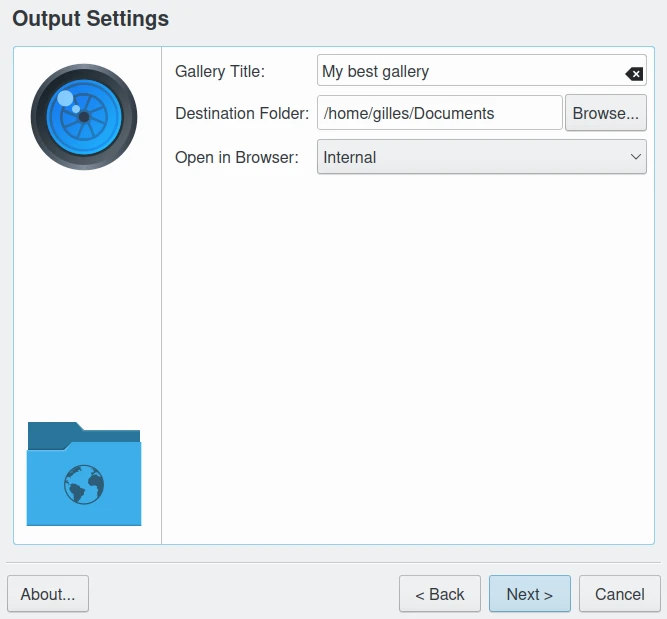
The HTML Gallery Page to Configure the Output
This page defines the settings of where and how to store the gallery with all its associated images. Select a folder or add a new folder with write access where you want the gallery to be written. Two sub-folders with the name of your album folder and the theme name will be created containing everything.
A progress dialog is displayed to provide feedback to the user. Press the Cancel button if you want to abort the process during this stage.
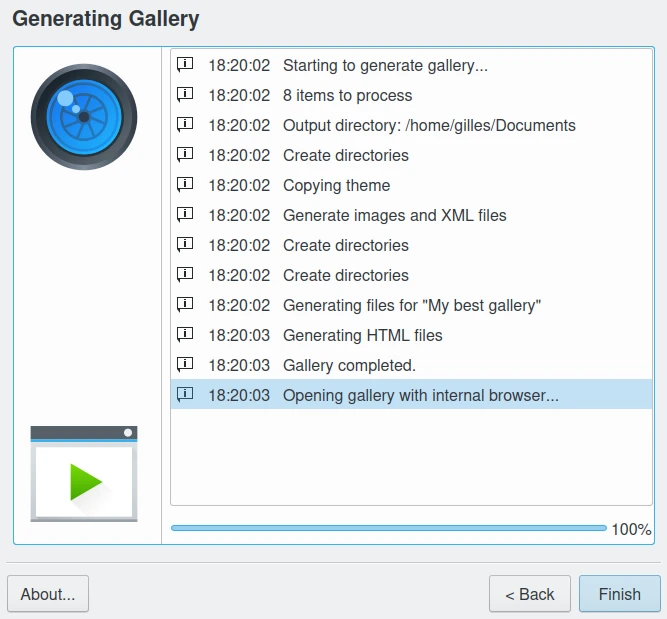
The HTML Gallery Page to Show Progress While Generating the Gallery
Finally, the HTML gallery generated is displayed in a browser.
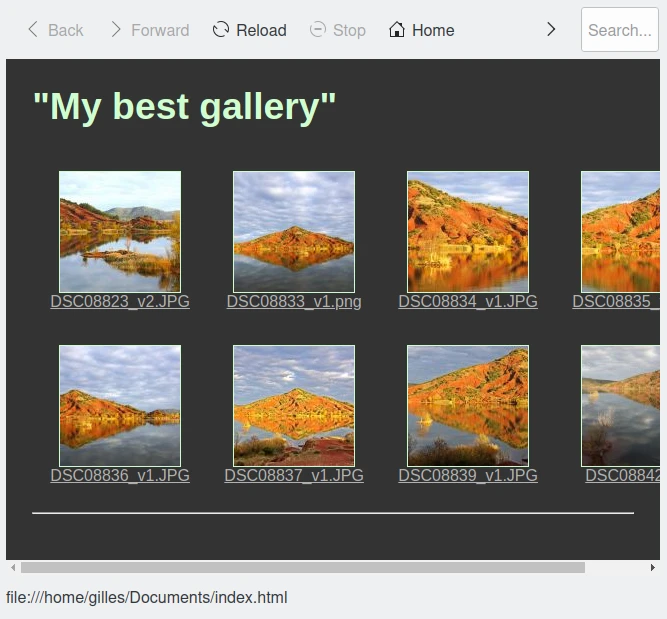
The Browser Displaying the HTML Gallery at end
Creating a New Theme
The HTML Gallery tool can easily produce very different sites based on themes. This section explains how to create a new theme.
Getting Started
A theme is a folder which contains at least two files:
A Desktop File describing the theme.
A
template.xslfile to generate the HTML files.
When the tool is running, it does the following:
Creates an output folder.
For each image collection:
Creates a folder.
Generates thumbnails (square by default).
Generates full images.
Optionally copies original images.
Copies the theme folder to the output folder.
Generates an XML file describing the image collections:
gallery.xml.Generates the HTML files by applying
template.xsltogallery.xml.
The Desktop File
The desktop file describes the theme. The information it contains is used in the theme selection page of the tool.
It’s an INI file and it looks like this:
[Desktop Entry]
Type=Theme
Name=Hello World
Comment=A demonstration theme

[X-HTMLGallery Author]
Name=The Author
Url=http://example.com/themes/helloworld

[X-HTMLGallery Preview]
Name=Preview's Caption
Url=preview.png
A desktop file format is used to facilitate entry translations. If you look at the desktop file for one of the themes shipped with the tool, you will find something like this:
[Desktop Entry]
Name=Simple
Name[br]=Eeun
Name[cs]=Jednoduchý
Name[cy]=Syml
Name[da]=Simpel
...
The nice thing is that when your theme gets integrated into the HTML Gallery default themes, translators will internationalize the desktop file for you.
The image preview file used to illustrate the theme in the wizard will be placed in the root theme folder.
Creating a new Theme from Another One
The easiest way to get started is to copy one theme and modify it. Folders can be found usually under Linux at /usr/share/apps/digikam/themes/. Writing in this folder requires root access, so we will not create our theme there - instead do the following from a console:
Create a theme folder in your home directory:
mkdir -p ~/.local/share/digikam/themes/
Go to this directory:
cd ~/.local/share/digikam/themes/
Copy the snow theme to this folder, under a new name snow2:
cp -r /usr/share/apps/digikam/themes/snow snow2
Rename the desktop file accordingly:
cd snow2
mv snow.desktop snow2.desktop
Edit snow2.desktop to remove all the Name[…] entries and replace Name=Snow with Name=Snow 2.
You are done, you can now open digiKam and start the HTML Gallery tool, the Snow 2 theme should appear in the theme list.
Generating HTML Using XSL Rules
The template.xsl file is responsible for generating the HTML files from the gallery.xml file. It’s a standard ini-style file and looks like this:
<?xml version="1.0" encoding="UTF-8"?>
<collections>
 <collection>
  <name>Name of first collection</name>
  <fileName>collection_folder</fileName>
  <comment>Collection comment</comment>
  <image>
   <title>Image Title</title>
   <description>Image Description</description>
   <date>2009-08-27T09:53:26</date>
   <full fileName="pict1279.jpeg" height="450" width="600"/>
   <thumbnail fileName="thumb_pict1279.jpeg" height="80" width="80"/>
   <!-- If there is an original image, you will get the 'original' tag -->
   <original fileName="original_pict1279.jpeg" height="3000" width="4000"/>

  </image>
  <image>
   <title>Image Title</title>
   <date>2009-08-27T09:55:33</date>
   <description>Image Description</description>
   <full fileName="pict1280.jpeg" height="450" width="600"/>
   <thumbnail fileName="thumb_pict1280.jpeg" height="80" width="80"/>
   <original fileName="original_pict1279.jpeg" height="3000" width="4000"/>
  </image>
  ...
 </collection>

 <collection>
  <name>Name of second collection</name>
  ...
 </collection>
</collections>
We won’t explain XSLT syntax here, you should be able to find the documentation you need on the Internet. We recommend the XSLT tutorial here for learning XSLT.
Nevertheless, it’s worth noting that you can make use of EXSLT, a set of extensions to XSLT. In particular, the exslt:document element is extremely useful because it allows you to generate multiple documents from the same file.
HTML Gallery tool imposes no constraint on the organization of HTML files. You can generate one file per image, or only one per collection. One could imagine a theme which would only contains one HTML file and uses JavaScript to show the different images. There is already one theme using frames. You can even generate CSS files on the fly if you want to.
About Translations
You should not hardcode any text in the template, but you should instead use the i18n parameters. For example instead of using this:
<a href="previous">Previous</a>
| <a href="next">Next</a>
Do this:
<a href="previous"><xsl:value-of select="$i18nPrevious"/></a>
| <a href="next"><xsl:value-of select="$i18nNext"/></a>
It’s a lot more verbose, but this way your user will get localized HTML output.
If you want to use i18n parameters in attributes, do it like this:
<a href="previous" title="{$i18nPrevious}"><img src="previous.png"/></a>
| <a href="next" title="{$i18nNext}"><img src="next.png"/></a>
For now, the available general i18n parameters are:
i18nPrevious
i18nNext
i18nCollectionList
i18nOriginalImage
i18nUp
And the image properties are:
i18nexifimagemake („Make“)
i18nexifimagemodel („Model“)
i18nexifimageorientation („Image Orientation“)
i18nexifimagexresolution („Image X Resolution“)
i18nexifimageyresolution („Image Y Resolution“)
i18nexifimageresolutionunit („Image Resolution Unit“)
i18nexifimagedatetime („Image Date Time“)
i18nexifimageycbcrpositioning („YCBCR Positioning“)
i18nexifphotoexposuretime („Exposure Time“)
i18nexifphotofnumber („F Number“)
i18nexifphotoexposureprogram („Exposure Index“)
i18nexifphotoisospeedratings („ISO Speed Ratings“)
i18nexifphotoshutterspeedvalue („Shutter Speed Value“)
i18nexifphotoaperturevalue („Aperture Value“)
i18nexifphotofocallength („Focal Length“)
If you need more i18n parameters, please submit a request to the Project Team.
Images and CSS Files
You are free to use images, CSS files or other files in your theme. Just put them in the theme folder and the tool will copy them into the output folder.
Original Images
As explained before, if the user selects the option Include original images, the gallery.xml file will contain <original /> tags. If this tag is present, the image page should contain a link to download the original image.
Here is an example:
<xsl:if test="original/@fileName != ''">
      <p>
           <a href="{original/@fileName}"><xsl:value-of select="$i18nOriginalImage"/></a>
      </p>
 </xsl:if>
Non-Square Thumbnails
By default, thumbnails are cropped so that they are square-shaped and all have an identical size. This makes it easier to create the HTML/CSS style. However, if your theme is ready to cope with thumbnails of different sizes, add this snippet to your desktop file:
[X-HTMLGallery Options]
Allow-non-square-thumbnails=true
The user will then be able to select whether squares should or should not be square. For non-square thumbnails, the specified thumbnail size becomes the size of the larger side of the thumbnail.
Theme Parameters
You might want to provide a way for the user to customize your theme, for example you could provide a few alternative CSS files, or let the user customize the background color. This is easy to do.
Declaring a Parameter
First, you need to declare your parameter. Edit your desktop file and add something like this:
[X-HTMLGallery Parameter bgColor]
Name=Background Color
Type=color
Default=#123456
Now start the tool and select your theme, after pressing next, you should see an option page with a color button initialized to the #123456 color.
Using Parameter Value
In template.xsl, you can get the value of your parameter like this:
<xsl:value-of select="$bgColor"/>
To change the background color of the body tag, you would write something like this:
<body bgcolor="{$bgColor}">
...
</body>
Parameter Reference
Here is a more complete description of the way to declare parameters. A parameter is declared by a section named X-HTMLGallery Parameter someName. someName should be replaced with the name you want to use in template.xsl.
The Name key defines the text which will be shown in the option page. Since this is a desktop file, it can be translated like the other keys.
The Type key defines the type of the parameter. At the time of this writing it can be one of:
caption
string
color
list
int
The Default key defines the default value of the parameter.
List Parameter Keys
A list parameter lets the user select an item from a list. To declare the available items, you must use two sets of keys: Value-N and Caption-N, where N is the position of the item, starting from 0.
Value-N is the internal value of the item. This is the value which will be set to the parameter.
Caption-N is the displayed value of the item. This is the text which will be shown in the list.
Here is an example: the style parameter from the Simple theme:
[X-HTMLGallery Parameter style]
Name=Style
Type=list
Default=natural.css
Value-0=natural.css
Caption-0=Natural
Value-1=dark.css
Caption-1=Dark
As you can see, the user will be able to choose either Natural or Dark. Depending on the user choice, <xsl:value-of select=‘$style‘/> will expand to either natural.css or dark.css.
Int Parameter Keys
An int parameter lets the user select an integer using a spin-box. In addition to the default value, you can define the minimum and maximum values, using the Min and Max keys.
Here is an example:
[X-HTMLGallery Parameter size]
Name=Size
Type=int
Default=12
Min=4
Max=28
String and Caption Parameter Keys
A string parameter lets the user enter a single string to set configuration rules for example. A caption parameter lets the user enter a multi-string with spell-checking support to set a Description or a Title.
Final Words
This is the end of this chapter, so now is the time for you to get creative and start adding new themes.
When you are done, do not hesitate to submit your work for official integration in digiKam. Think of how proud you will be to see your new theme included in the official list. See the Contribute page from the digiKam project web-site for details.